


I was playing some games on my Playstation when suddenly my controller suffered from stick drift. So I looked in on how to fix controller stick drift and I’m going to show you exactly how to do so if you’re experiencing the same issue. Any links on parts you might need will be linked at the bottom of this blog post.
nnnnOne of the most annoying things that can happen to you while gaming is stick drift. So I did some research on how to fix this problem. I found that resetting your controller, cleaning your controller, pressing your analog sticks, and replacing your analog sticks are some good methods of fixing this annoying problem. So let’s look into how to do these things and what else you could do if these options don’t work.
nnnnnnnnHow To Reset Your Controller
nnnnnnnn
Resetting your controller is always worth trying when you’re experiencing issues like this. So I’m going to give a simple step-by-step guide on how to reset your PlayStation controller and then how to do the same with an Xbox controller. All you’ll need for this is a paperclip and a USB cable (to reconnect it with the PlayStation).
nnnnnnnnHow to reset Playstation controller:
nnnn- n
- Turn off your Playstation & disconnect the controller if plugged in via USB. n
It’s very important that you unplug your controller and turn off & completely unplug your PS before resetting your controller for your safety & because it might not work otherwise.
nnnn2. Locate the reset button on your PlayStation controller.
nnnnThe reset button on the PS4 & PS5 controllers is on the back, located in the little hole close to the top of the controller.
nnnn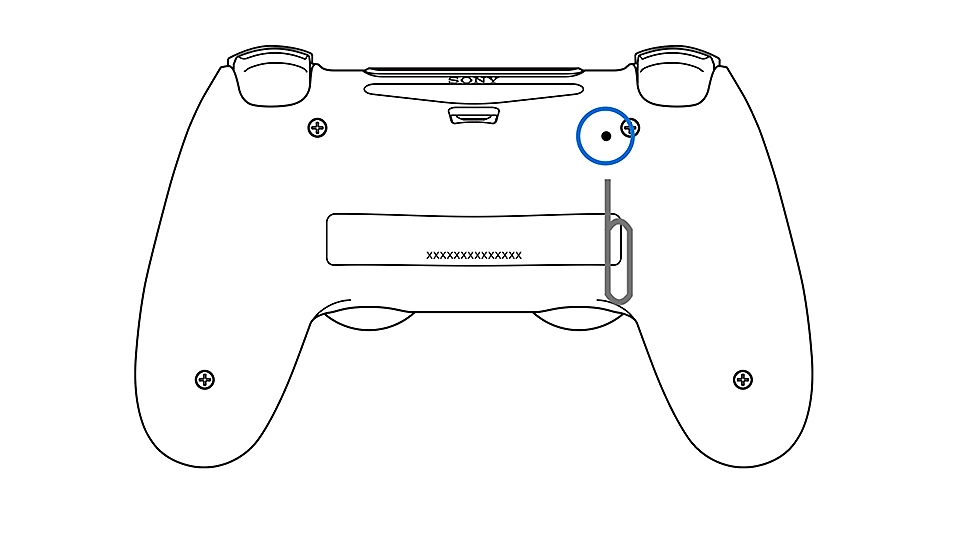
3. Reset your controller.
nnnnReset your controller by going in the hole with a paperclip and pressing the button inside, once you’ve done this the Playstation controller should have reset.
nnnnnnnnHow to reset your Xbox controller:
nnnn- n
- Fully turn off your Xbox controller. n
Turning off your Xbox controller is simple but varies between models. For an Xbox One controller, hold the sync button on the top for 10-15 seconds. For Xbox Series S/X controllers, hold the Xbox button in the middle for 10-15 seconds.
nnnn2. Turn your controller back on.
nnnnTurning the Xbox controller back on is the same for both the Xbox One controllers and the Xbox Series S/X controllers. All you have to do is press the Xbox button in the middle of the controller.
nnnn3. Connect your controller to your console.
nnnnReconnect your console to your console by using a USB cable and the controller should have reset.
nnnnnnnnBest Ways To Clean Your Controller
nnnnnnnn
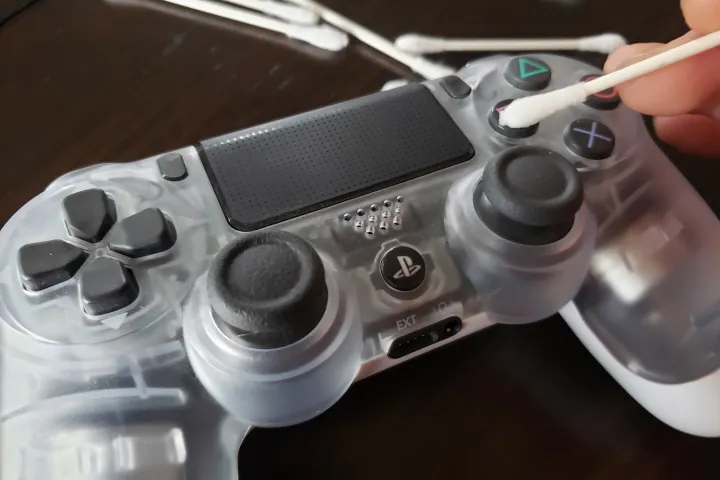
A dirty controller can be the cause of many issues of the controller, most commonly stick drift is caused by dirt in the controller. So I found some methods on how to best clean your controller when experiencing stick-drift and I’ll feature my 3 favorite and in my opinion best ways here.
nnnnnnnnAlcohol wipes & canned air:
nnnn- n
- Unplug your controller to avoid damage. If it’s wireless, remove the batteries. nnnn
- Place paper towels on your desk to catch any dirt. nnnn
- Use a toothpick to scrape out gunk from the tiny nooks and crannies. nnnn
- Blow out any remaining debris with canned air, keeping the can upright to avoid spraying liquid. nnnn
- Wipe down the controller with alcohol wipes to remove grease and dirt. For wireless controllers, avoid using wipes inside the battery compartment. Alcohol wipes are preferred because they disinfect without leaving moisture or soap residue. If you don’t have alcohol wipes, use a lint-free cloth soaked in mild soapy water, wrung out well. nnnn
- Ensure everything is dry. n
Deep clean your controller:
nnnn- n
- Disassemble (Optional): For controllers like the Xbox One, use a screwdriver to remove the backplate and access the internals. Be careful with delicate clips or wires. nnnn
- Soak the Soft Parts: Remove rubber grips or buttons and soak them in warm soapy water for 15 minutes. Rinse thoroughly and let them air dry completely. nnnn
- Scrub the Shell: Use a soft toothbrush dipped in mild dish soap to scrub the controller shell, focusing on grips and around buttons. Rinse with a damp cloth and dry with a microfiber towel. nnnn
- Clean the Internals (Optional): If disassembled, use a dry toothpick to scrape out crevices. Blow through a plastic straw to remove dust or debris from the circuit board and buttons. Avoid excessive liquid or touching sensitive components. nnnn
- Reassemble and enjoy! n
Replace the joystick module
nnnnNow replacing the joystick model is a bit more advanced then the other 2 methods, but if everything else didn’t work for you then maybe it’s worth trying. This guide will only be for PlayStation 5 controllers.
nnnn- n
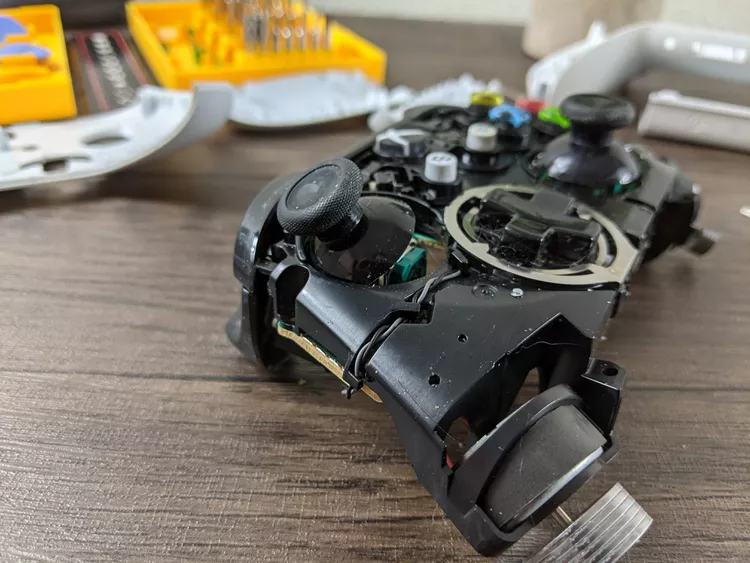
- Take your controller apart. First, turn off your PS5 controller. Use a flat tool to pry off the black cover, starting at the handle ends and working toward the middle. Pop off the R1 and L1 buttons with a screwdriver, then remove the screws on the back and open the controller. Gently disconnect the battery, microphone, and ribbon cables for the touchpad and buttons. Flip the motherboard back and remove additional screws to separate it from the black cradle. Finally, remove the silicone button holders, microphone ribbon cable, and the screws holding the touchpad to the faceplate. nnnn
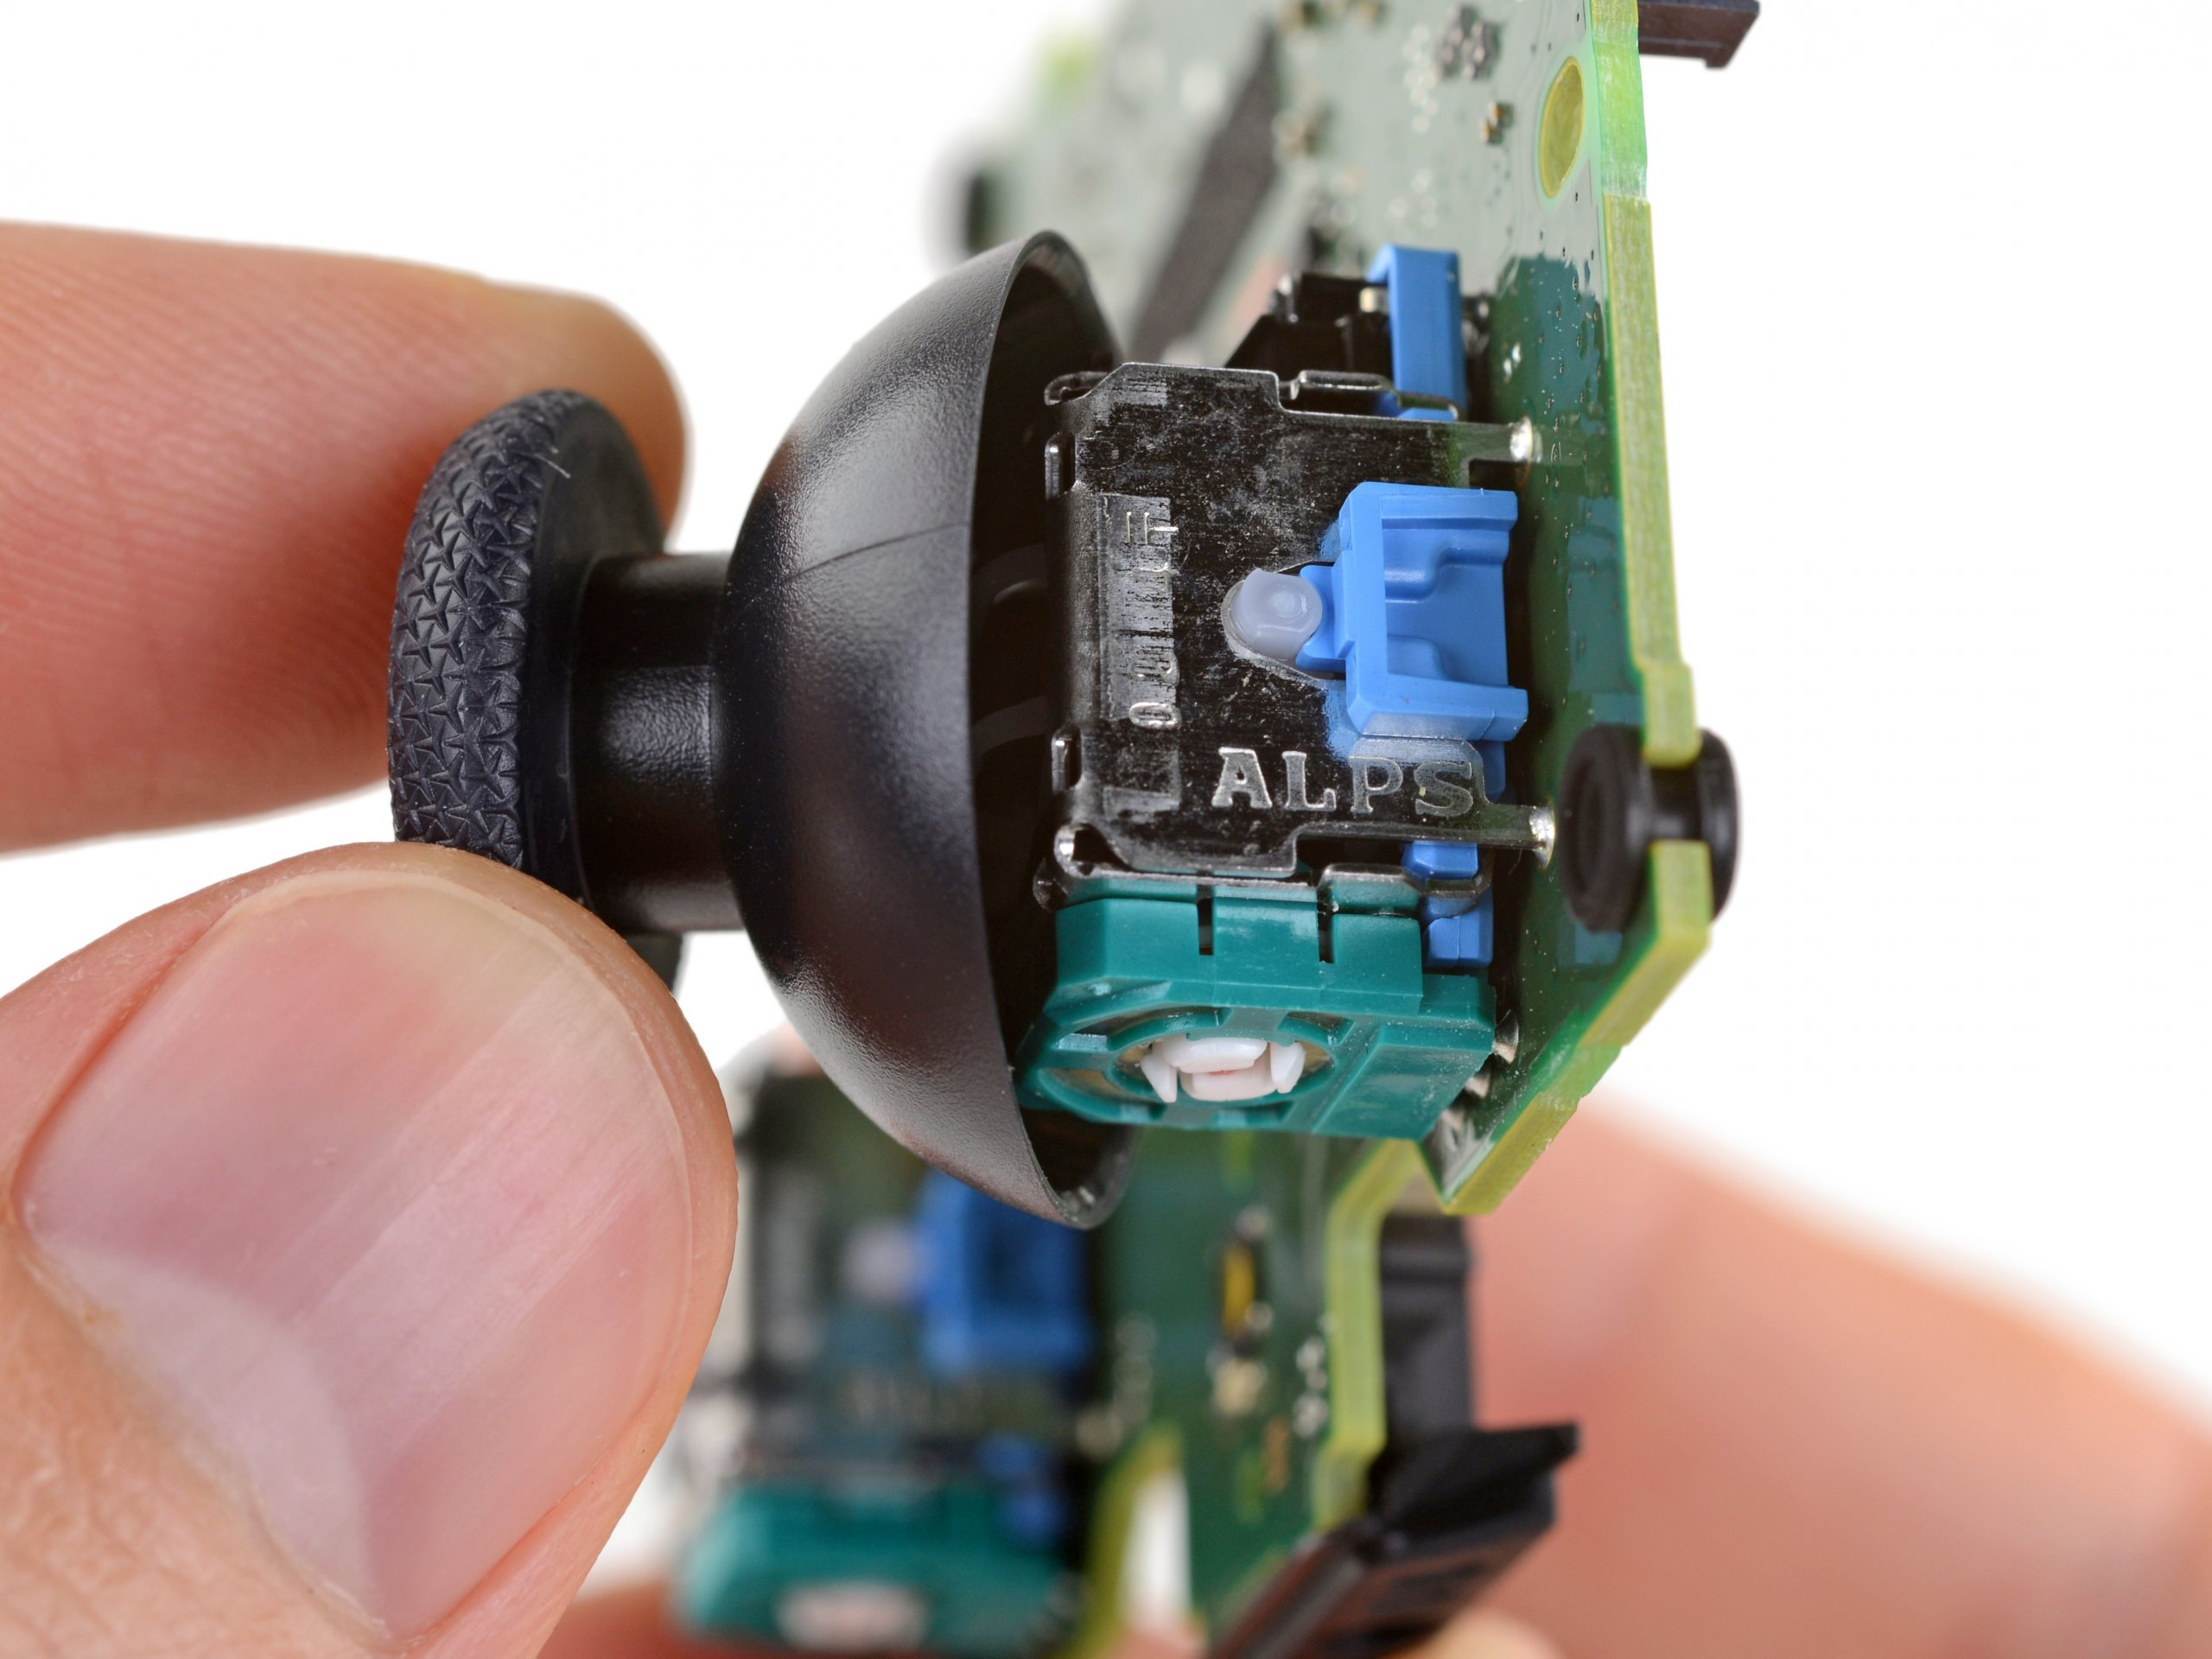
- Take of the cap of the joystick that’s the issue, the joystick should just pop straight of when you pull it gently. nnnn
- Clean the potentiometers. Clean the potentiometers by applying a small amount of isopropyl alcohol (90% or higher) to a cotton swab and carefully reaching into the small openings. Move the joystick around to distribute the alcohol and remove any dirt or debris, then allow the alcohol to evaporate completely. nnnn
- If it there’s still stick drift, replace the wipers. Carefully remove the joystick module from the circuit board and gently pry open the potentiometer casing, noting the internal arrangement. Extract the old wipers carefully, then place the new wipers into the casing in the same orientation, ensuring proper contact. Snap the potentiometer casing back together and reattach the joystick module to the circuit board. nnnn
- Reassemble your controller. Reassemble the controller by reconnecting the battery and ribbon cables. Secure the back cover with screws and snap the black cover back into place. n
How To Replace Your Analog Sticks
nnnnnnnn
Replacing your analog sticks is again a different process on Playstation and Xbox so I’ll make two simple guides showing you exactly how to do it on both your Xbox- and your PlayStation controller.
nnnnnnnnHow to replace your analog stick on a playstation controller:
nnnn- n
- Turn Off and Disconnect: Power off your PlayStation controller and disconnect it from any device or power source. nnnn
- Remove the Faceplate: Use a small flat tool to carefully pry off the faceplate of the controller. Start at the edges and work your way around to release it. nnnn
- Unscrew and Open: Use a screwdriver to remove the screws holding the controller together. Open the controller carefully, noting any delicate clips or connections. nnnn
- Disconnect Components: Gently disconnect the ribbon cables that connect the face buttons and touchpad to the motherboard. Set these components aside. nnnn
- Remove Analog Sticks: Locate the analog sticks on the controller’s circuit board. Carefully lift and wiggle the sticks to detach them from their sockets. Take note of their orientation for reassembly. nnnn
- Install New Analog Sticks: Place the new analog sticks into the sockets on the circuit board, aligning them correctly with the controller’s casing. nnnn
- Reassemble the Controller:
Reconnect the ribbon cables for the face buttons and touchpad.
Close the controller carefully, ensuring all clips are securely fastened.
Screw the controller back together. Snap the faceplate back into place. nnnn - Test the Controller: Power on the controller and test the analog sticks to ensure they are responsive and function correctly. n
How to replace your analog stick on a Xbox controller:
nnnn- n
- Turn Off and Prepare: Turn off your Xbox controller and ensure it is disconnected from any power source. nnnn
- Remove Battery and Cover: If applicable, remove the battery pack or batteries from the controller. Use a screwdriver to remove any screws securing the back cover. nnnn
- Open the Controller: Carefully pry open the controller using a flat tool, starting at the seams. Take note of any delicate clips or wires inside. nnnn
- Disconnect Components: Gently disconnect any ribbon cables or wires connected to the circuit board to access the analog sticks. nnnn
- Remove Old Analog Sticks: Use a screwdriver to unscrew the analog sticks from their mounts. Carefully lift them out of their sockets, noting their orientation for replacement. nnnn
- Install New Analog Sticks: Place the new analog sticks into the sockets, ensuring they align correctly with the controller’s orientation markers. nnnn
- Reassemble the Controller: Reconnect any disconnected cables or wires. Close the controller by snapping the halves back together. Secure the back cover with screws and reinstall the battery pack or batteries. nnnn
- Test the Controller: Turn on the controller and test the analog sticks to ensure they are functioning properly. n
What Else You Could Do To Fix This Issue
nnnnnnnn
If you’ve tried everything in this post already and your problem still isn’t fixed I would recommend seeing if these two things will fix your problem.
nnnnnnnn#1 Adjust deadzone and sensitivity
nnnnAdjusting your deadzone and sensitivity settings in-game can effectively mitigate stick drift issues on controllers. Deadzone adjustments allow you to define a threshold around the analog stick’s center position, ignoring minor input variations that can cause unintended movement. By setting a larger deadzone, you can prevent the controller from registering small, unintended movements as inputs. Additionally, fine-tuning sensitivity settings can help reduce the overall responsiveness of the analog sticks, making it less likely for minor stick drift to affect gameplay. These adjustments not only enhance precision but also extend the longevity of your controller by minimizing wear caused by constant recalibration.
nnnnnnnn#2 File a warranty claim
nnnnBy utilizing the warranty, you can have the controller repaired or replaced at no additional cost, ensuring optimal performance and longevity. Addressing stick drift early can prevent further damage to the controller and ensure continued enjoyment of gaming sessions without the frustration of inaccurate input responses.
nnnnnnnnI hope this blog posts helped you with fixing your controller stick drift issue and be sure to check out some of my other blog posts.
nnnnnnnnLinks
nnnnnnnn
These are some links to products you might need when trying out some of these methods. Do note that these links are Amazon affiliate links, if you want to learn more about Amazon affiliate links click here.
nnnnScrewdriver: https://amzn.to/4exaIZ9
nnnnCanned air: https://amzn.to/3VRJcyk
nnnnAlcohol wipes: https://amzn.to/3xskT0A
nnnnPotentiometer wipers (take out the wipers from these potentiometers and replace them with your old wipers): https://amzn.to/3Vqs7Kw
nnnnAnalog sticks PS5 controller: https://amzn.to/3zeyidd
nnnnAnalog sitcks Xbox controller: https://amzn.to/4c6wMbN
n
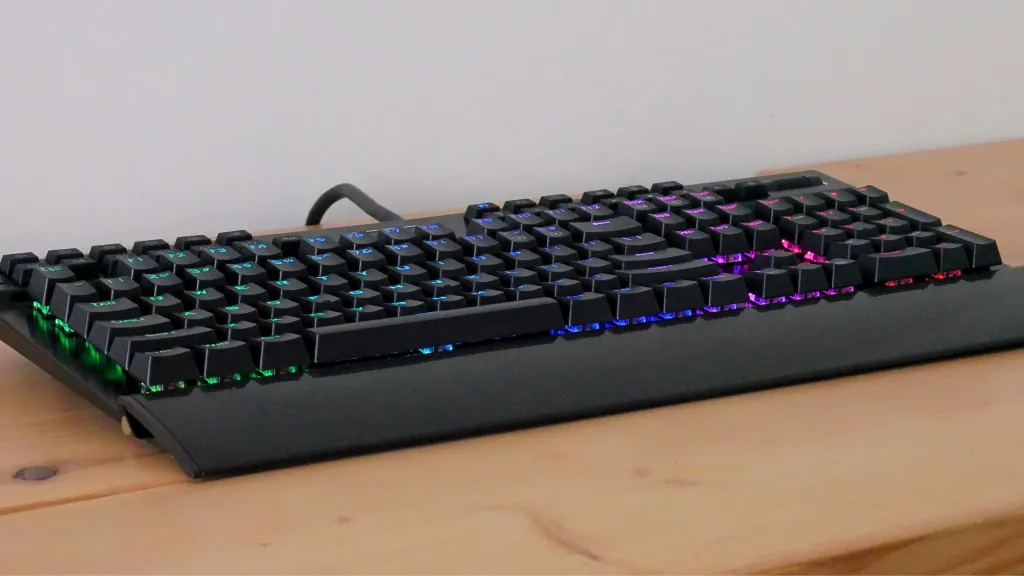


Redragon YAMA K550 Review: Feature-Packed & Affordable
Looking for a premium full-size keyboard under $100? The Redragon YAMA K550 delivers RGB, macros, and serious value.
How Charging Your Power Bank to 100% Can Damage It
Learn why you shouldn’t charge your power bank to 100% and tips on extending your power banks lifespan.
Power Bank Lifespan: How Many Charges Will You Get?
Learn how to make your power bank last 3-5 years with expert tips on usage, storage, and maintenance. Discover the secrets to longer battery life!
Portable Charger Technologies: A Complete Guide to Fast Charging in 2024
Discover the latest portable charger technologies, from USB-PD to GaN charging. Learn which fast-charging standard is best for your devices and how to choose the right power bank.
Can Portable Chargers Overheat? Understanding the Risks and Safety Measures in 2024
Discover the potential risks of portable charger overheating, learn why it happens, and get crucial safety tips to protect your devices and yourself in 2024.