


Is your iPad feeling sluggish lately? You’re not alone! Did you know that the average iPad user can accumulate up to 5GB of cached data in just a few months? Yikes! But don’t worry – I’ve got your back. In this guide, we’ll dive into the world of cache clearing on your iPad. It’s like giving your digital companion a refreshing spa day! We’ll explore why clearing cache matters, and I’ll walk you through various methods to get your iPad running smoothly again. Ready to speed things up? Let’s jump in!
Helpfull article:

2024 How To Screenshot on iPad: Easy Step-by-step guide
To screenshot on your iPad, locate and press the Top and Volume Up buttons simultaneously, then quickly release them. Find the screenshot in the lower-left… Read more
Best latest article:
Table of Contents:
- 01 What is Cache and Why Should You Clear It?
- 02 Method 1: Clearing Safari Browser Cache
- 03 Method 2: Clearing App Cache Individually
- 04 Method 3: Clearing Cache Through App Resets
- 05 Method 4: Using Third-Party Cleaning Apps
- 06 Method 5: Clearing App Cache Individually
- 07 Tips for Maintaining a Clutter-Free iPad
- 08 How to Clear Cache on iPad: Conlusion
- 09 FAQ’s
What is Cache and Why Should You Clear It?
Cache is essentially a temporary storage area on your iPad that holds data from apps and websites you frequently use. This stored data helps your device load content faster when you revisit an app or website because it doesn’t have to download the same information again. For instance, when you open a website you visit often, the cache allows the page to load almost instantly since the images, logos, and other elements are already stored locally on your iPad. In short, the cache is there to make your device more efficient, reducing load times and improving the overall user experience.

However, while cache plays a vital role in speeding up tasks, it can also accumulate over time and start to slow down your iPad if it isn’t cleared out periodically. One of the key benefits of clearing your cache is that it can significantly improve your device’s performance. As the cache builds up, it can take up valuable storage space, which might be limited depending on your iPad model. By clearing it out, you free up this space, making room for new apps, photos, or updates. This also helps in maintaining the smooth operation of your device, as it reduces the chances of lagging or freezing that can occur when your iPad’s storage is nearing its capacity.
On the flip side, excessive cache buildup can lead to a variety of issues. For one, it can cause apps to behave unpredictably, crashing more often or failing to load altogether. This happens because the cached data may become outdated or corrupted over time. Additionally, too much cache can slow down your iPad, as it tries to manage the large amount of stored data, which can strain its resources. In some cases, you might even notice that your battery life isn’t as long as it used to be, as your iPad works harder to process all the cached information. Thus, regularly clearing your cache is a simple yet effective way to keep your iPad running efficiently.
Method 1: Clearing Safari Browser Cache
To access Safari settings on your iPad, start by tapping the “Settings” app on your home screen. Once you’re in the Settings menu, scroll down until you find “Safari” in the list of options on the left side of the screen. Tap on “Safari,” and you’ll be taken to a screen where you can manage all your Safari settings, including privacy and security options, search engine preferences, and more. This is where you’ll go to clear your browsing data and manage your cache.
To clear your website data, follow these step-by-step instructions:
- Once you’re in Safari settings, scroll down to the section labeled “Privacy & Security.”
- Tap on “Clear History and Website Data.”
- A prompt will appear, asking if you’re sure you want to clear history and data. Confirm by tapping “Clear” to remove all stored history, cookies, and other browsing data.
Within this menu, you’ll also find different options for clearing specific types of data, rather than wiping everything at once. For instance, if you tap on “Clear History and Website Data,” you may notice that you can choose from options like “All History,” “Today,” or “Today and Yesterday.” Selecting “All History” will remove all browsing history and website data from the beginning of time, essentially giving Safari a fresh start. If you choose “Today,” only the data from the current day will be erased, leaving your older browsing history intact. Meanwhile, “Today and Yesterday” will clear the data from the last two days, which can be useful if you want to keep your history mostly intact while removing recent activity.
Get all the latest post on through the eyes of a teenager straight in your inbox.
Subscribe to stay updated, it’s free!
Each of these clearing options allows you to tailor your privacy settings according to your needs. Whether you want to erase everything for a complete reset or just remove recent data to free up space, Safari gives you the flexibility to manage your browsing data in a way that best suits your preferences.
Method 2: Clearing App Cache Individually
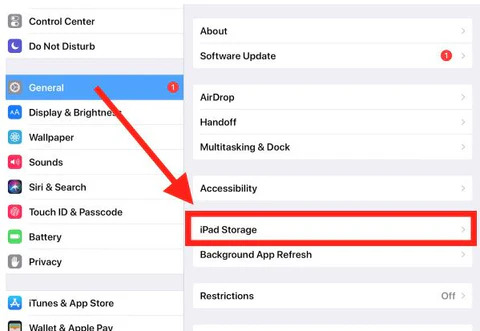
To manage your iPad’s storage and optimize its performance, start by navigating to the “Settings” app on your home screen. Once you’ve opened Settings, scroll down the menu on the left until you find “General.” Tap on “General,” and then select “iPad Storage” from the list of options that appears. This section provides an overview of your device’s storage usage, showing how much space each app occupies and giving you various tools to manage your storage effectively.
Within the iPad Storage settings, you can find and select specific apps that are taking up significant space. The list of apps is organized by the amount of storage they use, with the largest ones at the top. To get more details, simply tap on any app. This will open a screen showing how much space the app itself takes up, along with the size of its associated documents and data. From here, you can make informed decisions about which apps to keep, offload, or delete.
If you want to free up space without losing your app data, you can choose to “Offload Unused Apps.” To do this, tap on the app you want to offload, then tap “Offload App.” This will remove the app from your iPad, but keep its documents and data intact, so if you reinstall the app later, everything will be just as you left it. Alternatively, if an app has accumulated a lot of documents and data that you no longer need, you can clear these by tapping “Delete App” on the same screen. This option will remove both the app and all of its data, freeing up even more space on your device.
These tools make it easy to manage your iPad’s storage, helping you keep your device running smoothly by getting rid of unnecessary clutter and ensuring you have enough space for the apps and files you actually use.
Method 3: Clearing Cache Through App Resets
Resetting an app on your iPad can be a useful troubleshooting step when an app isn’t working properly, such as when it’s freezing, crashing, or behaving unpredictably. Resetting an app essentially returns it to its default state, as if you had just installed it for the first time. This process involves deleting the app and all its associated data from your device, and then reinstalling it fresh from the App Store.

To reset an app to its default state, follow these steps:
- Locate the app you want to reset on your home screen.
- Press and hold the app icon until a menu appears, then tap “Remove App.”
- Confirm by selecting “Delete App,” which will remove both the app and all its data from your iPad.
- Next, go to the App Store, search for the app you just deleted, and tap the download icon to reinstall it.
Once the app is reinstalled, it will be in its default state, free of any previous settings, data, or potential bugs that may have been causing issues.
However, it’s important to be cautious when using this method, as resetting an app will result in the loss of any data associated with it. For example, if it’s a game, you might lose your progress, or if it’s a note-taking app, any unsynced notes could be deleted. Therefore, it’s crucial to back up any important data before you reset the app, if possible. You should only use this method when you’ve exhausted other troubleshooting options, like force-quitting the app or restarting your iPad, and when you’re certain that any data loss won’t be problematic. Resetting an app can be a powerful fix, but it should be used with care.
Method 4: Using Third-Party Cleaning Apps
When it comes to managing cache on your iPad, reputable cache cleaning apps can be a helpful tool for keeping your device running smoothly. These third-party apps are designed to clear out unnecessary files, such as cache, temporary files, and other junk data that can accumulate over time. By automating the process, these apps make it easy to maintain your iPad’s performance without having to manually dig through settings.
Using third-party cache cleaning apps comes with both benefits and drawbacks. On the positive side, these apps can save time and effort, especially if you’re not familiar with the manual methods of clearing cache. They often provide additional features like identifying large files, optimizing storage, and even boosting battery life by managing background processes. Some apps also offer regular maintenance reminders, helping you keep your iPad in top shape without having to remember to do it yourself.
However, there are also some potential downsides to consider. Not all cache cleaning apps are created equal; some might not be as effective as they claim, or worse, could introduce security risks by accessing too much of your personal data. Additionally, many of these apps are free but offer in-app purchases or subscriptions for full functionality, which can be an ongoing expense. It’s essential to choose a reputable app from a trusted developer to avoid these pitfalls.
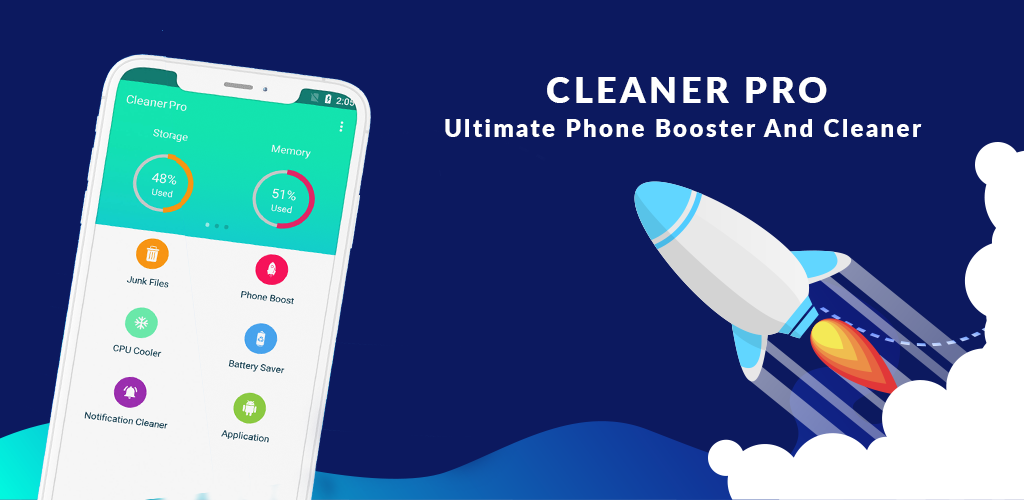
A few popular options available on the App Store include Cleaner Pro, which offers a simple interface for clearing cache and managing storage, Smart Cleaner, known for its ability to quickly identify and delete unnecessary files, and Phone Cleaner for Media Files, which specializes in managing and cleaning up large media files like photos and videos. These apps are widely used and have good user reviews, making them reliable choices for those looking to optimize their iPad’s performance with minimal hassle.
Tips for Maintaining a Clutter-Free iPad
Establishing a regular cache clearing schedule is an effective way to ensure your iPad continues to run smoothly over time. While the frequency of clearing cache depends on how intensively you use your device, a good rule of thumb is to clear the cache every few weeks or at least once a month. This routine maintenance helps prevent the buildup of unnecessary files that can slow down your iPad, ensuring that apps and websites continue to load quickly and operate efficiently.
In addition to regularly clearing your cache, there are other maintenance tasks that can keep your iPad in optimal condition. One important task is updating your apps and iPadOS whenever new versions are available. Updates often include performance improvements, bug fixes, and security patches that are crucial for maintaining the smooth operation of your device. Restarting your iPad occasionally is another simple but effective practice, as it clears out temporary files and resets system resources, helping to resolve minor glitches and improve overall performance.
Best practices for app and file management also play a significant role in keeping your iPad running well. Regularly reviewing the apps you have installed and deleting those you no longer use can free up valuable storage space and reduce background activity that might be draining your battery. It’s also helpful to organize your files and media into folders and periodically move older, less frequently accessed items to cloud storage or another backup solution. This not only declutters your device but also ensures that your most important data is easily accessible and secure.
By combining a regular cache clearing schedule with these additional maintenance tasks and best practices, you can keep your iPad running smoothly and efficiently, maximizing its lifespan and performance.
How to Clear Cache on iPad: Conlusion
Whew! We’ve covered a lot of ground, haven’t we? From Safari sweeps to app resets, you’re now armed with the knowledge to keep your iPad running like a well-oiled machine. Remember, clearing cache isn’t just about freeing up space – it’s about giving your trusty tablet a new lease on life. So why not make it a monthly ritual? Your iPad will thank you with zippier performance and more room for the things you love. Don’t let cached data slow you down – take charge and clear that cache today! Have any questions or favorite cache-clearing tricks? Drop them in the comments below – I’d love to hear from you!
FAQ’s
Signs that you might need to clear your cache include sluggish app performance, slow loading times, or if you’re running low on storage. If apps are not behaving as expected or if you notice a significant drop in performance, clearing the cache can be a good troubleshooting step.
Clearing cache generally does not affect your saved data or personal information, such as emails, contacts, or photos. However, it can remove certain settings or preferences saved within apps, meaning you might need to reconfigure some app settings or log in again.
Before resetting an app, back up your data by checking if the app has its own backup feature or syncing options. For apps like games or productivity tools, look for cloud storage or export features. Additionally, ensure that your iPad is backed up to iCloud or a local computer to safeguard all your data.


Redragon YAMA K550 Review: Feature-Packed & Affordable
Looking for a premium full-size keyboard under $100? The Redragon YAMA K550 delivers RGB, macros, and serious value.
How Charging Your Power Bank to 100% Can Damage It
Learn why you shouldn’t charge your power bank to 100% and tips on extending your power banks lifespan.
Power Bank Lifespan: How Many Charges Will You Get?
Learn how to make your power bank last 3-5 years with expert tips on usage, storage, and maintenance. Discover the secrets to longer battery life!
Portable Charger Technologies: A Complete Guide to Fast Charging in 2024
Discover the latest portable charger technologies, from USB-PD to GaN charging. Learn which fast-charging standard is best for your devices and how to choose the right power bank.
Can Portable Chargers Overheat? Understanding the Risks and Safety Measures in 2024
Discover the potential risks of portable charger overheating, learn why it happens, and get crucial safety tips to protect your devices and yourself in 2024.