


Installing your CPU or Central Processing Unit might seem daunting at first. But in this post, I’m going to show you that it’s simple. Everything you need to install your CPU includes: a screwdriver, thermal paste, and of course a motherboard to install it in, thermal paste is to keep your CPU cool and you can find it on Amazon for pretty cheap. I would also strongly recommend getting a cooler, this is most of the time included with your CPU but if it isn’t you should get one. CPU coolers come in all shapes and sizes, but if you have a normal processor the stock cooler will do just fine. Do know that if you’re getting a stock cooler you have to get it from the right brand, if you have an AMD processor then you should get an AMD cooler and if you have an Intel processor then you should get an Intel cooler.
nnnnSo in this post, I’ll explain how to install your CPU in only 5 simple steps, and all you need is a screwdriver and some thermal paste. The process of installing your CPU will also depend on what brand of CPU you’re using. So first I’m going to explain how to install your AMD CPU and then I’ll tell you how to install your Intel CPU. Then I’ll show you how to install the stock cooler as it’s pretty similar for both AMD and Intel
nnnnnnnnHow To Instal An AMD CPU
nnnnnnnn
I’m going to explain how to install your AMD CPU in only 5 steps, and I’m going to try to keep it as simple as possible.
nnnnnnnn- n
- Get the socket ready. n
Start by putting the retention arm on your CPU socket up by gently pressing it to the side and then up, as shown in the picture below.
nnnn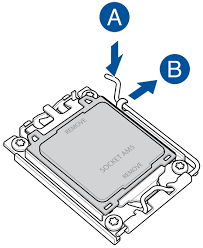
2. Putting the CPU in it’s socket.
nnnnGently put the CPU in the socket by letting it fall in the holes, you should see a golden arrow in one of the corners of the CPU make sure that it’s pointing in the same direction as the arrow on the socket. Note that you shouldn’t be using any force to do so and give it a gentle little wiggle once it is in to confirm the CPU is fully seated in its socket. Also, make sure to not touch any of the pins as they’re quite fragile. If it isn’t going in try repositioning it a couple of times and it should just fall in, as shown in the picture below.
nnnn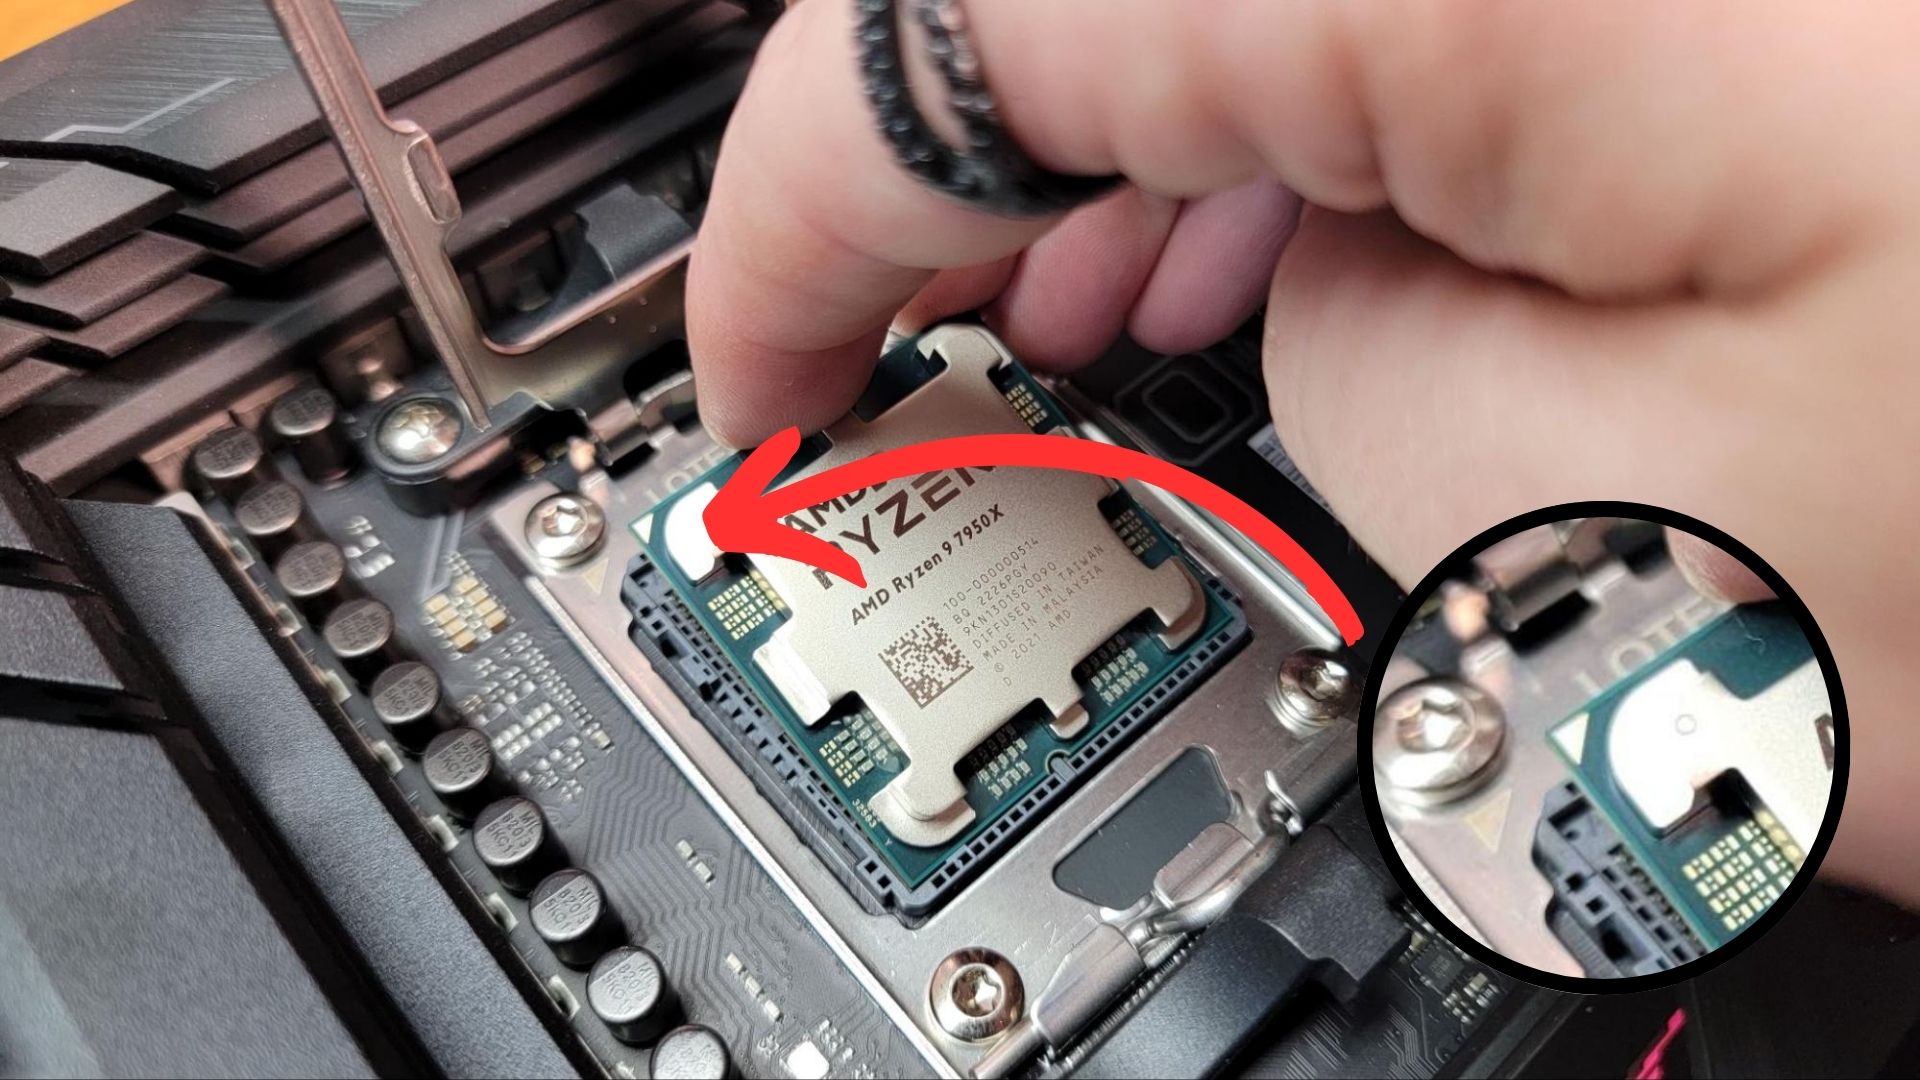
3. Fully installing the CPU.
nnnnPut the retention arm down again and you’ve succesfully installed your CPU!
nnnn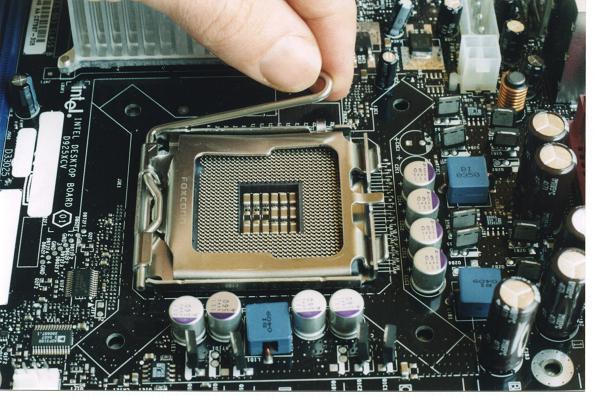
How To Install An Intel CPU
nnnnnnnn
Installing an Intel CPU might seem similar but there are a few things you have to do differently than with an AMD CPU.
nnnnnnnn- n
- Get the socket ready. n
Getting the socket ready is the same process as with the AMD socket, start by putting the retention arm on your CPU socket up by gently pressing it to the side and then up, as shown in the picture below. Now you will also have to flip the load plate up, the load plate will be unlocked once you have put the retention arm up. Also, make sure to not touch the pins once they’ve been exposed as they can be quite fragile.
nnnn
2. Putting the CPU in it’s socket.
nnnnPutting the CPU in its socket is a bit different with Intel as the pins aren’t on the CPU but on the socket. Again be sure to not touch the bottom of the CPU, because your fingers can get oils or residue in there which isn’t what you want. Now as with the AMD CPU, there will be a golden arrow and another arrow printed on the loadplate and they should be pointing in the same direction. You want to go straight down and gently put it in its socket, be sure not to use any force or try and press it in as the CPU should just fall straight into the socket and give a gentle little wiggle to confirm it’s fully in.
nnnn
3. Fully installing the CPU.
nnnnNow if the CPU is fully seated you can put the loadplate back down over the CPU, and if you have a black protective cover on your loadplate it should just pop straight off. Then proceed to put the retention arm back down to its original spot, so fully down and beneath that notch. And that’s it, well done!
nnnn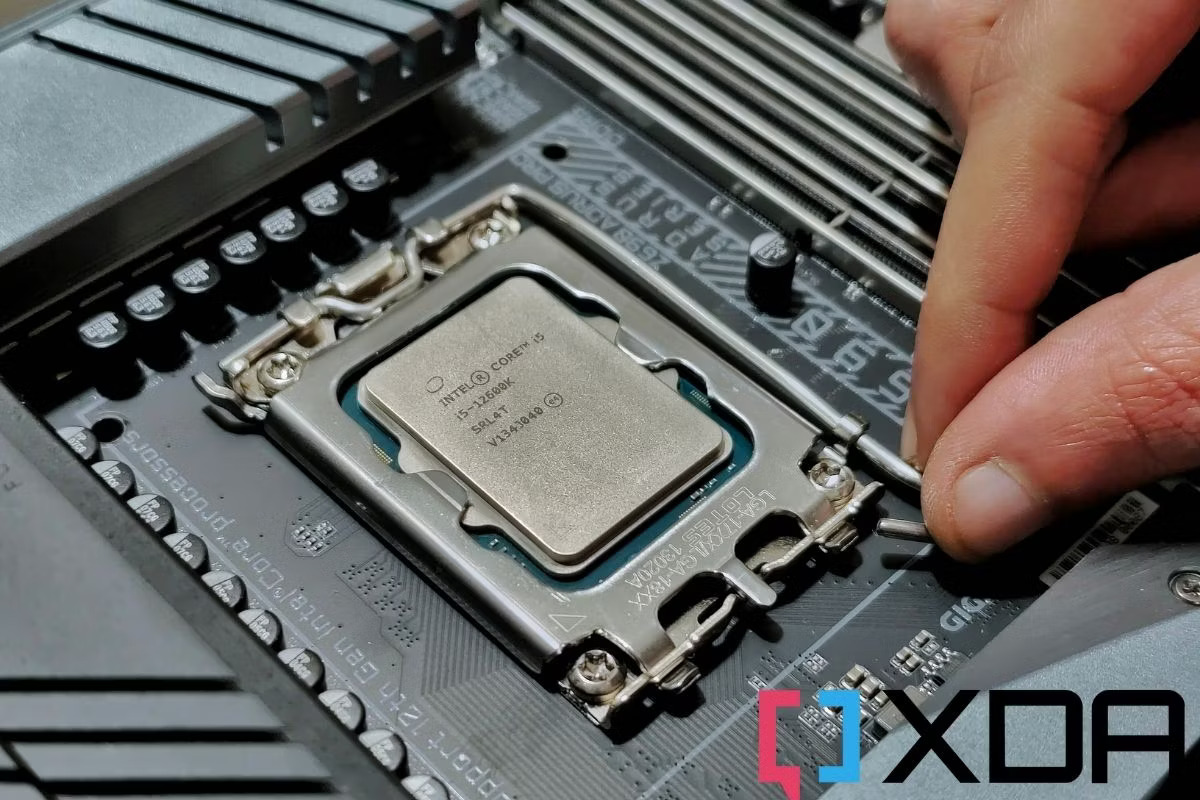
How To Install The Stock Cooler
nnnnnnnn
Installing your CPU stock cooler is going to be pretty much the same on AMD and Intel, so I’m going to just make 1 guide for this. All you will need to install your CPU’s stock cooler is some thermal paste (which might already be pre-installed on your stock cooler) and a screwdriver.
nnnnnnnn- n
- Applying some thermal paste. n
Applying thermal paste is very important to ensure that your CPU isn’t overheating and that it’s working at its maximum potential. Applying the thermal paste is easy, note that if you bought a new CPU then there should already be thermal past pre-applied on the stock cooler. There are multiple ways of putting on thermal paste, my favorite is putting a dot of it on your CPU and it should automatically spread out if you have a spatula for your thermal paste which looks like this, you should spread it out with that and make sure everything is covered with a thin layer of thermal paste.
nnnn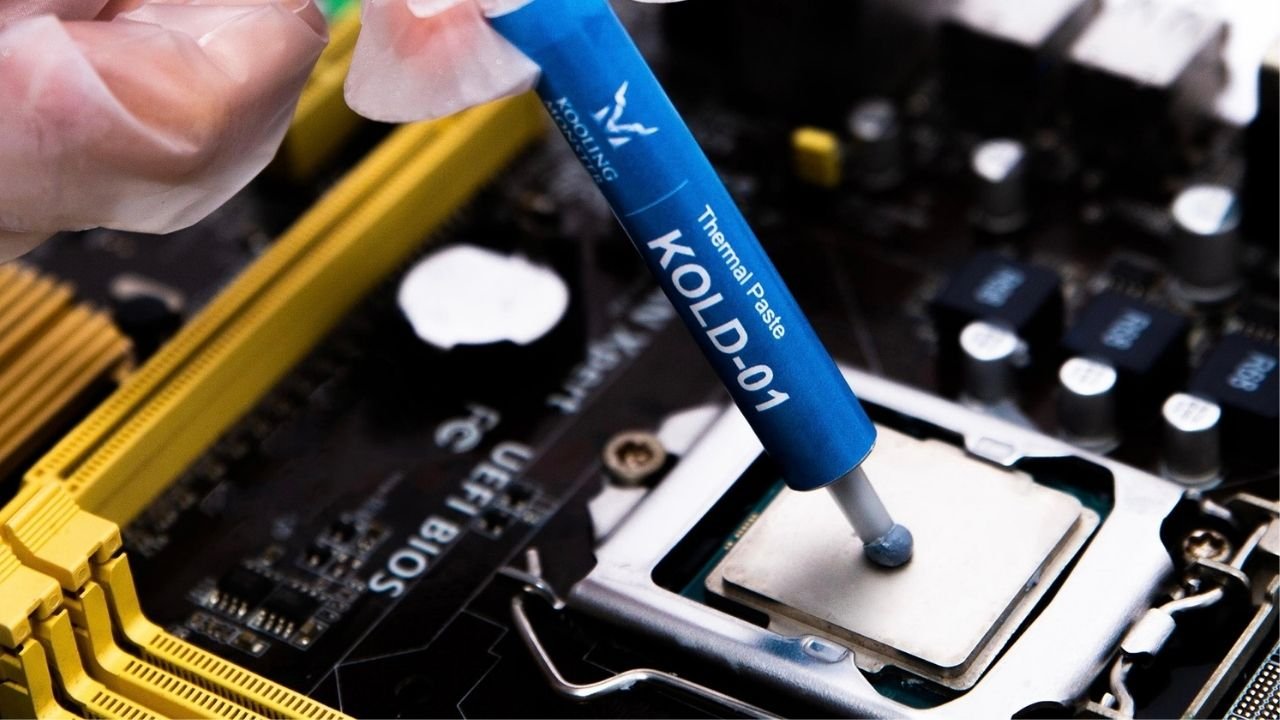
2. Putting the cooler on the CPU
nnnnNow putting the cooler on the CPU might look complicated but it’s easy, all you need is a screwdriver. Firstly you want to locate the designated holes for the cooler on the motherboard, these will often be pretty big holes in all 4 corners around the CPU. Then you have to put the cooler on and screw it in, it’s that simple! You should do this in one go so the thermal paste stays intact so make sure you’re being careful when installing the cooler.
nnnn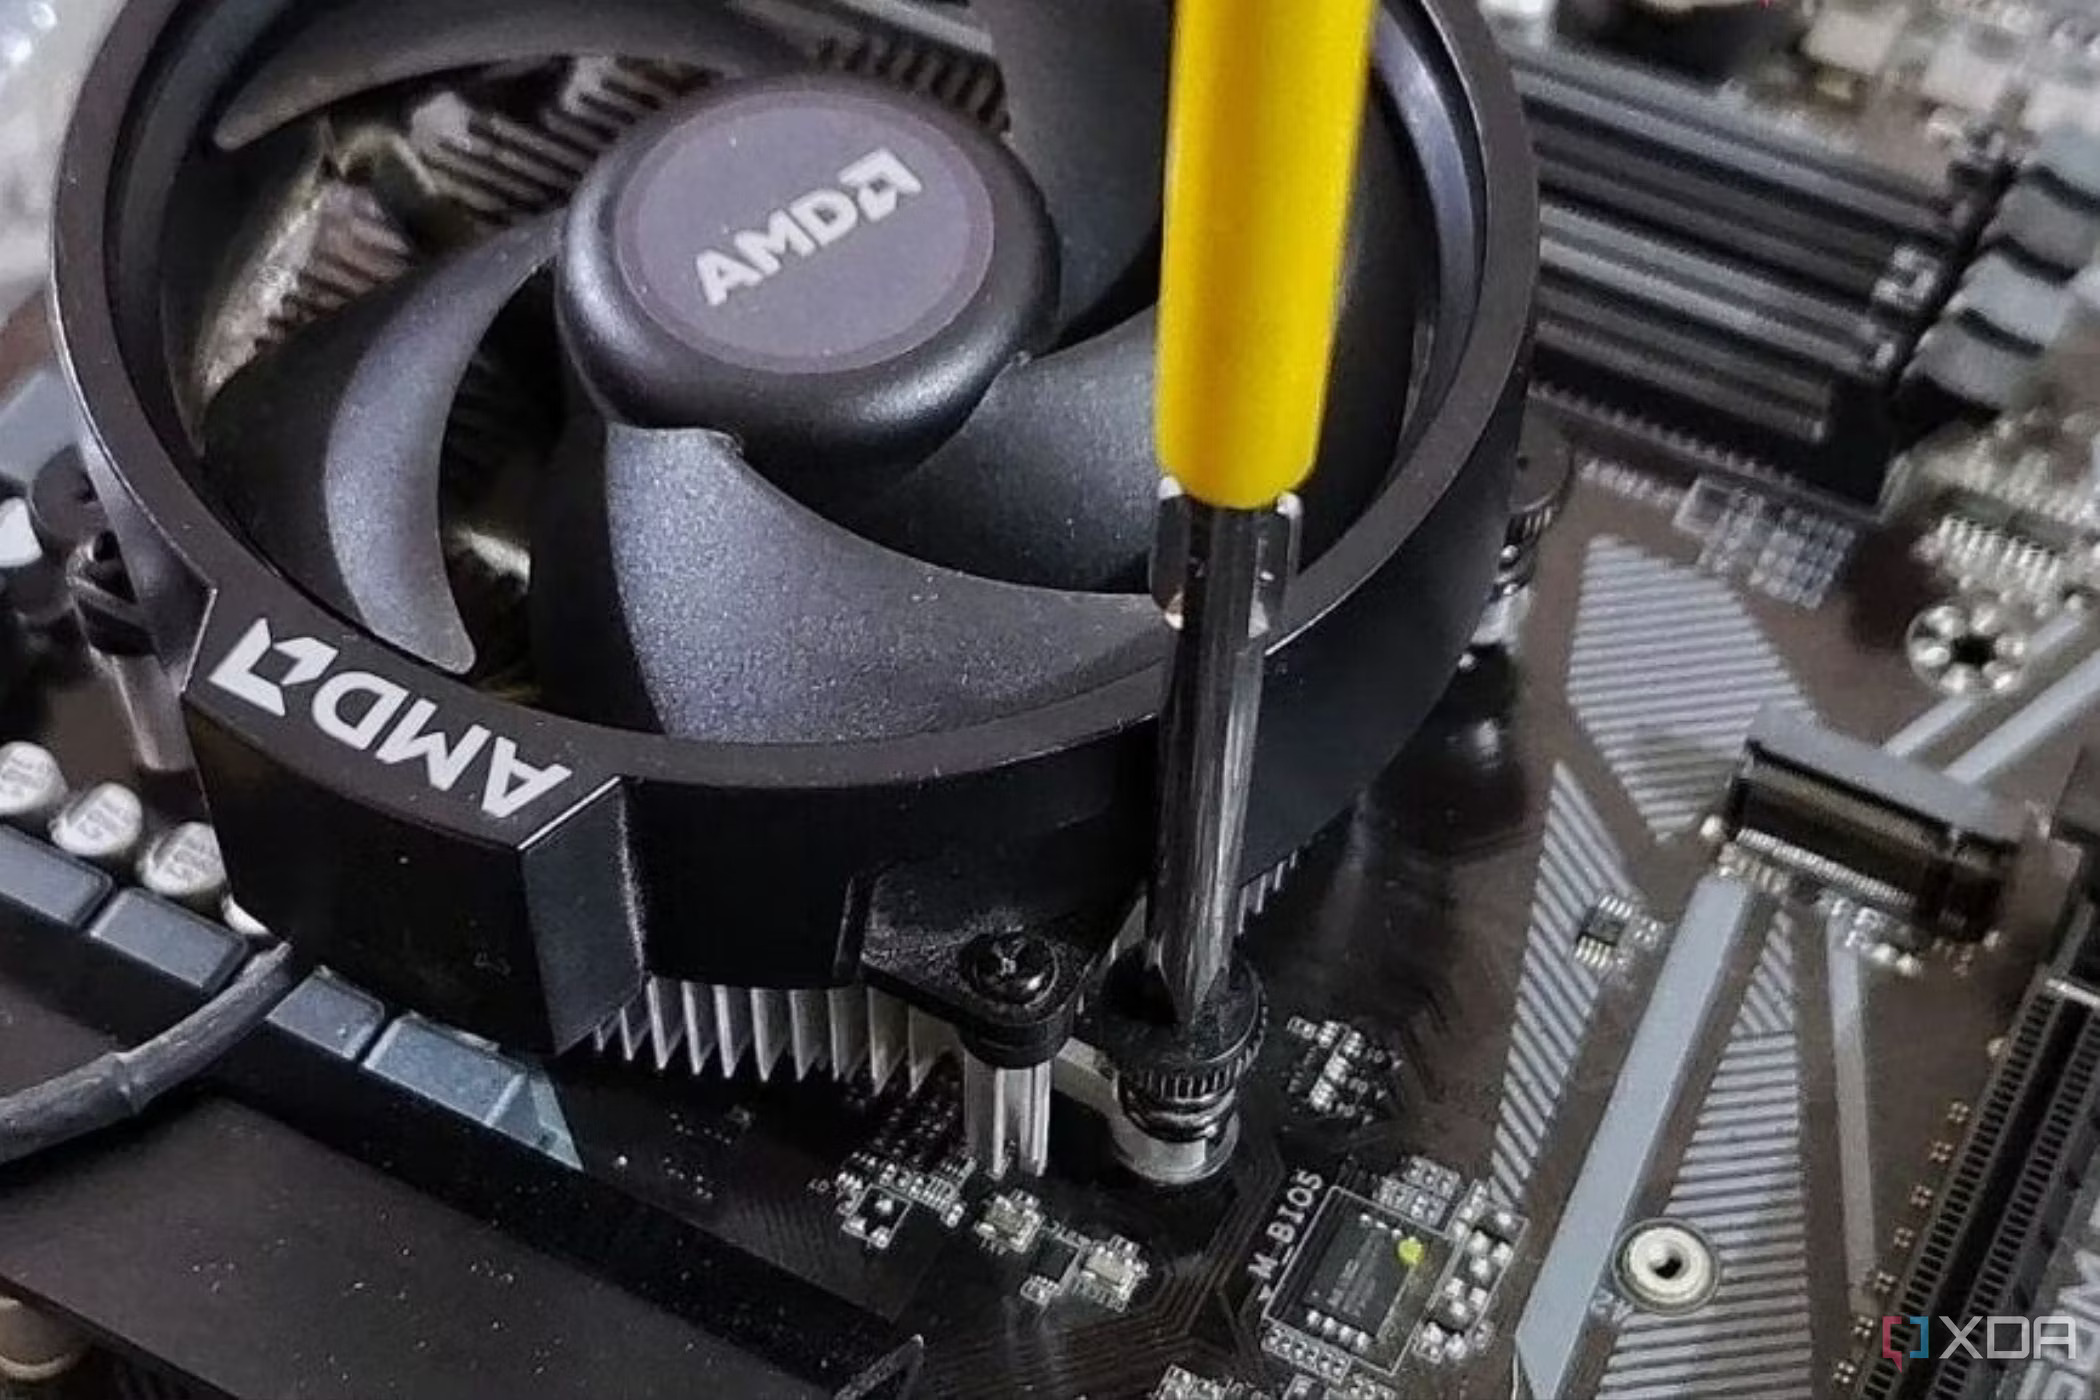
3. Connecting the cooler to the motherboard.
nnnnNow for our last step, plugging the cooler into the motherboard. This is probably the easiest to do so I’ll make this nice and short. Locate the cable of your stock cooler, typically a black cable coming from the top (so where the logo is). Then you want to find the PWM header on the motherboard, this can be anywhere from the top to the sides of your motherboards but should say CPU_FAN above it. Plug it in and you should be good to go!
nnnn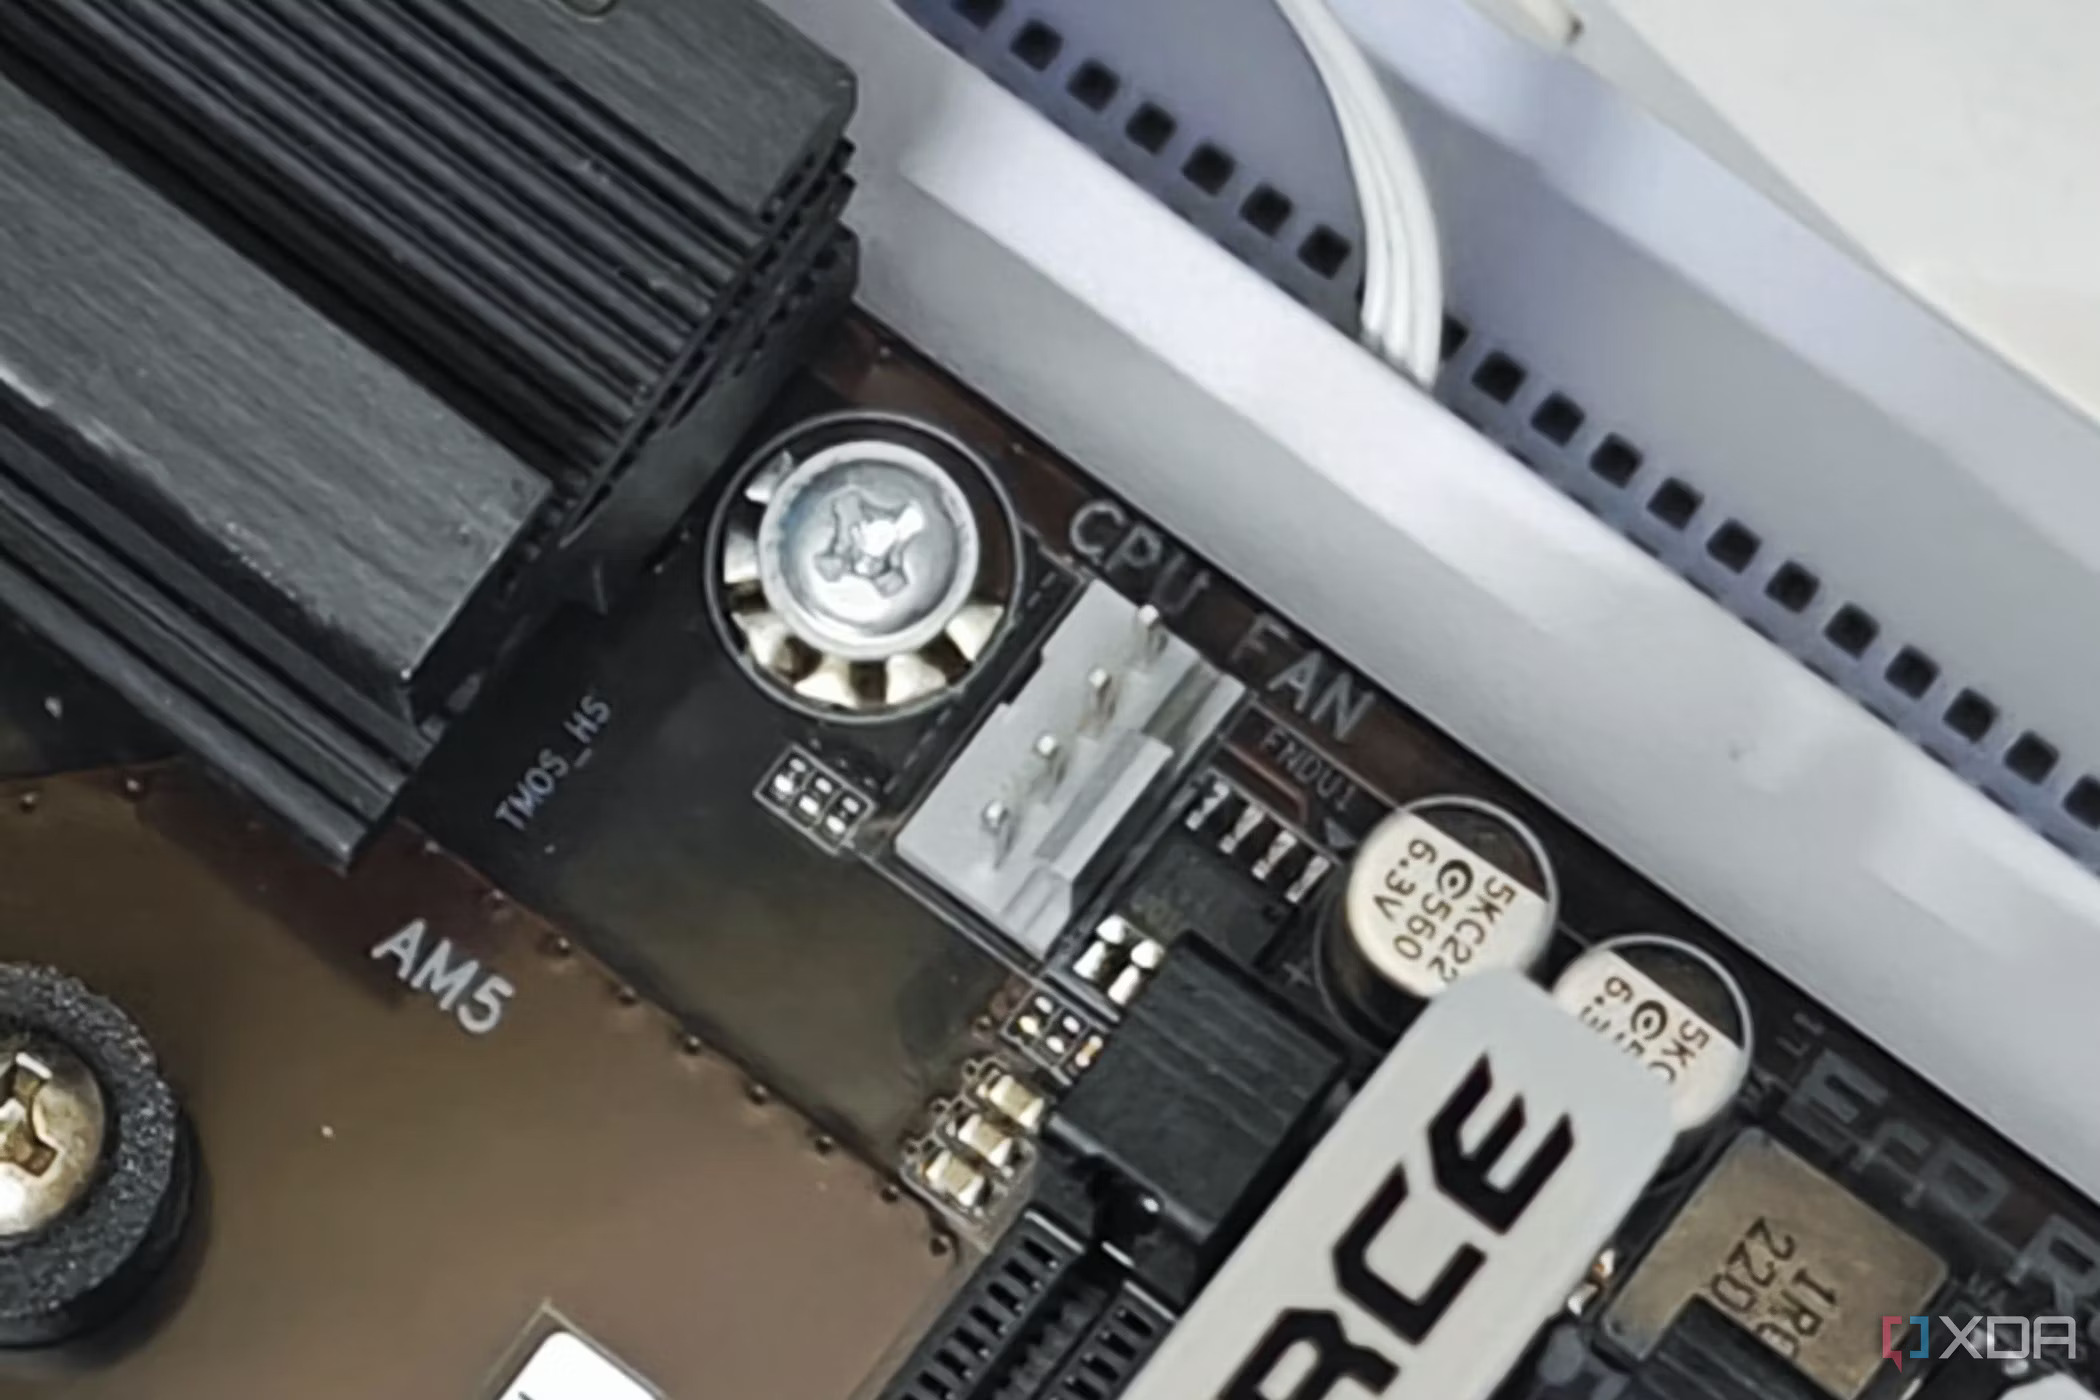

Easily Connect Keyboard and Mouse to Xbox One for Enhanced Gaming
n Have you ever wanted to try out using your keyboard and mouse on the Xbox One? Well, you’ve come to the right place, because today I’m going to explain a simple way of doing this and how to take full advantage of using your keyboard and mouse on the Xbox One.I’ll first show how…
4 Simple Ways to Fix Smartphone Charging Issues Without Tools
n All of us have been there—your phone suddenly refuses to charge, or the battery drops way too fast. Whether it’s a sketchy charging port or a charger that seems to have given up. It’s always super annoying and throws off pretty much your whole day. nnnn But don’t worry! I’ve got four simple tricks…
How to Fix Microphone Not Working on Windows 10 & 11 in 2024: 10 Easy Solutions
n Is your microphone giving you the silent treatment again? Well, you’re not alone—around 68% of Windows users deal with microphone issues at least once a year. nnnn Whether you’re trying to hop on a Zoom call, join a gaming session, or record a podcast with your friends. A broken mic can throw everything off.…
How to Connect PS4 Controller to PS5 in 5 Simple Steps (2024 Guide)
n Are you one of the 117 million gamers who have rocked a PS4 console and its iconic DualShock 4 controller? If you’ve recently made the leap to the PS5 but can’t bear to part with your trusty controller, then you’re in for a treat! nnnn Connecting your PS4 controller to the PS5 might seem…
Cool Tech For Teenagers June
n Have you ever wanted some cool tech to spice up your room or gaming setup? Well, you’ve come to the right place, welcome back to tech for teenagers in this episode I’m going over the 4 best tech products for teens under €40. These won’t just be the generic RGB mousemats or a headphone…