Will researching my article about the best OLED TV’s around $1000, I frequently stumbled across ”Nvidia G-Sync”. However, like most of you, I didn’t really know what that meant until now. So in this post I’ll go over what it means, if you need it and more.
nnnn
Quick Answer:
nnnn
Nvidia G-Sync is basically a technology that synchronizes your monitor’s refresh rate with your GPU’s frame rate. It eliminates screen tearing and minimizes stuttering during gameplay. It’s designed to provide a smoother, more immersive gaming experience. While this may sound complicated, All it basically does is ensure that each frame is displayed only when the monitor is ready to show it.
nnnn
G-Sync works by dynamically adjusting the monitor’s refresh rate to match the frame rate of your Nvidia graphics card. This means that if your game’s frame rate isn’t consistent, the monitor will adjust accordingly. This adjustment prevents the common issues of tearing. Tearing occurs when part of the screen displays one frame while the rest shows another. It looks like a horizontal split in the image where parts of different frames are displayed at the same time, making the picture appear broken. Unlike traditional V-Sync, which can introduce input lag. It waits for frames to be fully rendered. G-Sync offers a more seamless experience by syncing the frames in real-time.
nnnn
The technology is particularly beneficial in fast-paced games where smooth visuals and quick response times are crucial. G-Sync improves your overall gaming performance by reducing screen tearing and stuttering. Movements feel more fluid and gameplay becomes more responsive. Whether you’re playing on a high refresh rate monitor or just trying to get the most out of your current setup, Nvidia G-Sync can make a noticeable difference.
The main reason you might want Nvidia G-Sync is to eliminate screen tearing and reduce stuttering in your gaming experience. This technology is designed to synchronize your monitor’s refresh rate with your GPU’s frame rate. This ensures that each frame is displayed smoothly and without delay. The result is a fluid visual experience that makes your gameplay more immersive and more enjoyable. G-Sync is particularly valuable in fast-paced games where visual disruptions can throw you off and impact your performance (and just makes it not fun to play). G-Sync helps maintain a steady and consistent image by keeping everything in sync. This allows you to focus on the game rather than on technical issues.
nnnn
n
n
n
One of the main advantages of G-Sync is its ability to prevent screen tearing. Screen tearing happens when your monitor tries to display parts of two or more frames at the same time. This creates a weird broken looking image as shown below. This is often caused by a conflict between your GPU’s frame output and your monitor’s refresh rate. With G-Sync, the monitor’s refresh rate adjusts dynamically to match the frame rate of your GPU. This ensures that each frame is displayed only when it’s fully rendered. This adjustment eliminates screen tearing and results in a much more cohesive visual experience. This improvement is crucial for gamers who need smooth and uninterrupted visuals, especially during fast movements in fast-paced games.
n
nnnn
n
“Nvidia G-Sync synchronizes your monitor’s refresh rate with your GPU’s frame rate to eliminate screen tearing and reduce stuttering for a smoother, more immersive gaming experience.”
nnnn
Through The Eyes Of A Teenager
n
n
n
nnnn
In addition to preventing screen tearing, G-Sync also plays a crucial role in reducing stuttering. Stuttering occurs when the frame rate drops below the monitor’s refresh rate, leading to laggy and inconsistent gameplay. This can be particularly frustrating in games that require precise timing and quick reflexes. G-Sync minimizes stuttering by synchronizing the monitor’s refresh rate with the game’s frame rate, even when the frame rate is inconsistent. This synchronization helps maintain a smooth flow of frames, making your gaming experience more responsive and enjoyable. Reducing stuttering can significantly improve how your games feel. It gives you a more stable and reliable experience.
nnnnScreen taring (Image credit: AV Acces)nnnn
For gamers who are serious about getting the most out of their gaming setups, Nvidia G-Sync is an essential feature. It not only enhances the visual quality of your games but also improves the overall responsiveness of your system. This can be a game-changer in competitive scenarios where every millisecond counts. G-Sync ensures that your monitor and GPU work in perfect harmony. It provides you with a smoother, more consistent, and visually pleasing experience. Whether you’re playing to win or just for fun, G-Sync can make your games look&feel better. It also makes your games feel more immersive. This makes it a valuable addition to any gaming setup.
n
nnnnnnnn
n
G-Sync vs. Free-Sync
nnnn
When comparing G-Sync and FreeSync, it’s important to understand how each technology enhances your gaming experience. Nvidia G-Sync and AMD FreeSync both aim to synchronize your monitor’s refresh rate with your GPU’s frame rate. This synchronization helps eliminate screen tearing and reduce stuttering. However, there are some key differences between them that might influence your choice depending on your needs and setup.
nnnnnnnn
G-Sync, developed by Nvidia, requires a unique module to be built into the monitor. This module ensures good integration between the monitor and Nvidia graphics cards. It provides very precise synchronization that can offer excellent performance. G-Sync is known for its high quality and reliability. However, this can also mean a higher price for monitors that include the technology. G-Sync works best with Nvidia GPUs. Making it a great choice if you are already using or plan to use an Nvidia graphics card.
nnnn
FreeSync, on the other hand, is developed by AMD. It operates using the Adaptive Sync standard built into the DisplayPort and HDMI interfaces. This means that FreeSync-compatible monitors can be more affordable since they don’t require a unique module. FreeSync is designed to work with AMD GPUs and also supports a broader range of monitors and price points. While FreeSync can offer similar benefits in terms of reducing screen tearing and stuttering, the performance can vary. It varies depending on the monitor’s implementation and the range of refresh rates it supports.
nnnn
nnnnn
Get all the latest post on through the eyes of a teenager straight in your inbox.
nnnn
Subscribe to stay updated, it’s free!
nnn
nnnn
Both G-Sync and FreeSync improve your gaming experience by providing smoother visuals and better responsiveness. The choice between the two often comes down to your existing hardware and budget. If you have a Nvidia graphics card and don’t mind paying a premium price, G-Sync might be the better option. It offers potentially higher precision and reliability. If you’re using an AMD GPU or prefer a more cost-effective solution, FreeSync offers excellent performance and compatibility. Ultimately, both technologies aim to enhance your gaming experience by ensuring that your monitor and GPU work seamlessly together.
n
nnnnnnnn
n
Popular monitors that support Nvidia G-Sync
nnnn
There are a lot of monitors that are compatible with Nvidia G-Sync these days. The list is always evolving as new models are released. Here’s a broad overview of categories and some popular models from various brands known for their G-Sync compatibility. For the most up-to-date information, checking Nvidia’s official list or manufacturer websites is always a good idea.
G-Sync Compatible vs. G-Sync Ultimate: G-Sync Compatible monitors use adaptive sync technology that’s validated by Nvidia to work well with their graphics cards. G-Sync Ultimate monitors are Nvidia-certified for the highest standards of performance. This includes better performance in variable refresh rates. They also offer lower latency and higher brightness.
nnnn
Check for Firmware Updates: Some monitors may gain G-Sync compatibility through firmware updates. It’s always a good idea to check for the latest updates from the manufacturer.
nnnn
Resolution and Refresh Rate: G-Sync technology supports a wide range of resolutions and refresh rates. Make sure to choose a monitor that meets your specific needs in terms of gaming or professional use.
nnnnn
*For the most comprehensive and up-to-date list, visit Nvidia’s official G-Sync monitor page. Alternatively, check the specifications on the manufacturer’s website.
Yes, many FreeSync monitors can work with Nvidia GPUs through a feature called “G-Sync Compatible.” However, performance may vary depending on the monitor’s specifications and implementation.
To use Nvidia G-Sync, you need an Nvidia GPU that supports the technology (typically GTX 650 Ti or higher), a monitor that is G-Sync compatible, and a DisplayPort 1.2 or higher connection. Some laptops with G-Sync support may also require specific configurations.
No, Nvidia G-Sync is designed exclusively for use with Nvidia GPUs. If you have an AMD graphics card, you should look for monitors that support AMD FreeSync, which offers similar benefits like reducing screen tearing and stuttering.
You’ve probably heard a lot about HDMI 2.1 recently, especially with 4K and 8K gaming becoming more mainstream these days.
nnnn
But did you know that over 40% of HDMI 2.1 cables sold online are counterfeit or mislabeled? It’s crazy, right? The tech world can be tricky, and cables are often overlooked, but a real HDMI 2.1 cable is essential for getting the most out of your devices.
nnnn
Trust me, I’ve been there—sorting through cables and trying to figure out which ones will actually work for my gaming setup (it’s a pain).
nnnn
So, in this guide, I’ll walk you through exactly how to test if your HDMI cable is truly HDMI 2.1 and avoid getting tricked by fake ones.
nnnn
n
n
n
Quick Summary:
nnnn
n
To check if your HDMI cable is HDMI 2.1, look for the “Ultra High Speed HDMI” logo and check overall build quality.
nnnn
Use your TV or console settings to confirm 4K at 120Hz or 8K at 60Hz support. Also test Variable Refresh Rate (VRR) and Auto Low Latency Mode (ALLM) on compatible gaming consoles.
nnnn
Be cautious of cables lacking certification or that seem cheaply made, as they may not meet HDMI 2.1 standards.
HDMI 2.1 is a standard with 48Gbps bandwidth that allows 4K at 120Hz and 8K at 60Hz, perfect for gaming and high-definition movies.
nnnnnnnn
This bandwidth allows HDMI 2.1 to handle 4K gaming at 120Hz and 8K at 60Hz—something HDMI 2.0 could never manage. If you’re into gaming or love watching ultra-high-definition movies, this is a must-have feature.
nnnn
The HDMI 2.1 standard also includes support for technologies like Variable Refresh Rate (VRR), Auto Low Latency Mode (ALLM), and Quick Frame Transport (QFT). All of which can enhance your gaming experience by reducing input lag and improving frame rates.
nnnn
These features may sound a bit techy, but if you’re playing games or watching the latest movies, they’ll make a huge difference in quality.
nnnn
One thing to note: not every HDMI 2.1 cable will have the exact same features. Some may support 4K at 120Hz but not 8K. So, be sure to check your cable’s specs to see what it’s capable of!
n
nnnnnnnn
n
Physical Identification Methods
nnnn
To check if your HDMI cable is HDMI 2.1, look for the “Ultra High Speed HDMI” certification label and official hologram on the cable or packaging.
Genuine HDMI 2.1 cables come with labels showing their certification—specifically the “Ultra High Speed HDMI” certification logo. This is crucial. A cable without this label might not meet the required specifications, even if it claims to be HDMI 2.1.
nnnn
Look closely at the cable or its packaging for the official HDMI hologram. If it’s missing or doesn’t match the official design, that’s a big red flag.
nnnn
You should also see a QR code on the packaging that can be scanned to verify the cable’s authenticity. This might not work with every cable, but it’s worth giving a shot as it does prove 100% authenticity.
nnnn
If you’re buying online, always double-check the product description and look for that official certification. Some sellers may try to pass off HDMI 2.0 cables as 2.1, and that can lead to a lot of confusion and disappointment. It’s also always smart to make sure your buying from good brands such as: Belkin or Monoprice.
n
nnnnnnnn
n
Testing Your HDMI 2.1 Cable’s Performance
nnnn
Now let’s get into the fun part—testing your HDMI cable. After all, labels and holograms are great, but we need to make sure your cable can handle the specs it promises. Here’s 3 methods how you can easily test it:
nnnnnnnn
1. Built-in TV/Monitor Diagnostic Tools
nnnn
Most modern TVs and monitors have built-in diagnostic tools that show you information about the current display settings. This includes the resolution and refresh rate.
nnnn
You can even check this on windows by going into: Display setting>Display resolution. Once there you can verify if your HDMI cable’s resolution is the same as on the box.
This is always a good and reliable way to test your HDMI cables capabilities.
nnnnnnnn
2. Testing Bandwidth and Resolution
nnnn
Testing your bandwidth and resolution can be a bit daunting, but it does have a few benefits such as:
nnnn
n
Ensures top video quality by confirming cable capabilities.
nnnn
Prevents compatibility issues with HDMI 2.1.
nnnn
Saves money by avoiding unnecessary upgrades.
n
nnnn
Many TV brands offer apps or settings where you can test the bandwidth of the incoming signal. Using these tools, you can confirm whether your HDMI cable supports 48Gbps. If it doesn’t, it’s probably not HDMI 2.1.
nnnnnnnn
3. Verifying VRR Support
nnnn
For gamers, VRR (Variable Refresh Rate) support is key. This feature helps reduce screen tearing and stuttering. It does this by syncing the refresh rate of your monitor with your graphics card’s frame rate.
To test VRR support, first connect your cable to a gaming console like the Xbox Series X or PlayStation 5. Then look for VRR settings in the console’s video output menu. If the option is available and your screen supports it, your cable is likely HDMI 2.1.
n
nnnnnnnn
n
Common Red Flags of Fake HDMI 2.1 Cables
nnnn
Let’s face it—nobody wants to get done by a counterfeit cable. So, how do you spot the fakes? Here are a few things you should look out for when buying a HDMI 2.1 cable:
nnnn
n
Price: If the price seems too good to be true, it probably is. HDMI 2.1 cables are more expensive than older versions because of their higher bandwidth. A super cheap HDMI cable is likely not HDMI 2.1.
nnnn
Missing Certifications: If your cable doesn’t have the proper “Ultra High Speed HDMI” logo or lacks the hologram, then that can be a big red flag.
nnnn
Claims that don’t add up: Some cables will boast about 8K or 4K at high refresh rates but may only support lower resolutions. If the marketing sounds too good to be true, dig deeper before buying.
nnnn
Build Quality: Counterfeit cables often have poor build quality. Look for flimsy connectors or subpar materials. A genuine HDMI 2.1 cable is built to last.
n
nnnn
Of course I would always recommend that you check out a review of the cable that you want to buy. However, if that’s just not possible because there aren’t any reviews of it online, then these tips can save you from a scam.
nnnn
To make it as easy a possible, here are a few cables that I would recommend. I picked these cables specifically because of their great quality and affordability. You can check it my full review for each cable here.
If you’re still unsure about your HDMI 2.1 cable, there are a few tools and apps that can help you confirm its authenticity:
nnnnnnnn
1. Official HDMI Certification Verification App
nnnnnnnn
The HDMI Licensing Administrator actually offers an official app that allows you to verify the HDMI 2.1 certification of your cable. Just scan the QR code on the packaging and check the details. This app is available for both Android and iOS, and it’s a really simple way to confirm that your cable meets the proper standards.
nnnn
Ofcourse, nothing is 100% reliable. However, this app is the best method out there an I’d say it gets it right around 98% of the time. You can download it for free here.
On many TVs and monitors, you can check the information about the signal coming in by using the display info menu. This menu will show you the resolution, refresh rate, and other important specs. If your cable supports HDMI 2.1, it should show the appropriate resolution and refresh rate.
nnnn
As shown in the image above, this also works on Windows. All you have to do is go to: Display setting>Display resolution and then see if it shows the appropiate resolution.
nnnnnnnn
3. Gaming Console Video Output Settings
nnnnnnnn
Both the PlayStation 5 and Xbox Series X have settings that let you check and adjust video output. So, If your HDMI cable supports 4K at 120Hz or 8K at 60Hz. Then that should appear in the video output settings on these consoles.
nnnn
It might also not be able to reach the advertised resolution if your TV/monitor isn’t cappable. So I would suggest to first check your monitor’s Hz and then check in the settings if it’s the same.
nnnnnnnn
4. Professional Testing Equipment
nnnnnnnn
For the hardcore tech enthusiasts, there’s always professional testing equipment available. This equipment can measure the actual bandwidth and performance of your HDMI cable.
nnnn
These tools aren’t cheap, but they’re the most accurate way to test HDMI cables for compliance with HDMI 2.1 standards. I wouldn’t necessarily recommend it to everyone, but if you have the equipment lying around then it’s worth a shot.
n
nnnnnnnn
n
How To Check If HDMI Cable Is 2.1 – Conclusion
nnnn
And there you have it! Now you’re fully equipped to test your HDMI 2.1 cables and avoid the fakes. Whether you’re gaming, watching movies, or streaming, you need a cable that can keep up with the high demands of modern tech. Remember, always check for official certification labels, use diagnostic tools to test performance, and don’t fall for deals that sound too good to be true.
nnnn
If you have any doubts or questions about your HDMI cable, feel free to leave a comment below! I’ll help you figure it out. Your gaming and entertainment experience deserves the best, and that starts with the right cable.
Yes! HDMI 2.1 cables are backward compatible with older HDMI versions. However, if your device doesn’t support HDMI 2.1 features, like 4K at 120Hz or 8K, the cable will still work but won’t provide those benefits.
The key difference is the bandwidth: HDMI 2.1 supports 48Gbps, allowing for 4K at 120Hz and 8K at 60Hz. HDMI 2.0 supports 18Gbps, which is limited to 4K at 60Hz. HDMI 2.1 also adds support for features like Variable Refresh Rate (VRR) and Auto Low Latency Mode (ALLM).
If you want to play 4K games at 120Hz or take advantage of features like VRR and ALLM, an HDMI 2.1 cable is necessary. However, for regular 4K at 60Hz gaming, HDMI 2.0 may suffice.
Looking for some of the best latest tech deals? You’ve come to the right place, because today I’m going over the 5 best Amazon tech deals of today which is augus 15 2024, and the best part is, everything’s under $300! Whether you’re looking for a new tablet or thinking about upgrading your router, today’s deals are packed with value and are perfect for anyone looking to enhance their tech setup without breaking the bank.
nnnn
Even though it’s not Prime Day or Black Friday, the deals are still seriously tempting. From sleek tablets to high-performance laptops, I’ve rounded up the top offers on Amazon that you won’t want to miss. These tech deals combine fantastic features with great prices, making them a great deal for tech lovers.
nnnn
Stick around as we dive into the top deals of the day. You’ll find out the latest tech deals you can snag at low prices, all under $300. Get ready to discover some of the best offers of today and upgrade your tech game!
This Roku Stick 4K is only $34 on Amazon right now and for that price it delivers some great value. Roku is one of the best Smart TV platforms so to get one for only $34 is a no-brainer. Learn more about Roku here.
The Samsung Galaxy Tab A9+ features an 11-inch screen, solid performance, and plenty of storage. It’s perfect for watching videos, playing games, and handling everyday tasks. Plus, it’s sleek, lightweight, and has a long-lasting battery, making it a great all-around tablet for it’s price.
The TP-Link AXE5400 Tri-Band WiFi 6E Router is now just $152.85, thanks to a 24% discount. With its tri-band technology, it delivers fast, reliable internet for all your devices. It’s perfect for high-speed streaming, gaming, and working from home, making it a fantastic deal at this price.
The ApoloSign Laptop with 12GB RAM and a 512GB SSD is now just $269.99, down from $999.99 because of a massive 73% discount. With its powerful specs and speedy performance, it’s perfect for multitasking, gaming, and more. This is an incredible deal for a high-performance laptop!
The JBL Tune Flex True Wireless Noise Cancelling Earbuds are now only $49.95, thanks to a 50% discount. With their excellent noise cancellation and compact design, they’re perfect for enjoying your music without distractions. Grab this great deal and experience high-quality sound on the go!
That was our our roundup of the best Amazon tech deals for August 15, 2024! From affordable tablets to top-notch earbuds, there’s something here for everyone looking to get a great deal on quality tech. Don’t miss out—these discounts won’t last forever!
The Apple Pencil is a great way to make for some extra productivity. The Apple Pencil is great for writing stuff by hand for example, but connecting it might be a bit challenging in the beginning. However, you don’t have to worry because I’ve made a quick and easy tutorial on how to do so on all the different Apple Pencils so after this post you’ll know exactly what to do!
nnnn
Quick tutorial: connecting your Apple pencil to your iPad
nnnn
n
Check Compatibility: n
n
Make sure your iPad and Apple Pencil are compatible.
Complete guide: connecting your Apple pencil to your iPad
nnnn
Connecting your Apple Pencil to your iPad allows you to make use of its full potential, from taking handwritten notes to creating some amazing digital artwork. Here’s a detailed, step-by-step guide to help you pair your Apple Pencil with your iPad, depending on the model of your Apple Pencil and iPad plus some troubleshooting tips if you run into any issues.
nnnn
1. Check Compatibility
nnnn
Before you begin, make shure that your iPad and Apple Pencil are compatible with each other. Here’s a compatibility breakdown:
Remove the Cap: Gently pull off the cap from the back end of your Apple Pencil to reveal the Lightning connector.
nnnn
Connect to iPad:n
n
For iPads with a Home Button: Plug the Lightning connector of your Apple Pencil directly into the Lightning port on your iPad.
nnnn
For iPads without a Home Button: Use the USB-C to Apple Pencil Adapter. Plug the Lightning end of the Apple Pencil into the adapter, and then connect the adapter to the USB-C port of your iPad.
n
n
nnnn
Tap Pair: Once connected, a pairing prompt will appear on your iPad screen. Tap the “Pair” button to complete the connection process.
nnnn
Confirm Connection: After pairing, you should see a confirmation on your iPad, and your Apple Pencil is ready to use.
Locate the Magnetic Connector: On the side of your iPad, below the Volume buttons, find the magnetic connector.
nnnn
Attach the Apple Pencil: Place the flat edge of your Apple Pencil against the magnetic connector on the iPad. It should snap into place magnetically.
nnnn
Automatic Pairing: The Apple Pencil will automatically pair with your iPad when attached. Ensure that the Pencil is charged; it will show the battery status on your iPad when it’s connected.
nnnn
Check for Connection: Once paired, you can start using your Apple Pencil immediately. The iPad will recognize the Pencil’s presence, and you can start writing or drawing.
nnnnn
4. Pairing the Apple Pencil (USB-C)
nnnnn
Ensure iPadOS Update: Make sure your iPad is running iPadOS 17.1 or a newer version. Check this by going to Settings > General > Software Update.
nnnn
Open the Cap: Remove the cap from the end of the Apple Pencil (USB-C) to expose the USB-C port.
nnnn
Connect the Cable: Insert a USB-C cable into the USB-C port on your Apple Pencil. Connect the other end of the USB-C cable to the USB-C port on your iPad.
nnnn
Follow On-Screen Instructions: Your iPad may display a pairing prompt. Follow any on-screen instructions to complete the pairing process.
nnnn
Verify Connection: Once paired, the Pencil should work immediately, and you should be able to check its battery status on your iPad.
nnnnn
5. Troubleshooting Connection Issues
nnnn
If your Apple Pencil isn’t connecting, try these troubleshooting tips:
nnnnn
Check for Physical Damage: Inspect both your Apple Pencil and iPad for any visible damage. Replace any broken components as necessary.
nnnn
Close and Reopen Apps: Sometimes, a glitchy app can prevent pairing. Close any open apps and try reconnecting the Apple Pencil.
nnnn
Restart Your iPad: Restart your iPad by holding down the power button and sliding to power off. Turn it back on and attempt to pair the Apple Pencil again.
nnnn
Charge Your Apple Pencil:n
n
Apple Pencil (1st Generation): Ensure it is properly connected to the Lightning port for at least 20 minutes to charge.
nnnn
Apple Pencil (2nd Generation): Make sure Bluetooth is turned on (go to Settings > Bluetooth), and allow it to charge for 20 minutes.
n
n
nnnn
Clean Charging Port: For the 1st Generation Apple Pencil, check the Lightning port on your iPad for dust or debris. Clean it gently with a cotton swab or compressed air.
nnnn
Forget and Re-Pair:n
n
Go to Settings > Bluetooth.
nnnn
Find your Apple Pencil in the list of devices, tap the information button (blue “i”), and select “Forget this Device.”
nnnn
Try to pair your Apple Pencil again from scratch.
n
n
nnnnn
If you’ve tried these steps and still have issues, consider scheduling a repair or seeking assistance from a professional technician.
nnnn
nnnnn
Get all the latest post on through the eyes of a teenager straight in your inbox.
nnnn
Subscribe to stay updated, it’s free!
nnn
nnnn
Conclusion
nnnn
By following these detailed steps, you can successfully connect your Apple Pencil to your iPad and start taking advantage of its features. Whether you’re drawing, writing, or marking up documents, your Apple Pencil will enhance your iPad experience. If you encounter any difficulties, the troubleshooting tips should help resolve common issues. Enjoy your creative and productive journey with your Apple Pencil and iPad!
nnnnnnnn
What are the differences between Apple Pencil (1st Generation) and Apple Pencil (2nd Generation)?
nnnn
Choosing between the Apple Pencil (1st Generation) and the Apple Pencil (2nd Generation) largely comes down to a few key differences that come down to your needs and preferences. The biggest difference is in their charging methods. The 1st Generation Apple Pencil charges via the Lightning connector, either by plugging it directly into your iPad or through a small adapter. This can look a bit awkward and messes with the iPad’s smooth look. On the other side, the 2nd Generation Apple Pencil features wireless charging, it attaches magnetically to the side of any compatible iPad. This method not only keeps the Pencil charged with ease but also eliminates the need for any cables or adapters, providing a more cleab and up-to-date experience.
nnnn
Design differences between the two models are also quite noticable. The 1st Generation Apple Pencil has a glossy finish with a removable cap that covers the Lightning connector, which some might find less convenient. The 2nd Generation Apple Pencil, on the other hand, has a matte finish and a flat edge that attaches magnetically to your iPad. This design reduces the risk of losing parts and keeps the Pencil in place while charging, adding to its convenience and aesthetics. Additionally, the 2nd Generation Pencil supports a double-tap feature to switch between tools, a function which isn’t available on the 1st Generation model, improving efficiency for tasks that require a lot of tool changes.
nnnn
Compatibility is another important thing to consider. The 1st Generation Apple Pencil is compatible with older iPads like the iPad (6th generation and later) and some iPad Pro models that feature a Lightning port. Meanwhile, the 2nd Generation Apple Pencil is designed for newer iPads, including the latest iPad Pro models and the iPad Air with a magnetic connector. This means if you’re using an older iPad, the 1st Generation Pencil will be your best option, but for those with the latest iPad models, the 2nd Generation Pencil offers a more integrated and seamless experience.
To find out which Apple Pencil is compatible with your iPad, check the Apple website or your iPad’s specifications. Generally, the 1st Generation Pencil works with older iPad models that have a Lightning port, while the 2nd Generation Pencil is compatible with newer iPads with a magnetic connector. The Apple Pencil (USB-C) works with iPads that have a USB-C port.
Most apps designed for drawing or note-taking, such as Notes or Procreate, support Apple Pencil. However, some apps might not be fully optimized for it. Check the app’s description in the App Store to see if it supports Apple Pencil features.
If your Apple Pencil isn’t working, try restarting your iPad, making sure the Pencil is charged, and checking the Bluetooth connection. If it’s still not working, you might need to clean the iPad’s charging port or contact Apple Support for further assistance.
Taking a screenshot on you’re iPad can be really handy if you want to shar would you’re looking at or just want to save it for later. So that’s why today I’m going to explain exactly how to screenshot on iPads in 2024. After reading this post you will know exactly how to screenshot an iPad. You will also learn which iPads or versions of IOS can take screenshots. Finally, you will also understand how to screenshot in 3 different ways like for example on a keyboard or even how set it up so you can take a screenshot with just swiping.
nnnn
How to screenshot on iPad Quick summary
nnnnn
Locate the Top button and the Volume Up button
nnnn
Press both buttons at the same time
nnnn
Quickly release both buttons
nnnn
Look for the screenshot preview in the lower-left corner
nnnn
Tap the preview to edit or swipe left to dismiss it.
Screenshotting on your iPad is a great way to save important information. You can share what you’re seeing. Or just keep a record of something you want to save. Whether you’re using it for work, or personal use. Here’s a detailed guide on how to take a screenshot on your iPad.
nnnnn
Locate the Buttonsn
n
First, you need to find the Top button. It’s sometimes called the Power/On button. You also need to find the Volume Up button on your iPad. The Top button is located on the top left of your iPad. The Volume Up button is also on the left side of the device, beside the Volume Down button. Make sure you have a good grip on your iPad to avoid dropping it during the process.
n
n
nnnnnnnnnn
Press the Buttons at the Same Time
n
n
With your iPad in your hand, press both the Top/Power button and the Volume Up button at the same time. It’s important to press them together to capture the screenshot properly. Make sure you don’t press them too hard or too soft—just a firm, simultaneous press should do the trick.
n
n
nnnnnnnnnn
Quickly Release the Buttonsn
n
Once you’ve pressed both buttons, release them quickly. You should hear a camera shutter sound and see a brief flash on the screen. This indicates that the screenshot has been successfully taken. If you don’t see the flash or hear the sound, make sure you pressed both buttons again.
n
n
nnnn
Find the Screenshot Previewn
n
After taking the screenshot, a small preview of the screenshot will be in the bottom left corner of the screen. This preview will be visible for only a few seconds before it disappears. If you tap on it, you’ll enter the editing mode. You can crop, draw, or make other changes to your screenshot there. If you don’t tap on the preview, it will still be saved automatically so don’t worry about that.
n
n
nnnnnThis is shown on a phone, on a iPad it would be in the bottom left corner (Image credit: IOS Gadgets Hacks)nnnnn
Access the Screenshot in the Photos Appn
n
To view or share your screenshot later, open the Photos app on your iPad. Go to the “Recents” album or the “Screenshots” album (some may not have that). Your screenshot will be there, ready for you to view, edit, or share. You can also use the “Share” button within the Photos app to send it via email, message, or social media.
n
n
nnnnn
And you’re done! With these steps, you can easily capture and manage screenshots on your iPad. Taking a screenshot is quick & easy. Whether you’re saving an important document, or just something you want to remember. Taking a screenshot is a great way to do so.
n
nnnnnnnn
n
Other ways to screenshot on iPad
nnnn
If you wanna know more ways to screenshot on an iPad like on a keyboard for example, then the following tips are for you. I have listed 3 other ways to take a screenshot on an iPad that are worth checking out.
nnnnnnnn1. How To Take A Screenshot On iPad With A Swipe Gesture?n
nnnnn
Another and far easier way of taking screenshots on an iPad is to use something called a ”swipe gesture”, a swipe gesture is a gesture of you swiping up or down, or sideways, etc. So we can also use this gesture for taking screenshots, all you’ll need is an iPad that supports iPad OS 15 and you’re good to go! So here’s a quick and easy-to-understand list which shows you exactly how to do so:
nnnnn
Open Settings: Tap on the Settings app on your iPad.
nnnn
Tap Multitasking & Gestures: Navigate to Home Screen & Dock > Multitasking & Gestures.
nnnn
Turn on Swipe Finger from Corner: Ensure that the toggle for Allow Multiple Apps is turned on.
nnnn
Customize Corner Gestures:n
n
Tap on Left Corner Swipe or Right Corner Swipe.
nnnn
Select Screenshot from the list of options.
n
n
nnnn
Swipe from a Corner: Swipe your finger from the bottom left or bottom right corner of the screen, depending on which corner you set up for taking a screenshot.
nnnn
Screenshot Taken: A screenshot will be taken and saved to your Photos app.
nn
nnnnnnnnn2. How To Screenshot On iPad Keyboard?n
nnnnn
Now for those who have a keyboard connected to their iPad, taking a screenshot is just as easy. So if your iPad has an external keyboard and has iPad OS 13 or later, then follow this guide:
nnnnn
Connect Your Keyboard: Ensure your external keyboard is properly connected to your iPad.
nnnn
Press Shortcut Keys: Press the following keys simultaneously:n
n
Command (⌘) + Shift + 3: This will take a screenshot of the entire screen.
nnnn
Command (⌘) + Shift + 4: This will take a screenshot and immediately open it in Markup for editing.
n
n
nnnnn
So very easy to do and it should just work straight away.
n
nnnnnnnnn3. How To Take A Screenshot On Your iPad Without Pressing Buttonsn(Image credit: Tom Rolfe/TapSmartnnnn
The last method of taking a screenshot on your iPad is by using something called ”AssistiveTouch” note that you will need an iPad compatible with IOS 13 or later to do this. This is also the most complicated one to set up so far, but it could come in handy if you for whatever reason don’t like swiping or pressing 2 buttons. So here’s a quick and easy guide on how to set up AssistiveTouch to take screenshots on your iPad:
nnnnn
Enable AssistiveTouch:n
n
Open the Settings app.
nnnn
Go to Accessibility.
nnnn
Tap on Touch.
nnnn
Select AssistiveTouch and toggle it on.
n
n
nnnn
Customize AssistiveTouch:n
n
Tap on Customize Top Level Menu.
nnnn
Tap on an icon you don’t use often or tap the + button to add a new icon.
nnnn
Select Screenshot from the list of options.
n
n
nnnn
Take a Screenshot:n
n
Tap the floating AssistiveTouch button on your screen.
If you don’t see a flash or hear the shutter sound, ensure that you’re pressing both buttons simultaneously and releasing them quickly. Check that your iPad’s volume is not muted, as the shutter sound might be off. If the issue persists, restart your iPad and try again.
To take a screenshot on an iPad with a Home button, press and hold the Top button and the Home button at the same time. Quickly release both buttons. The screen will flash, and you’ll hear a shutter sound indicating that the screenshot has been taken.
To share a screenshot, open the Photos app, find the screenshot in your “Recents” or “Screenshots” album, tap on it, and then tap the “Share” icon (a square with an upward arrow). You can choose to share it via email, messages, social media, or other apps.
Have you been struggling with connecting your PS5 controller and just need a quick guide to help you? Well if so, this post is for you. I’m going to give you an easy 5 step tutorial on how to connect your PS5 controller to your PS5. And I’m also going to show you how to connect your PS5 controller to your PC. By the end of this post, you’ll know exactly how to connect your PS5 controller to your PS5 and PC.
Quick Tutorial: Connecting Your PS5 Controller to Your PS5
Power on Your PS5: Press the power button on your console.
Activate Pairing Mode: Press and hold the PS button and the Create button on your controller until the light bar starts flashing.
Connect the Controller: Use a USB cable to plug the controller into one of the USB ports on the PS5.
Complete the Pairing: Press the PS button on the controller to finish the pairing process.
Disconnect the Cable: Once connected, you can unplug the USB cable and use the controller wirelessly.
Complete Guide: Connecting Your PS5 Controller to Your PS5
If you’re still a bit lost with the quick tutorial above, then don’t worry. Here is a more detailed guide explaining every step in-depth. It will be super easy to understand for anyone and everyone.
Power on Your PS5
Locate the Power Button: Find the power button on the front of your PlayStation 5 console. It’s the small, white button near the bottom of the console’s face.
Turn on the Console: Press the power button once. You’ll see a white LED light, indicating that the PS5 is powering up. Wait until the PS5 completes its boot-up process. This should take just a minute or so, and you’ll eventually see the home screen or the PS5 dashboard.
Activate Pairing Mode on Your Controller
Prepare the Controller: Ensure your DualSense controller is charged. If not, connect it to the PS5 using a USB cable or charge it with a separate charger.
Enter Pairing Mode: On your controller, locate the PS Button. It is the circular button with the PlayStation logo. Find the Create Button. It is the button to the left of the touchpad.
Press and Hold: Press and hold both the PS Button and the Create Button simultaneously. After a few seconds, you’ll see the light bar on the controller start to flash rapidly. This flashing indicates that the controller is in pairing mode and searching for a console to connect to.
Connect the Controller to the PS5
Prepare a USB Cable: Take a USB-C to USB-A cable (the one that came with your PS5 controller or any compatible USB-C cable). The USB-C end will connect to the controller, and the USB-A end will connect to the PS5.
Plug in the Cable: Insert the USB-C end of the cable into the port on the top of the controller. Then, connect the USB-A end into one of the USB ports on the front or back of the PS5 console.
Automatic Detection: The PS5 will automatically detect the connected controller. You may see a prompt on the screen asking if you want to pair the controller. If this happens, follow the on-screen instructions to confirm pairing.
(Image credit: Youtube/the tech giant)
Complete the Pairing Process
Press the PS Button: With the USB cable still connected, press the PS Button on the controller. This action should log you into your PS5 user profile or prompt you to select a user if you have multiple profiles set up.
Confirm Connection: Once the PS5 recognizes the controller, it will cease flashing and the light bar will show a solid color, indicating a successful connection. The PS5 home screen should now be navigable using the controller.
Disconnect the Cable
Unplug the USB Cable: Once you’ve confirmed that the controller is working correctly and responding to inputs, unplug the USB cable from the PS5.
Switch to Wireless Mode: The controller will now operate wirelessly. You can use it from a distance without the cable connected, and it will maintain its connection as long as it remains within range of the console.
Get all the latest post on through the eyes of a teenager straight in your inbox.
Subscribe to stay updated, it’s free!
Complete Guide: Connecting Your PS5 Controller to Your PC
Now if you’re wondering if you can also connect your PS5 controller to your pc, then I have the answer for you: yes, and here’s a quick guide on how to do it:
Prepare Your PS5 Controller
Charge Up: Before starting, make sure your PS5 DualSense controller is fully charged. You can do this by connecting it to your PS5 or a separate charger using a USB-C cable.
Power On: Ensure the controller is turned on. Simply press the PS button (the circular button with the PlayStation logo) until the light bar illuminates. This shows that the controller is ready for connection.
Decide on Your Connection Method
Wired Connection: For a straightforward setup, use a USB-C to USB-A cable. This method is typically plug-and-play and requires no additional software.
Wireless Connection: If you prefer a wireless setup, you’ll connect via Bluetooth. Make sure your PC has Bluetooth capabilities. If not, you’ll need a Bluetooth dongle.
Connecting via USB-C Cable
Obtain the Cable: Use a USB-C to USB-A cable. Connect the USB-C end to the port on the top of the controller.
Connect to PC: Plug the USB-A end of the cable into an available USB port on your PC. Windows should automatically detect the controller. You may see a notification indicating that the device is being set up.
Verify Connection: Go to your PC’s “Devices and Printers” or “Game Controllers” settings to confirm the controller is recognized. You should see it listed as “Wireless Controller” or similar. Test the controller in a game or the Windows game controller settings to ensure it’s working.
Connecting via Bluetooth
Enable Bluetooth on Your PC: Go to “Settings” > “Devices” > “Bluetooth & other devices” and turn on Bluetooth. Make sure it’s active and in discovery mode.
Put Controller in Pairing Mode: Press and hold the PS Button and the Create Button (the button next to the touchpad) simultaneously until the light bar starts flashing rapidly. This indicates the controller is in pairing mode.
Pair the Controller: On your PC, click “Add Bluetooth or other device” and select “Bluetooth”. Wait for your PC to detect the controller, which should appear as “Wireless Controller” or a similar name. Click on it to pair. Once connected, the light bar on the controller will stop flashing and remain a steady color.
Test and Configure
Check for Updates: Ensure that your PC’s Bluetooth drivers are up to date. Sometimes, issues can arise from outdated drivers. Check for updates in the Device Manager under “Bluetooth”.
Test the Controller: Open a game or use the Windows “Game Controller Settings” (found in the Control Panel or by searching in the Start menu) to test the functionality of the controller. Make sure all buttons and joysticks are working as expected.
Adjust Settings: If needed, use third-party software like DS4Windows to further customize your controller settings, such as button mappings or sensitivity adjustments.
Troubleshooting tips
Troubleshooting tips for connecting to Your PS5:
Controller Not Pairing
Check the Battery: Make sure your controller has enough juice. If it’s low, charge it up using your PS5 or another USB-C charger.
Reset the Controller: If it’s still not pairing, use a small pin to press the reset button on the back of the controller for about 10 seconds. Then try pairing again.
Update Your PS5: Go to Settings > System > System Software > System Software Update and Settings to check if your PS5 needs an update. Sometimes, outdated software can cause pairing issues.
Controller Not Recognized
Try a Wired Connection: Plug the controller into the PS5 with a USB cable. This might help the console recognize it.
Restart the PS5: Power off your PS5 by holding the power button for about seven seconds until you hear a second beep. Turn it back on and try connecting the controller again.
Controller Not Working After Disconnecting USB
Re-sync the Controller: Press the PS button on the controller to reconnect it wirelessly after unplugging the USB cable.
Check Bluetooth Status: Make sure the PS5’s Bluetooth is working fine. A quick restart of the console can sometimes fix connectivity issues.
Troubleshooting tips for connectingto Your PC:
Controller Not Detected
Update Your Bluetooth Drivers: Head to Device Manager and make sure your Bluetooth drivers are up-to-date. Outdated drivers can sometimes prevent detection.
Try Different USB Ports: If you’re using a wired connection and it’s not working, test different USB ports on your PC. Sometimes, ports can be temperamental.
Controller Not Working Wirelessly
Enable Bluetooth: Make sure Bluetooth is turned on in your PC’s settings. Check for driver updates if it’s not working.
Re-enter Pairing Mode: Press and hold the PS and Create buttons on the controller to re-enter pairing mode, then try connecting through Bluetooth settings on your PC.
Controller Not Working in Games
Check Game Compatibility: Some games might not support the PS5 controller right away. Look into the game’s settings or documentation to confirm compatibility.
Use DS4Windows: If you’re having trouble, try using DS4Windows. This software helps your PC recognize and customize PS5 controllers more effectively.
Controller Functionality Issues
Test on Another Device: Try connecting the controller to another PS5 or PC to see if it works there. This can help identify if the issue is with the controller or the original device.
Check for Interference: If you’re using Bluetooth, make sure there are no other Bluetooth devices causing interference. Keep things simple and close to your PC.
These tips should help you troubleshoot common problems with connecting your PS5 controller. If you’re still having issues, checking out official support resources or reaching out to customer support might be your next step.
No, the PS5 controller can only connect to one device at a time. If you want to switch devices, you’ll need to disconnect the controller from the current device and pair it with the new one.
While many games and applications support the PS5 controller natively on Windows, some might require additional software for full functionality. DS4Windows is a popular choice for customizing and ensuring full compatibility.
No, the PS5 controller can only connect to one device at a time. If you want to switch devices, you’ll need to disconnect the controller from the current device and pair it with the new one.
Are you always struggling when trying finding the right TV? You probably often ask yourself: what size do I need? What resolution is enough for me? Do I need an OLED? Well no need to worry anymore because I have created a list of 5 things you need to take into account when searching for a new TV. Only when you’ve taking all these 5 things into account can you choose the right TV.
If you’re in a hurry and want to get straight into the list, then don’t worry because I have them all neatly layed out for you here:
nnnnn
Find the Perfect Size for Your Spacen
n
Picking the right TV size is crucial. Too small, and you might miss out on the full experience; too big, and it could overwhelm your room. A good rule of thumb is to sit about 1.5 to 2.5 times the TV’s diagonal size away from the screen. It’s like finding the sweet spot for the best view in the house!
n
n
nnnn
Get with the Times—Go 4Kn
n
For sharp and detailed pictures, go for a 4K TV. It’s a step up from older HD models and makes everything look clearer and more vibrant. As more content is available in 4K, it’s a smart choice for getting the most out of your movies and shows.
n
n
nnnn
Choose the Right Screen Type for Your Viewn
n
Different screens give different looks. OLED TVs offer amazing contrast and rich colors, while QLEDs shine bright and vivid. If you want top-notch picture quality, OLED is like the luxury pick, while QLED is great for vibrant visuals.
n
n
nnnn
Look for HDR—It Makes a Differencen
n
HDR, or High Dynamic Range, improves how colors and contrast look on your screen. It makes bright areas brighter and dark areas darker, adding more depth to your viewing. TVs with HDR support can make your favorite movies and shows look even better.
n
n
nnnn
Know What to Expect in Terms of Pricen
n
When buying a TV, expect to invest a bit more for better quality. A decent 4K TV usually starts around $400 to $600, while higher-end models with OLED screens or advanced HDR features can cost $1,000 or more. Spending a bit extra can get you superior picture quality, more features, and a longer-lasting TV.
n
n
nnnnnnnnn
n
Find the Perfect Size for Your Space
nnnn
When it comes to picking the right TV size, it’s all about balancing your space and your budget. Whether you’re considering a basic model or something high-end like an OLED TV, screen size plays a huge role. Some things to think about when choosing your screen size are: how many people typically watch TV with you? And where you’ll be placing your new TV? You can also check out the differences between screen sizes here. You should always try and choose the largest screen that fits comfortably in your room without breaking the bank. For most living rooms, a good size could be anywhere between 55 and 75 inches—big enough to make an impact but still practical.
nnnn
Screen size also depends on how close you sit to the TV. If you can see individual pixels, you’re too close. A good rule of thumb is to sit about three times the height of the screen away from it for HD TVs, and just 1.5 times the height for 4K Ultra HD TVs. This means you can sit much closer to a 4K UHD TV without losing picture quality. Although this isn’t recommended as it can cause quite some eyestrain, read more here.
nnnn
At the end of the day, your TV size should enhance your viewing experience without taking up to much space. So, if you’re in a cozy apartment or small room, a 55-inch TV might be perfect. But if you’ve got a bigger room and love a cinematic feel, going up to 75 inches can make your movie nights a step above. It’s all about finding a balance between size, space, and your viewing habits.
nnnn
nnnnn
Get all the latest post on through the eyes of a teenager straight in your inbox.
nnnn
Subscribe to stay updated, it’s free!
nnn
nnnn
To summarize: Choose a screen size and resolution that suits the distance you’ll be sitting from the TV. For most setups, starting around 65 inches is a solid choice, unless you’re in a smaller space like an apartment or dorm.
nnnn
n
32 inch
43 inch
50 inch
55 inch
65 inch
n
n
nnnnnnnn
n
Get with the Times—Go 4K
nnnn
If you’re looking for a sharp, detailed picture that really pops, a 4K TV is your best option Compared to older HD models, 4K TVs offer a significant upgrade with four times the resolution. This means everything you watch will be clearer, crisper, and way more vibrant. The extra pixels for shure make a noticeable difference, especially when it comes to fine details like the texture of fabrics. It’s not just about having a bigger screen; it’s also about enjoying a more immersive and visually stunning experience.
nnnn
The benefits of 4K become even bigger as more content becomes available in this higher resolution. Streaming services like Netflix, Amazon Prime, and Disney+ are offering more and more movies and shows in 4K, so investing in a 4K TV ensures you’re ready to take full advantage of this content. As 4K technology becomes more well-known, you’ll find that more and more new releases and popular series are made in this format, giving you richer visuals and a more engaging viewing experience.
nnnn
All-in-all, a 4K TV is a great choice for future proofing and just in general as a lot of streaming platforms already offer loads of 4K content. As technology becomes better, having a 4K TV means you’re ready for upcoming content and improvements. It’s not just about what content there is today but also about being prepared for the new releases and tech innovations that will keep coming out. This makes a 4K TV a great investment if you want to stay ahead of the curve and enjoy high-quality visuals for years to come.
nnnn
In summary: if you’re looking to upgrade your TV and make the most out of your movie nights, a 4K TV is definitely worth considering. It provides a very clear and vibrant picture that enhances every viewing experience. With more content becoming available in 4K these days and the technology continuing to become better and better, it’s a choice that will keep your entertainment setup looking fresh and impressive for years to come.
nnnnn
nnnnnnnn
n
Choose the Right Screen Type for Your View
nnnn
When it comes to TV screens, each type offers its own unique visual experience. OLED TVs are known for their stunning contrast and vibrant colors. With OLED technology, each individual pixel lights up on it’s own, allowing for deeper blacks because the pixels can turn themselves on and off and brighter colors that truly pop. This means you get exceptional picture quality with loads of detail, making OLED the go-to choice if you like luxury and top-notch visuals. The contrast is so vivid that it makes everything feel more immersive and cinematic, perfect for those who love rich colors and sharp details.
nnnn
On the other side, QLED TVs are known for their brightness and vivid color reproduction. QLED stands for Quantum Dot LED, and these TVs use tiny quantum dots to enhance brightness and color accuracy. If you love a TV that can fill your room with some amazing colors and handle well-lit environments, QLED is a good choice. The bright, vivid display makes QLED TVs stand out, especially if you’re watching in a bright room or during the day.
nnnn
Choosing between OLED and QLED often comes down to what you value most in your TV experience. If you want the best picture quality possible with amazing contrast and color richness, OLED is the more luxurious option. It’s ideal for movie fans and gamers who want every detail to be crystal clear and every color to be as rich as possible. On the other hand, if you prefer vibrant visuals and a TV that performs better in brighter settings, QLED offers fantastic brightness and color accuracy.
nnnn
In the end: both OLED and QLED have their strengths, and the right choice depends on your viewing preferences and environment. Whether you go with the deep blacks and rich colors of OLED or the bright, vivid display of QLED, you’re sure to enjoy a great viewing experience that suits your style and needs.
nnnn(Image credit: New York Times)n
nnnnnnnn
n
Look for HDR—It Makes a Difference
nnnn
HDR, or High Dynamic Range, is a game-changer when it comes to picture quality. It enhances how colors and contrast appear on your screen, making your viewing experience pop with more depth and detail. HDR works by boosting the brightness of the brightest parts of the image and deepening the blacks, which helps create a more dynamic and immersive picture. This means you get to see every shade and nuance, whether it’s the glint of sunlight on a water surface or the subtle shadows in a dark scene. Learn more about HDR here.
nnnn
One of the biggest benefits of HDR is its ability to make your favorite movies and shows look even better. When a TV supports HDR, it means you’re getting the best possible version of your content, with richer colors and more contrasts. It brings out details that you wouldn’t see on standard displays, making scenes look more realistic and engaging. Whether you’re watching a vibrant animated movie or a dark, dramatic thriller, HDR ensures that every detail is the best it can be.
nnnn
HDR is also becoming more common in streaming services and Blu-ray discs, so having a TV with HDR support means you’re set to enjoy the latest content at its best. As more and more new releases and streaming options support HDR, it’s a feature that will continue to enhance your viewing experience. It’s all about making sure you see your favourite content the way it was meant to be seen—bright, detailed, and full of depth.
nnnn
In summary: HDR is a fantastic feature for anyone looking to up their TV experience. It takes your screen’s colors and contrasts to the next level, adding depth and making every scene look more vivid and engaging. If you want to get the most out of your movies and shows, a TV with HDR support is definitely worth considering.
nnnn(Image credit: Samsung)n
nnnnnnnn
n
Know What to Expect in Terms of Price
nnnn
When it comes to buying a TV, it’s important to note that investing a little more can lead to far better quality. If you’re looking for a decent 4K TV, you’ll typically be starting around $400 to $600. This price range usually offers solid performance and a good balance of features. However, if you’re aiming for the best picture quality and advanced features, you might want to consider spending a bit more. High-end models, especially those with OLED screens and/or advanced HDR capabilities, can cost you about a $1,000 or more.
nnnn
While the higher price tag might seem brutal, it often translates into way better picture quality, enhanced features, and a TV that will last longer. OLED TVs, for example, are known for their incredible contrast and color accuracy, while advanced HDR adds depth and vibrancy to your visuals. Investing in these premium options means you’re not just getting a TV but a more immersive viewing experience that can change the way you watch movies and shows.
nnnn
Think of it this way: spending a bit extra on your TV can be like upgrading from a standard ride to a luxury car. The enhanced picture quality, better color accuracy, and longer lifespan are all part of what makes the investment worth it. If you’re passionate about having the best possible viewing experience and want a TV that stands out, it’s worth considering the more higher-end models.
nnnn
In summary: while a decent 4K TV can be found for an okay price, opting for a higher-end model can offer you superior picture quality and additional features. Whether you’re after vibrant colors, deep blacks, or advanced HDR, spending a little more ensures you’re investing in a TV that delivers an exceptional viewing experience and will give you enjoyment for years to come.
nnnn(Image credit: WBUR)n
nnnnnnnn
n
Conclusion
nnnn
Choosing the right TV can feel overwhelming with so many options and features to consider. Whether you’re thinking about the sleek, high-quality visuals of an OLED TV or the bright, vibrant display of a QLED, understanding what each technology offers helps you make a more informed decision. For those who value sharp, detailed images and deeper colors, investing in a 4K TV with HDR can elevate your viewing experience to a whole new level. HDR enhances contrast and color depth, making every scene look more immersive and engaging, while 4K ensures that even the smallest details are crystal clear.
nnnn
When it comes to size, finding the right fit for your space is super important. Bigger isn’t always better, especially if you’re not accounting for the viewing distance and room size. Aim for a screen size that complements your space and offers a comfortable viewing experience. Remember, sitting at the right distance from your TV helps you get the most out of its resolution, whether you’re choosing an HD or 4K model. And if you’re considering a higher-end TV, like those with OLED screens or advanced HDR features, a bit of extra investment can mean better picture quality and a longer-lasting TV.
nnnn
In the end, your choice will come down to your preferences, budget, and the features that matter most to you. Whether you’re looking for a vibrant display, advanced features, or just a reliable, straightforward TV, there’s probably an option out there that fits your needs. By understanding the strengths & weaknesses of different technologies and considering factors like screen size and price, you can find the perfect TV that enhances your viewing experience and fits seamlessly into your home.
The refresh rate of a TV, measured in Hertz (Hz), determines how often the image on the screen is updated per second. A higher refresh rate, such as 120Hz, can result in smoother motion and reduced blur, which is especially beneficial for fast-paced content like sports and video games. If you watch a lot of action-packed content or play games, a higher refresh rate can enhance your viewing experience.
Knowing the difference between HDR10, Dolby Vision, and HLG can help you pick a TV that offers the best picture quality for your content. Dolby Vision provides dynamic adjustments for each scene, while HDR10 is a more common standard.
Understanding how a TV performs from various angles can help you choose a model that looks good no matter where you sit. OLED TVs typically offer better viewing angles compared to LCDs.
Google TV & Roku have both been out for quite some time now, but which is the best in 2024? Well that’s what I’m going to discuss in this post, aswell as some other things you should take into account when choosing between Google TV & Roku.
Google TV vs Roku Quick Summary:
Google TV stands out for its personalized experience and sleek interface. It integrates well with Google’s ecosystem, offering features like the “Top picks for you” rail and good compatibility with Google Assistant. Google TV also has more apps available and fewer annoying ads compared to Roku.
Roku has been the favorite for a long time now, mainly for its simplicity and cost-effectiveness. However, it’s increasingly flooded with ads that can clutter the interface. While Roku’s straightforward design is easy to use, it lacks the advanced features and cool customization options that Google TV provides.
Overall, if you prefer a more modern interface with more app support and fewer ads, Google TV is the better option. On the other side, Roku is a solid choice if you prioritize affordability and a straightforward simple user experience.
When it comes to choosing between Google TV and Roku, it’s all about what you think is the most important in your smart TV experience. Both platforms are big in the TV interface market, but both have their different needs and preferences. Google TV, which launched with the Chromecast in 2020, has quickly gained traction for its sleek, simple, user-friendly interface and strong integration with the Google ecosystem. This means you can enjoy features like the “Top picks for you” rail, which suggests content based on what you’ve watched, and seamless compatibility with Google Assistant for voice control and smart home integration. If you’re already in the Google ecosystem, Google TV is a great pick because it seamlessely integrates with your other Google products. Google TV also makes it really easy to find and navigate your favorite shows and apps.
Roku, on the other hand, has built a reputation for its simplicity and affordability. With devices such as the Roku Streaming Stick 4K, Roku offers a straightforward platform that’s easy to use and access. Its interface is designed for users who prefer a easy, uncomplicated experience. However, recent trends have seen Roku’s interface becoming more and more cluttered with ads. These ads, which appear mostly on the home screen, can take away from the user experience and make the interface feel less smooth than it once was. While Roku’s simplicity remains a strength, the growing presence of these ads is a significant downside for many users.
“Google TV provides a more refined and personalized experience with fewer ads and a broader app selection, while Roku’s simplicity and affordability are overshadowed by its increasingly ad-heavy interface.”
Through The Eyes Of A Teenager
Roku, on the other hand, has built a reputation for its simplicity and affordability. With devices such as the Roku Streaming Stick 4K, Roku offers a straightforward platform that’s easy to use and access. Its interface is designed for users who prefer a easy, uncomplicated experience. However, recent trends have seen Roku’s interface becoming more and more cluttered with ads. These ads, which appear mostly on the home screen, can take away from the user experience and make the interface feel less smooth than it once was. While Roku’s simplicity remains a strength, the growing presence of these ads is a significant downside for many users.
Another big difference is the app availability and customization. Google TV stands out for its large app library, ensuring that you have access to almost every major streaming service, including some that are missing from Roku’s store, like Twitch for example which left Roku in 2017. This wide selection is complemented by Google TV’s adaptive interface, which learns your preferences and suggests content similar to your interests. In contrast, Roku’s app selection, while still broad, is not as comprehensive, and its interface offers limited customization options. This can make Google TV a more appealing choice for those who want a more personalized and dynamic content discovery experience.
Despite its advantages, Google TV isn’t without its downsides. For example, it may require a bit more familiarity with Google’s ecosystem to fully make us of all its features. However, if you’re someone who values a modern, interactive TV experience with minimal ad interference and extensive content options, Google TV generally offers more value in terms of functionality and personalization. On the other side, Roku’s straightforward approach and more budget options make it a solid choice if you’re looking for simplicity and ease of use without all the cool customization & other stuff that Google offers.
Get all the latest post on through the eyes of a teenager straight in your inbox.
Subscribe to stay updated, it’s free!
At the end of the day, the decision between Google TV and Roku comes down to your personal preferences and needs. If you prioritize a good feature set, smart home integration, and a more customized viewing experience, Google TV is likely the better fit. However, if affordability and a simple, reliable interface are more important to you, Roku is a strong contender. Both platforms have their advantages & disadvantages, so think about what matters most to you before choosing.
(Image credit: Roku)
Google TV vs. Roku: Which Wins?
So, when it comes to picking between Google TV and Roku, it really comes down to what you’re looking for in your TV experience. Google TV is like the Sony A80L OLED of smart TV platforms—sleek, packed with features, and offering a top-notch experience. It’s got that polished interface, good Google integration, and features like the “Top picks for you” rail that’s very handy for discovering new content. Plus, if you like the idea of smart home setups, Google TV’s compatibility with Google Assistant makes it an easy choice.
Now, Roku is kind of like a reliable old friend who’s always there for you but might have a few quirks. It’s affordable and straightforward, which is great if you’re not looking for anything too crazy. However, Roku’s ad-heavy interface can make it seem a bit outdated. The constant ads get in the way of adding new tech and features, while Google TV’s sleek, ad-free setup keeps things fresh and modern. That’s why Google TV often feels like the more advanced choice.
Google TV also has the edge when it comes to app availability and customization. It offers a wider range of apps and a more personalized experience, making it easier to find content that rocks your boat. Roku’s app selection is decent but not as wide, and its customization options are pretty limited compared to Google TV’s customization.
In the end, your choice between Google TV and Roku will depend on what matters most to you. If you’re into a modern, interactive experience with minimal ad interruptions and lots of personalization, Google TV is the best option for you. But if you’re after something simple and more budget-friendly, Roku is still a great option. Just choose what works best for how you watch, and you’ll find the right fit for your setup.
Yes, both Google TV and Roku are compatible with a wide range of TV brands. Google TV is available on many TVs from brands like Sony, Hisense, and TCL, while Roku can be found on TVs from brands such as TCL, Hisense, and Sharp, among others. Additionally, Roku devices can be added to any TV with an HDMI port.
Both Google TV and Roku support high-definition streaming, including 4K and HDR content. However, the streaming quality largely depends on the TV model and the content source rather than the platform itself. Both platforms aim to provide excellent streaming quality, but specific features like HDR support might vary depending on the TV and device.
Google TV remotes typically come with built-in Google Assistant voice control, which can be very handy for searching and navigating. They often include dedicated buttons for popular streaming services. Roku remotes are known for their simplicity and ease of use, with some models featuring voice search and programmable shortcut buttons. The choice here depends on whether you prefer a more feature-rich remote or a straightforward one.
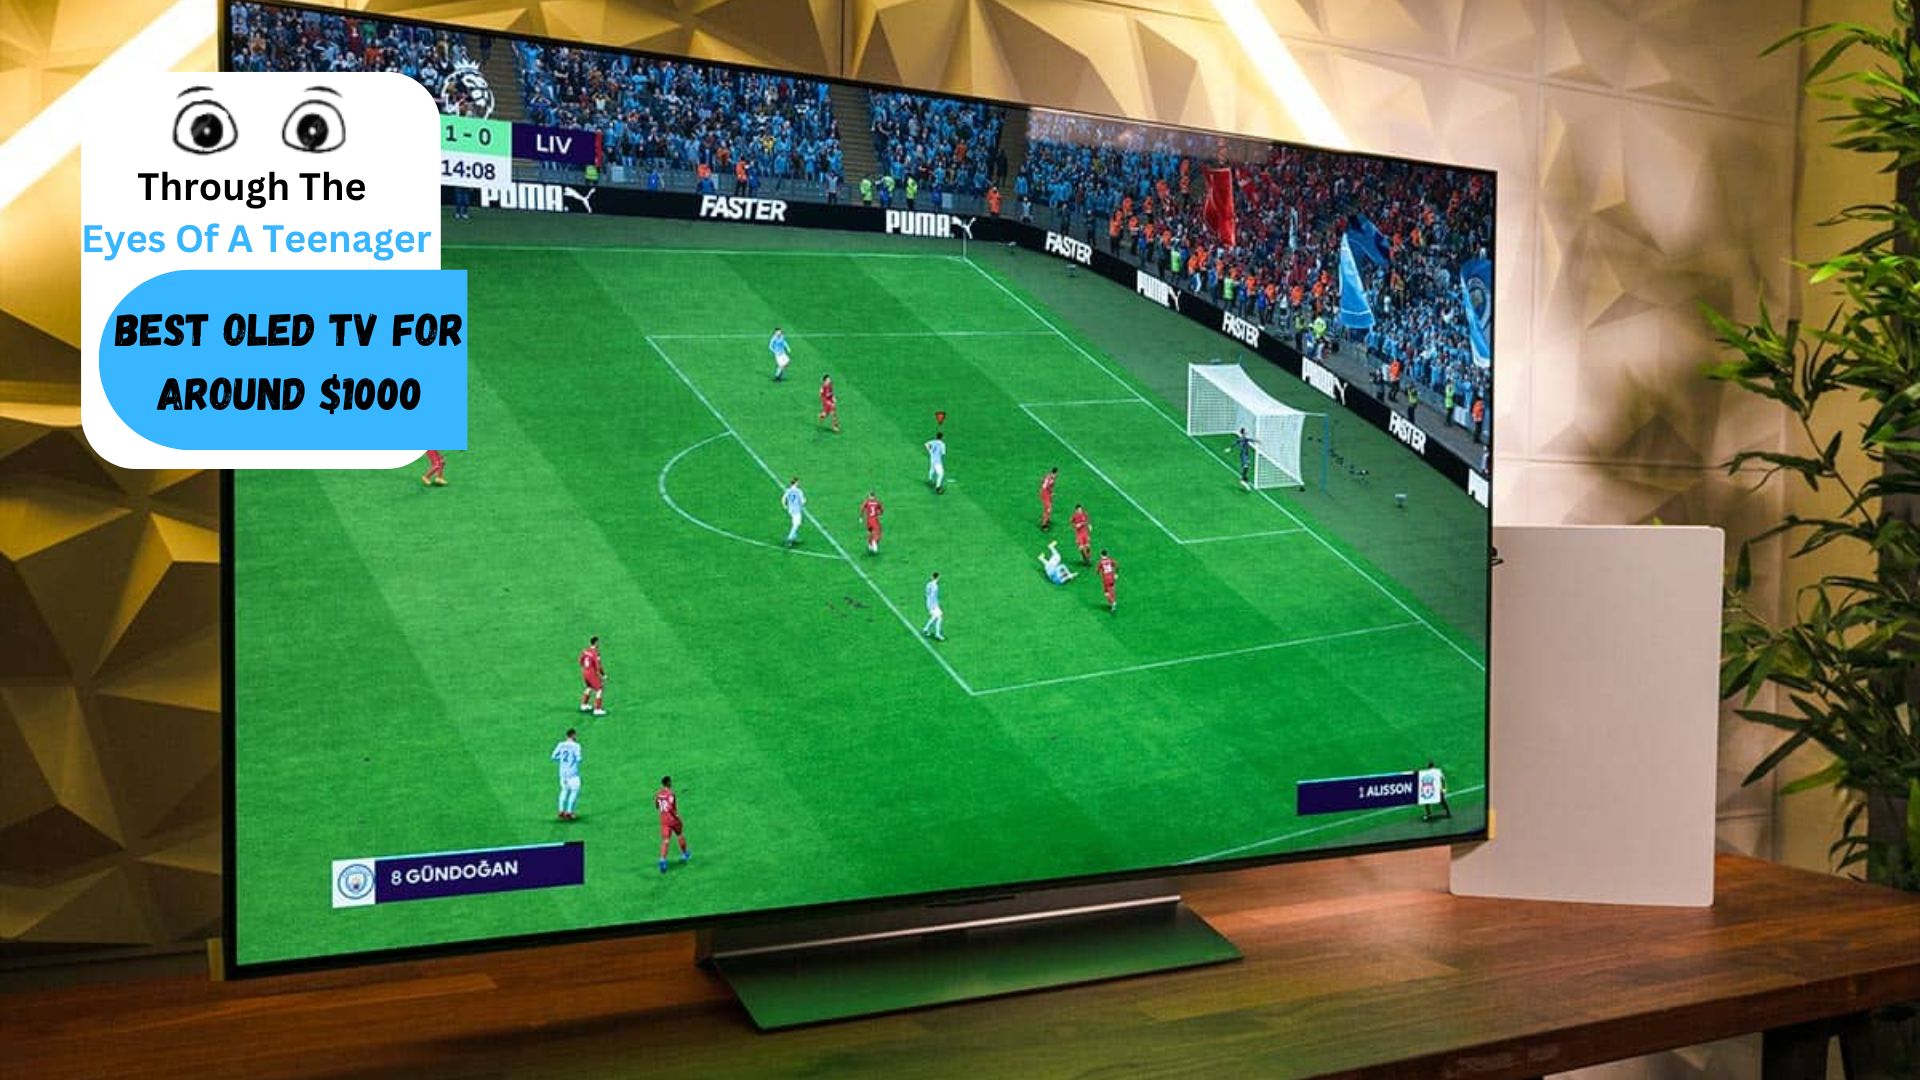
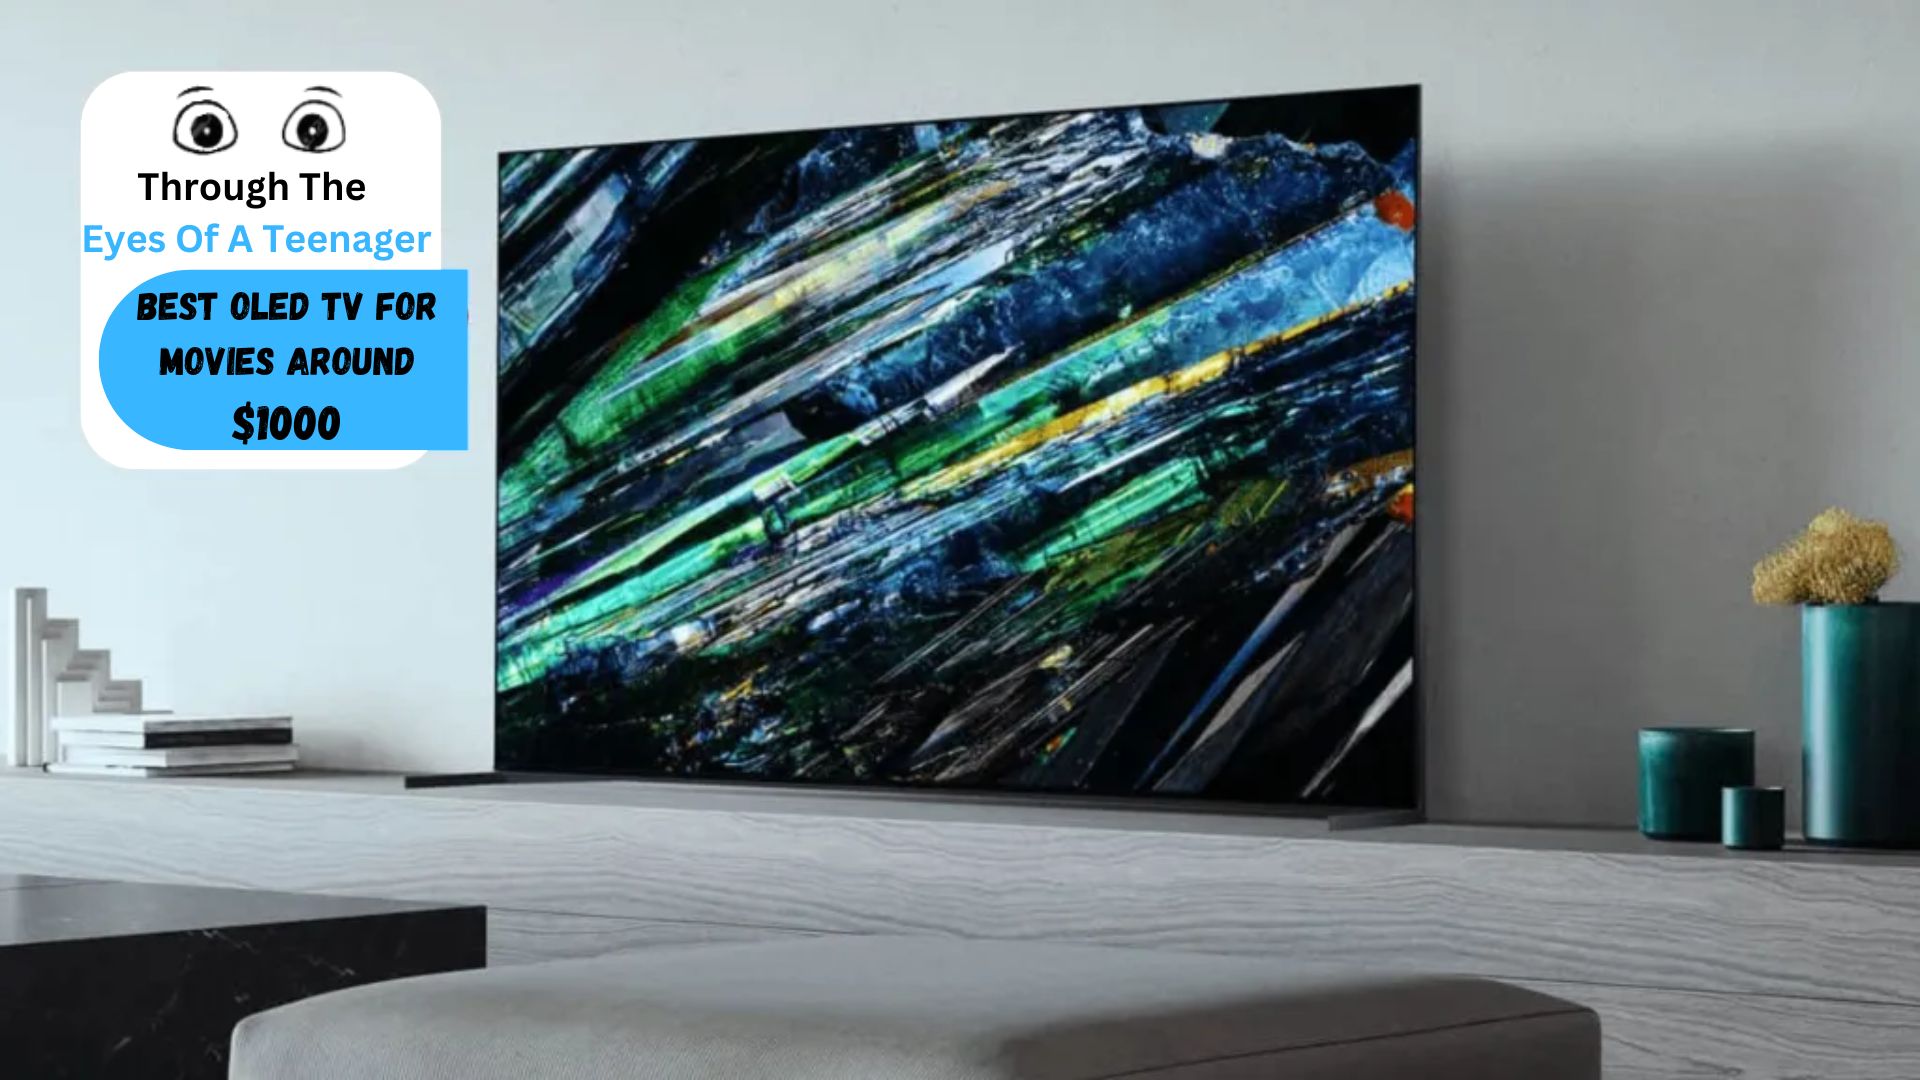
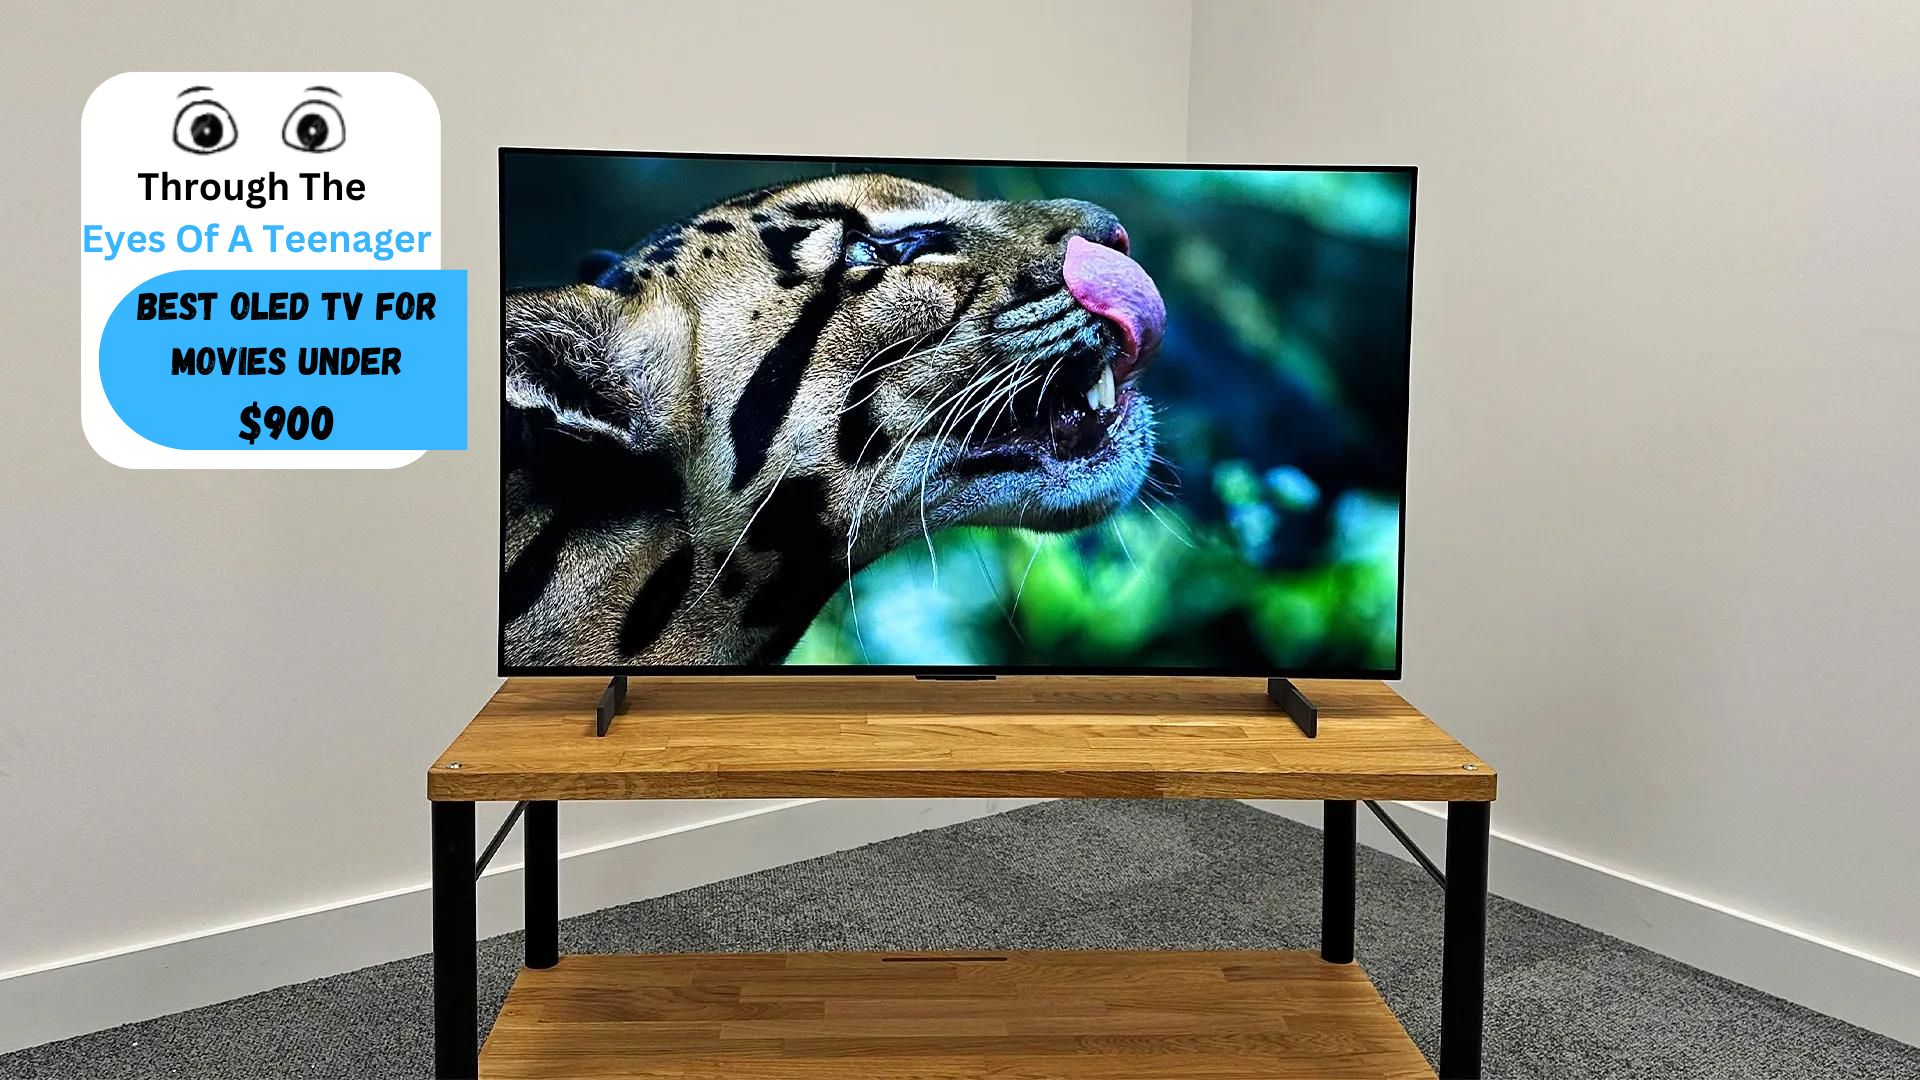
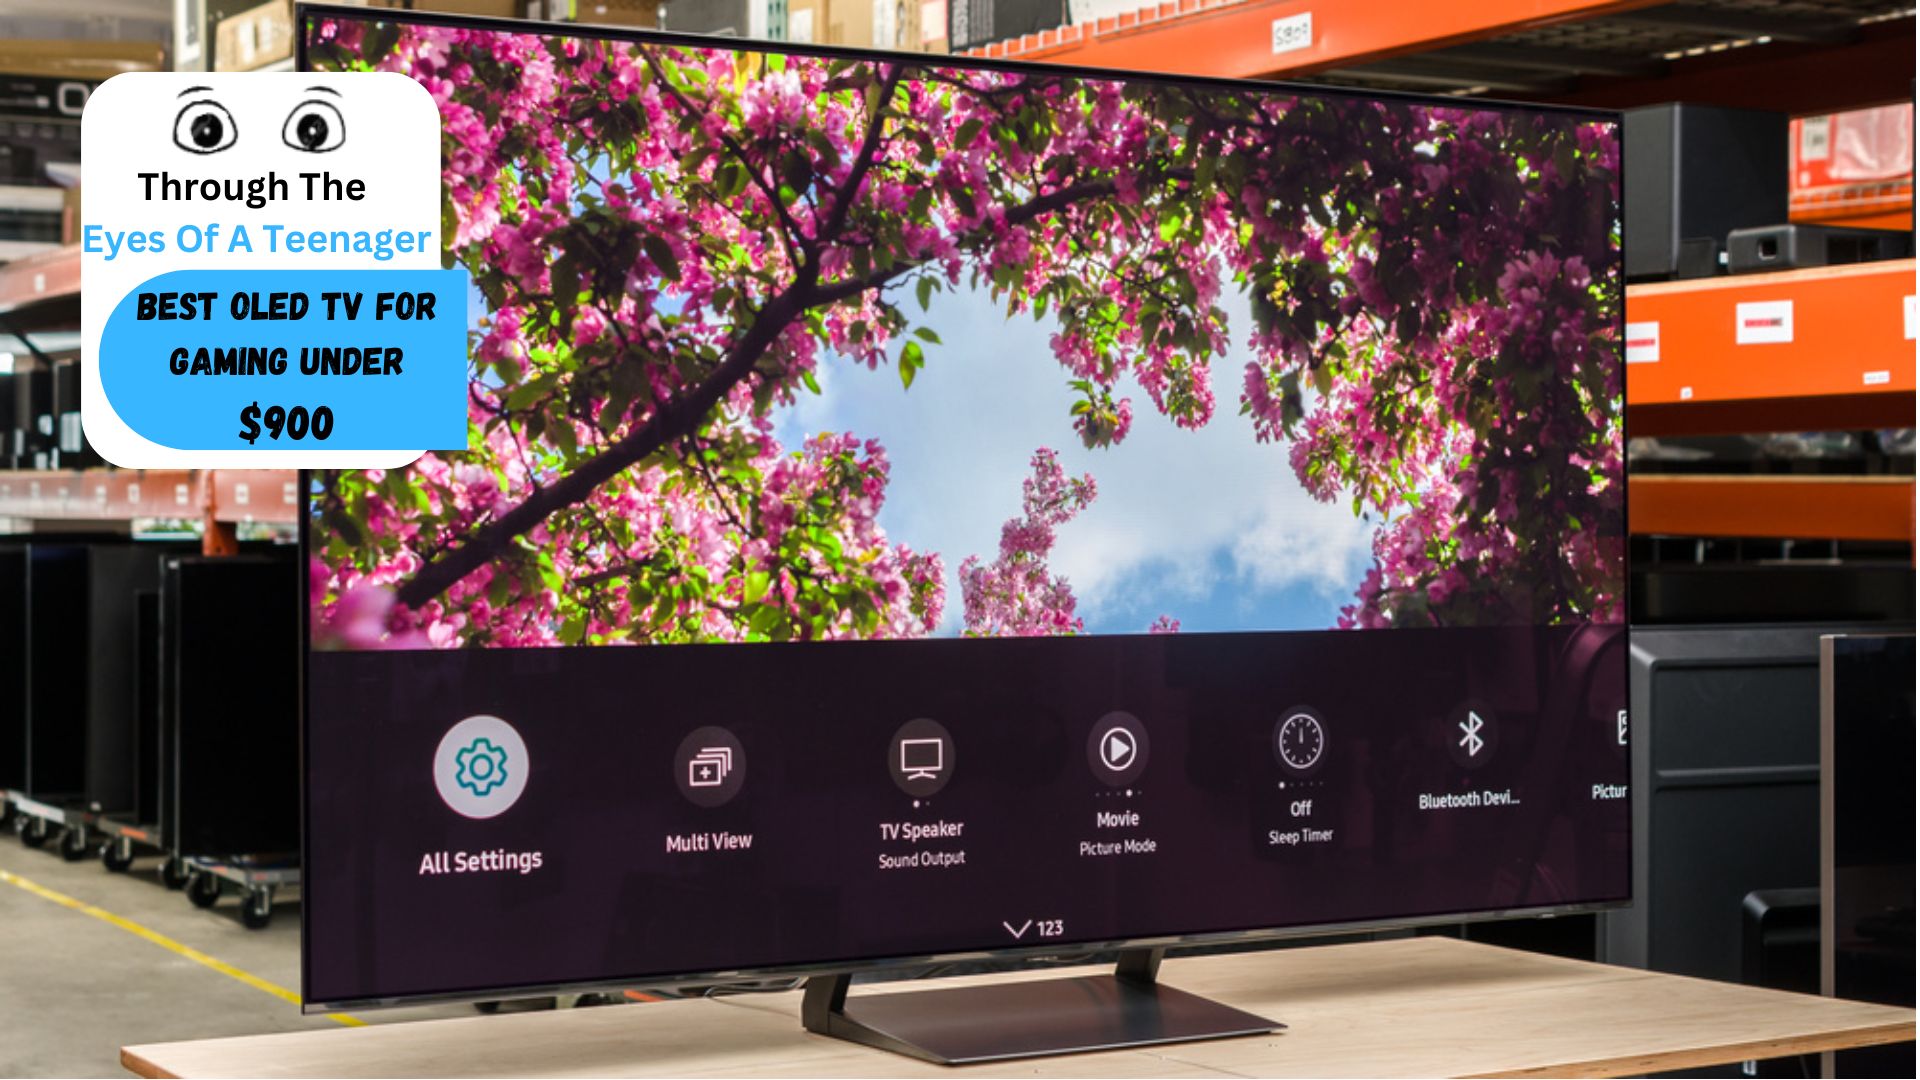
Whether you’re a gamer or a film lover, a good tv is essential to be able to enjoy these things in full quality. So that’s why I’ve compiled a list of the top 5 best OLED TV’s in 2024 – all for under $1000! I’ve chosen to write about OLED TV’s because they are so highly praised for their deep blacks and vivid colors, something that every teen would want. After you’re set up with all of last month’s cool tech for teenagers,
Whether you’re a gamer or a film lover, a good tv is essential to be able to enjoy these things in full quality. So that’s why I’ve compiled a list of the top 5 best OLED TV’s in 2024 – all for under $1000! I’ve chosen to write about OLED TV’s because they are so highly praised for their deep blacks and vivid colors, something that every teen would want. After you’re set up with all of last month’s cool tech for teenagers,
you can get ready for this month’s cool tech for teenagers OLED TV edition. This list will feature the latest best OLED TV’s for if you’re on a budget, like the Sony A80 OLED or even cheaper options like the LG C3 OLED EVO. So if you’re looking for a nice and affordable OLED TV and don’t want to get overwhelmed with difficult words and complex stuff (like I was), then you’ve come to the right place!
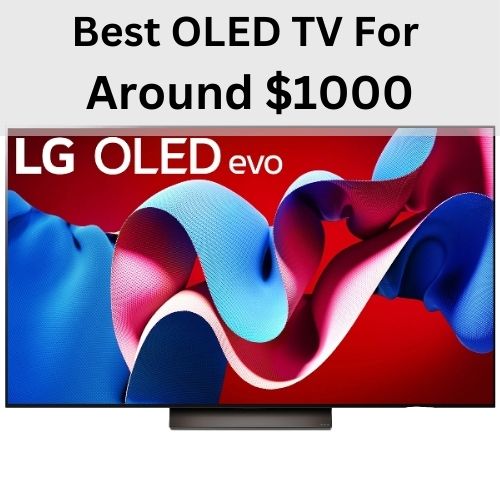
Best OLED TV’s For Around $1000
Why you can trust me✅
I spent hours researching, analysing and evaluating each product before mentioning them. Learn more about through the eyes of a teenager
here.
The LG C4 OLED EVO is a standout with vibrant colors, a 144 Hz refresh rate, and solid Dolby Atmos audio, but with only minor upgrades over the C3. The cheaper C3 is a great alternative if you don’t need the extra features. Read more.
The Sony A80L OLED TV, priced around $1000, delivers exceptional visuals with deep blacks and vibrant colors, improved image processing, and a new game menu, making it a top choice if it fits your budget. Read more.
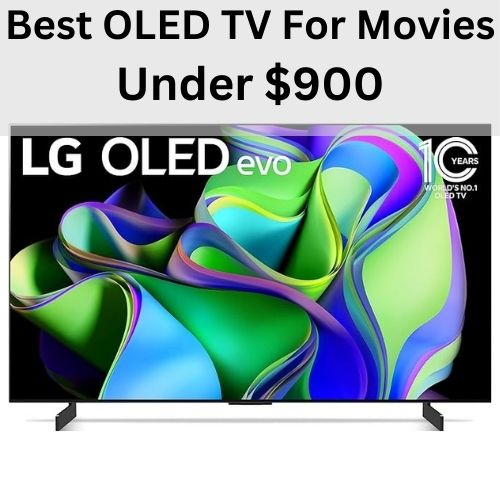
The LG C3 OLED EVO, for around $900, offers vibrant colors, deep blacks, and Dolby Vision for excellent movie quality, but it has a lower peak brightness and uses WebOS, which can sometimes be ad-heavy. Read more.
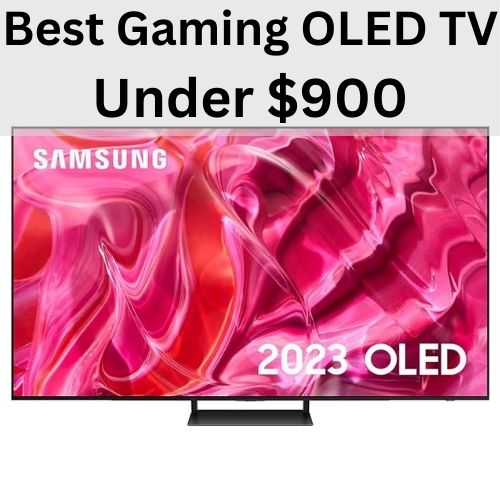
The Samsung S90C is the best gaming OLED TV with a 144 Hz refresh rate, low 5.1 ms input lag, and bright 1100-nit display, but its sound is weak without a Q-symphony soundbar, and the Tizen OS can be ad-heavy. Read more.
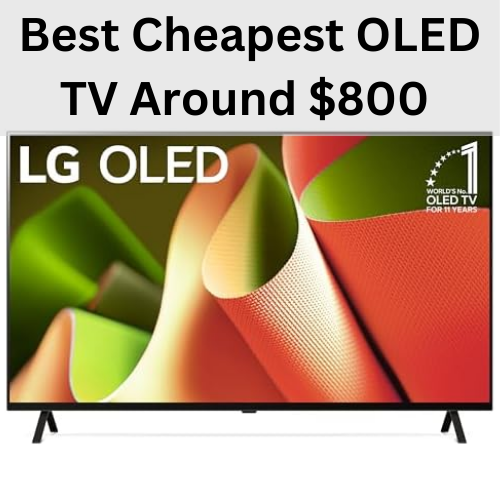
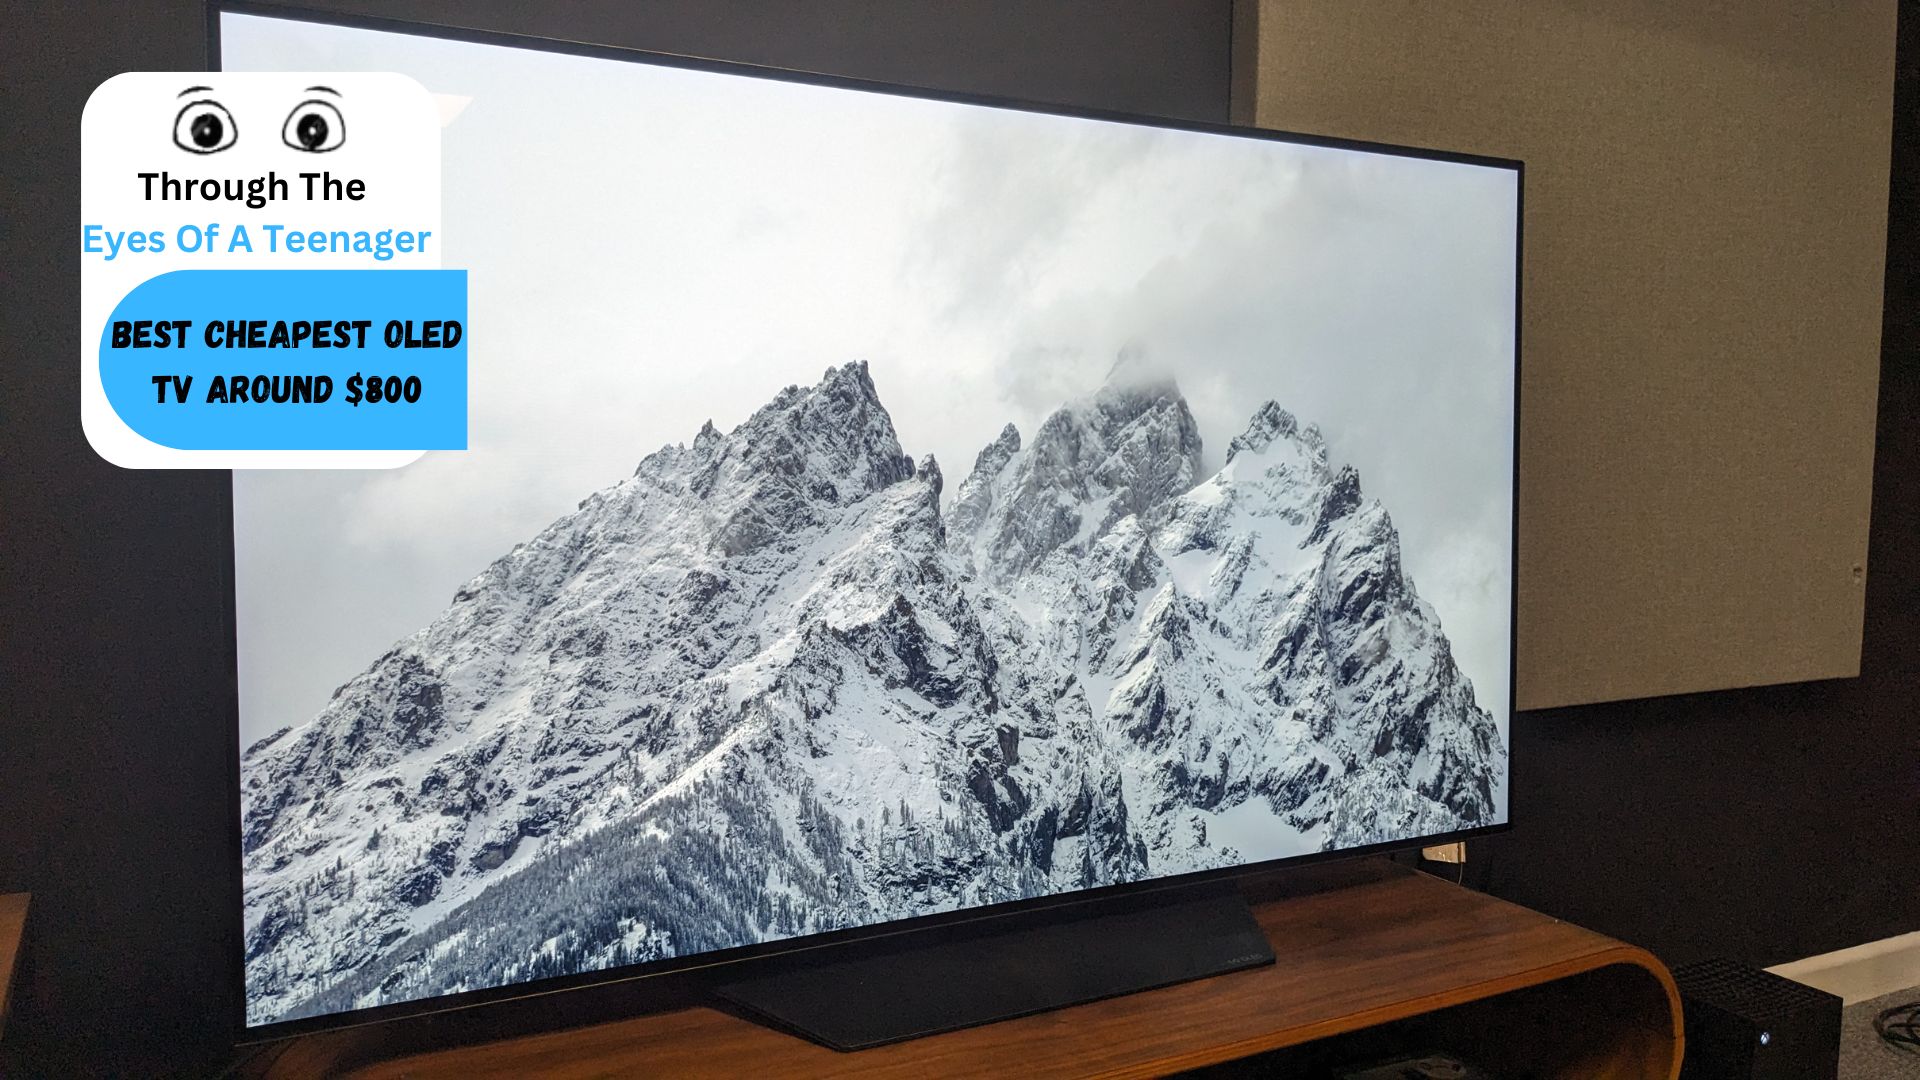
The LG B4 OLED TV is a great budget pick at $800, offering WebOS 24, Dolby Vision, solid brightness, 120Hz support on all HDMI ports, and decent audio, though it has thick bezels and not the best viewing angles. Read more.
The LG C4 OLED EVO is a standout with vibrant colors, a 144 Hz refresh rate, and solid Dolby Atmos audio, but with only minor upgrades over the C3, the cheaper C3 is a great alternative if you don’t need the extra features. Read more.
The Sony A80L OLED TV, priced around $1000, delivers exceptional visuals with deep blacks and vibrant colors, improved image processing, and a new game menu, making it a top choice if it fits your budget. Read more.
The LG C3 OLED EVO, around $900, offers vibrant colors, deep blacks, and Dolby Vision for excellent movie quality, but it has a lower peak brightness and uses WebOS, which can sometimes be ad-heavy. Read more.
The Samsung S90C is the best gaming OLED TV with a 144 Hz refresh rate, low 5.1 ms input lag, and bright 1100-nit display, but its sound is weak without a Q-symphony soundbar, and the Tizen OS can be ad-heavy. Read more.
The LG B4 OLED TV is a great budget pick at $800, offering WebOS 24, Dolby Vision, solid brightness, 120Hz support on all HDMI ports, and decent audio, though it has thick bezels and not the best viewing angles. Read more.
I would consider the LG C4 OLED EVO to be the best on this list, it has super vibrant colors, pretty good brightness, and a 144 Hz refresh rate for PC gamers. This and other reasons make it such a good all-round TV, and it’s only $1200 right now, which is quite a bit cheaper than it usually is. There is also one on Amazon here if you’re interested. It’s still not cheap, but if you’re looking for a good OLED I think this is the best for around $1000. There’s also a 42 inch version which is even cheaper, but if you’re using this as an actual TV then I would recommend paying a bit more for the 48 inch version.
Let’s start with audio because it doesn’t disappoint. It’s definitely better than the C3 model, with more spacious sound and bass. It has a 2.2-channel speaker system with 40 watts of power and supports Dolby Atmos and DTS:X for an immersive audio experience. Its AI Sound Pro mode enhances soundtracks. Pairing the C4 with a compatible LG soundbar unlocks advanced features like Wow Orchestra, which blends TV and soundbar audio for a richer sound, and Wow Cast, which streams full-quality Dolby Atmos wirelessly. While the built-in speakers deliver clear dialogue and spacious sound, especially with AI Sound Pro, they do lack in bass and dynamic range at higher volumes, so adding a soundbar is recommended for the best experience. For people who love music, the C4 offers a unique feature: playing Dolby Atmos tracks from Apple Music, a feature that’s only on LG TV’s.
However, overall the improvements over the LG C3 are pretty small so if you’re looking for a more budget friendly option then the LG C3 might be a better option for you. The only real differences between the LG C4 and last year’s LG C3 are: a differently textured back, new WebOS 24 (but the LG C3 will also get this in 2025), higher brightness, bit better motion handling and support for 144 Hz refresh rate. So overall not a lot of real differences between the C3 and the C4. I would only really recommend buying the C4 over the C3 if you were planning on hooking it up to your PC and needed a higher refresh rate, wanted a bit more brightness or if you just wanted the better of the two, up to you.
The LG C4 OLED EVO is in my opinion the best choice on this list with its vibrant colors, impressive brightness, and a 144 Hz refresh rate that’s perfect for PC gamers, especially with the current Walmart sale bringing it down to $1200. It also comes in a 42-inch version, but the 48-inch model is a better pick if you’re going to use it like an actual TV and not a monitor. The C4’s 2.2-channel speaker system, with Dolby Atmos and DTS:X support, has some great sound, and its AI Sound Pro mode enhances audio. In combination with an LG soundbar you unlock some advanced features like Wow Orchestra and Wow Cast for richer sound and Dolby Atmos streaming. However, the C4’s improvements over the C3 are minor—better texture, higher brightness, and the 144 Hz refresh rate—but if you don’t need these upgrades, the C3 is a more budget-friendly option.
– Solid all-round TV. – Pretty good audio + acoustic center sync, if you’re using a Sony soundbar. – Good for gaming with additional PS5 settings. – Really slim. – Dolby Vision. – Uses Google TV.
– Can be between $1000 and $1500 depending on the size. – Not that big of an upgrade compared to last year’s A80K. – Most expensive on this list. – Not super bright.
So let’s start with probably one of my favorites on this list, which is the Sony A80L OLED TV. Now this is also the most expensive on this list, coming in at around $1000, but in my opinion it’s still very much worth it. The Sony A80L OLED offers some good value with its deep blacks, vibrant colors, and overall just an amazing experience. Whether you’re planning to watch some movies or play some of your favorite games, this TV can do it with style. Since this TV is made by the same company that made the PS5 (Sony), it works great in combination with it giving you some added benefits like automatically activating HDR tone-mapping for games and a new game-menu you can open by pressing the menu button on your remote whilst connected to the PlayStation.
The Sony A80L OLED is Sony’s latest addition to the A80 series, however it’s not that much different compared to last year’s A80K. But I don’t think it really needed to be or could be much better since that TV was also amazing. The few things that are different on this year’s A80L are: a slimmer stand, an eco dashboard, a new game menu and some improvements to the XR cognitive processor. The biggest improvement to the XR cognitive processor is the addition of XR clear image, which is a fancy way of saying that they’re up-scaling lower image resolutions to 4K resolution. This new XR cognitive processor does improve the textures and skin tone of people, but compared to last year it’s only slightly better. One downside, however, is that it isn’t the brightest TV, as it can only go op to ~600 nits, which isn’t much compared to the other TV’s on this list.
Now as I mentioned, the Sony A80L also has a new game menu this year, catching up to Samsung and LG. Giving you access to some additional features when you’ve plugged in your PlayStation. As of now, the game menu offers six features consisting of: quick access to all the important gaming settings like VRR, motion blur reduction, and a black equalizer. You’re also able to activate a custom crosshair, which you can also customize in the game menu. The game menu offers six different types of crosshairs, all a bit different in size or color. The Sony A80L also uses Google TV, which is in my opinion the best TV operating software as it’s easy to navigate and there aren’t many ads. Not to mention that the audio is also really good, this is mainly due to what Sony call ”Acoustic Surface Audio+”, which is a system that uses actuators and woofers to gently vibrate the screen and create sound that comes from the screen itself.
So overall a great TV for around $1000, however note that the prices do fluctuate and it could also be more or less depending on the time and where you live. But if you’ve got the budget for it, it’s a great option for the price offering good quality images and overall a great all-round experience.
Best OLED TV For Movies Under $900 – LG C3 OLED EVO
Best OLED TV For Movies Under $900 – LG C3 OLED EVO
– Solid TV for watching movies. – Has Dolby Vision. – Only $900 for the 42 inch version. – Has loads of different sizes. – WebOS is pretty good. – Deep blacks and vibrant colors.
– Not super bright. – Pretty small if you want one under $1000.
Third on my list is going to be the very popular LG C3 OLED EVO, it’s got some of the best and most vibrant colors and some really deep black, which is why it’s so good for movies and normal TV stuff like sports. I might not have given it the best OLED TV for gaming award, but it’s still very much up there when it comes to gaming capabilities. It supports Nvidia Gsync and Freesync premium pro, so you’re bases are all covered whether you’re using a Playstation, an Xbox or even a gaming PC. But I wouldn’t say it is as good for gaming as the Samsung which offers a few more gaming features.
However, one thing that this TV has that the Samsung TV doesn’t is Dolby vision. Dolby Vision is basically a technology that makes TV and movie images look better by improving brightness, color, and contrast compared to regular content. So that’s a big reason of why I think this is the best OLED TV for movies around $900. However, one downside about this TV is again a lower brightness. Whilst still being a bit brighter than the A80L, this TV maxes out at around ~800 nits, which isn’t bad but if you have a bright room it is something to think about.
If you want to buy this TV for under $1000, you’ll have to choose from either 42 or 48 inch, which is a pretty small size but still a lot cheaper than most other OLED TV’s. But there are also loads of different sizes you can choose from, however these will of course be more expensive. It also uses WebOS, which is pretty good, but I would prefer to use Google TV which isn’t possible. WebOS can have quite a few ads and it can feel a bit messy at times, but overall it’s pretty good. A handy feature of WebOS is sports alert; sports alert is able to show you real time scoring updates for your favorite sports teams, no matter what else you might be watching.
The LG C3 OLED TV will impress you with its outstanding picture quality, delivering deep blacks and excellent contrast thanks to its individual pixel control. While it doesn’t reach the peak brightness of Samsung’s S90C, the C3’s brightness is still solid, with vibrant colors and impressive shadow detail, making it great for dimmer scenes. The TV also handles motion smoothly with its Cinematic Movement setting. It’s a top pick for movies with its beautiful, rich picture, though the Samsung S90C offers slightly better brightness and gaming features, and the older LG C2 could be a more budget-friendly choice. Overall, if you’re after a premium display, the C3 is tough to beat.
Best Gaming OLED TV Under $900 – Samsung S90C OLED
Best Gaming OLED TV Under $900 – Samsung S90C OLED
– 144 Hz refresh rate. – Great for gaming. – When connected with a Q- symphony compatible soundbar the audio experience is outstanding – Only 5.1ms input lag. – Nice and bright. – 4 HDMI 2.1 ports.
– No Dolby Vision. – Not the best operating system. – Only 3 options for size. – Not the best audio out of the box.
In this entire list, the Samsung S90C is the best for gaming, it’s got the lowest amount of input lag, 144 Hz refresh rate, and of course the screen looks stunning while gaming. It can also get really bright, up to 1100 nits! Which is just shy of twice as much as the Sony A80L. So brightness isn’t going to be a concern with this OLED TV, which is mainly because of Samsung’s QD-OLED technology. Note that the 83 inch version doesn’t have a QD-OLED panel so don’t take this as a review of the 83 inch version, because that TV is much less bright than the other sizes. Also note that this offer is only from the UK Amazon (Amazon.co.uk) and on the US version of Amazon (Amazon.com) it’s upwards of $2000, but the prices can fluctuate over time.
So let’s start with the sound, because it isn’t great straight out of the box. This is quite normal for OLED TV’s, as they’re really thin and mostly focused on picture quality. However, Samsung has added a feature called ”Q-symphony”, which basically allows you to make a Q-soundbar synchronize with the TV’s audio and then the audio comes both from the soundbar and the TV. This really adds to the experience as it gives more spatial sound and overall way better sound than the audio out of the box, here is a Q-symphony compatible soundbar if you’re interested. However, I have to say that the operating system (Tizen) isn’t my favorite as it can be pretty ad-heavy and doesn’t look the cleanest.
So why do I think it’s so good for gaming? Well, first and foremost it is the 144 Hz refresh rate. This is the highest refresh rate of any TV on this list and is really nice for any gamers looking for that extra bit of smoothness in their games. Another reason why I think this TV is so good for gaming is the low input lag, at only 5.1 ms this means there’s only a 5.1ms delay between your actions on the controller and what you see on the screen. This is crucial for any kind of competitive gaming and nice for any casuals looking for a smooth experience. Not to mention that the screen is extremely good and bright with a native resolution of 4K and of course vibrant colors and deep blacks. It also (like most of the other TV’s on this list) has the option to stream games straight from your TV without needing a console, all you need is a compatible controller. Lastly, it also has 4 HDMI 2.1 ports, which is really handy as you don’t need to worry that you’re in the wrong port or anything like that, HDMI 2.1 ,which is the latest and fastest version of the HDMI standard.
So all-in-all if you’re looking for an OLED TV with high brightness, that looks amazing and is great for gaming, then this OLED TV is the best for you. It has a high refresh rate and the lowest input lag of any TV on this list and of course 4 HDMI 2.1 ports. The image of this OLED TV is super vibrant and colorful and exceptionally bright for an OLED TV. The sound isn’t the best out of the box, but if you hook it up to a Q-symphony compatible soundbar, it’s immediately a lot better. This Q-symphony technology combines the soundbar and the TV for an overall amazing sound. It doesn’t have the best operating system, but it isn’t so bad that I wouldn’t buy it because of it. It also doesn’t have Dolby Vision and there are only 3 options for size, but it does have HDR 10+ and HDR quantum, which is basically the same as having Dolby Vision.
Last on this list is going to be the cheapest, coming in at only $800, which is really cheap for an OLED TV, is the LG B4. This is LG’s latest addition to the B line of OLED TV’s, and although it is the cheapest it doesn’t disappoint. This LG OLED TV supports the latest version of WebOS (WebOS 24) and some other cool features you would expect only higher end models to have like Dolby Vision. The only big downside design wise between this model and the C4, for example, is the thick bezels, which do make it look like a cheaper TV. It also gets pretty bright and all 4 HDMI ports support 120 Hz which is also a nice benefit. It does however have the same issue as the C4 with it’s viewing angles, you get the slightest bit of green tint when you’re looking at it from the side but it’s less than the C4 and overall not that big of a deal.
When it comes to audio, the LG B4 doesn’t quite blow you away, but it’s decent for its price point. The built-in speakers deliver clear sound and they get reasonably loud, which is great for everyday TV watching. You won’t get the same rich, immersive experience as you would with higher-end models, like the C4 for example, but the audio quality is still more than enough for most people. One thing to note is that the sound can lack depth and bass, so if you’re a big fan of movies or gaming, you might want to consider adding a soundbar. Overall, for an $800 OLED TV, the audio is fair and gets the job done without any major complaints.
When it comes to gaming, the LG B4 doesn’t disappoint either. With, like I said, all four HDMI ports supporting 120Hz, you’re looking at smooth, responsive gameplay that makes a noticeable difference in fast-paced titles. The low input lag is another great feature. This means your actions will appear on screen with very little delay, which is crucial for competitive gaming. While it might not have some of the more advanced gaming features found in some higher-end models, like advanced variable refresh rates or extra gaming modes, it still makes for a very good experience for its price. The only small downside is, like I previously mentioned, the slight green tint from side angles, which can be a bit distracting, but it’s not a deal breaker for most gamers. Overall, the LG B4 offers solid gaming performance at an $800 price point, making it a great option if you’re looking to get your game on without spending a fortune.
In summary, the LG B4 OLED TV is an impressive choice for those looking for a budget-friendly OLED option, coming in at just $800. As the newest member of LG’s B line up, it delivers great value with features like WebOS 24 and Dolby Vision that are usually only available on more expensive models. While the thick bezels and slight green tint from the sides might be minor downsides, they don’t take away from the TV’s strengths. It gets bright, supports 120Hz on all HDMI ports, and performs well for gaming with low input lag. For its price, overall the LG B4 gives you great features and good performance without costing too much.
What affiliate programs is Through The Eyes Of A Teenager associated with?
nnnn
Through The Eyes Of A Teenager is now associated with 2 affiliate programs which are the Best Buy affiliate program and the Amazon affiliate program. This means that if you click on any of you buy a product through my links from either Amazon or Best Buy I might earn a commission.
nnnnnnnn
What Are Affiliate Links?
nnnn
Affiliate links are a monetization tool for bloggers, allowing them to earn commissions by directing traffic to platforms like Amazon. Through an affiliate program, bloggers can create and share unique links that track user engagement and sales. This program is designed to incentivize content creators by providing a financial reward for each purchase made through their referral links. It effectively monitors and reports on the number of clicks and resulting sales generated via these affiliate links.
For you this means that if you buy a product through one of my links from either Best Buy or Amazon like I mentioned earlier, you will be supporting Through The Eyes Of A Teenager with a small percentage of that purchase. Note that this is needed to help fund Through The Eyes Of A Teenager to create more helpful articles that every teen can appreciate.
nnnnnnnn
If you have any further questions you can always Contact me with the form below or by emailing the following email adress:


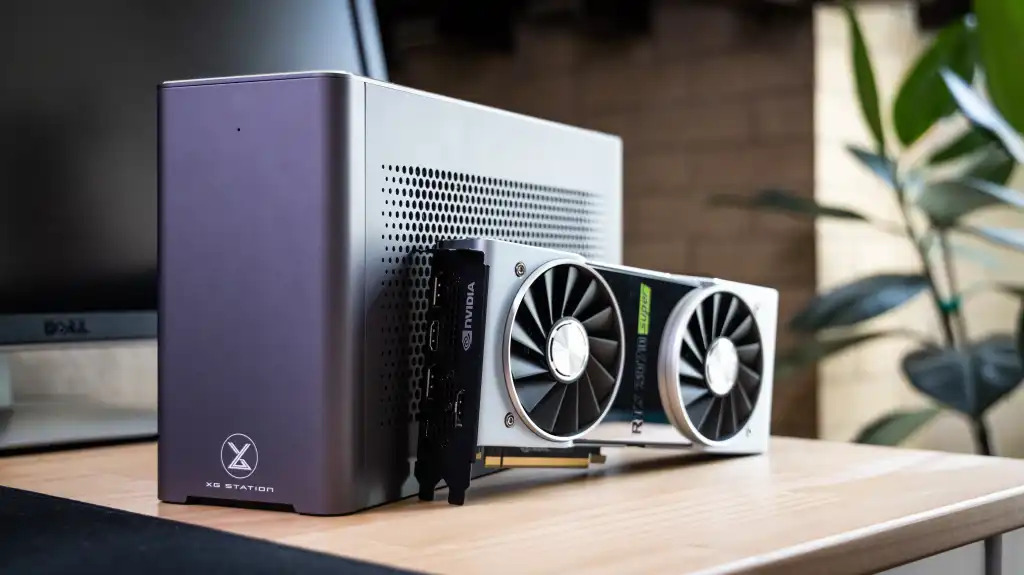

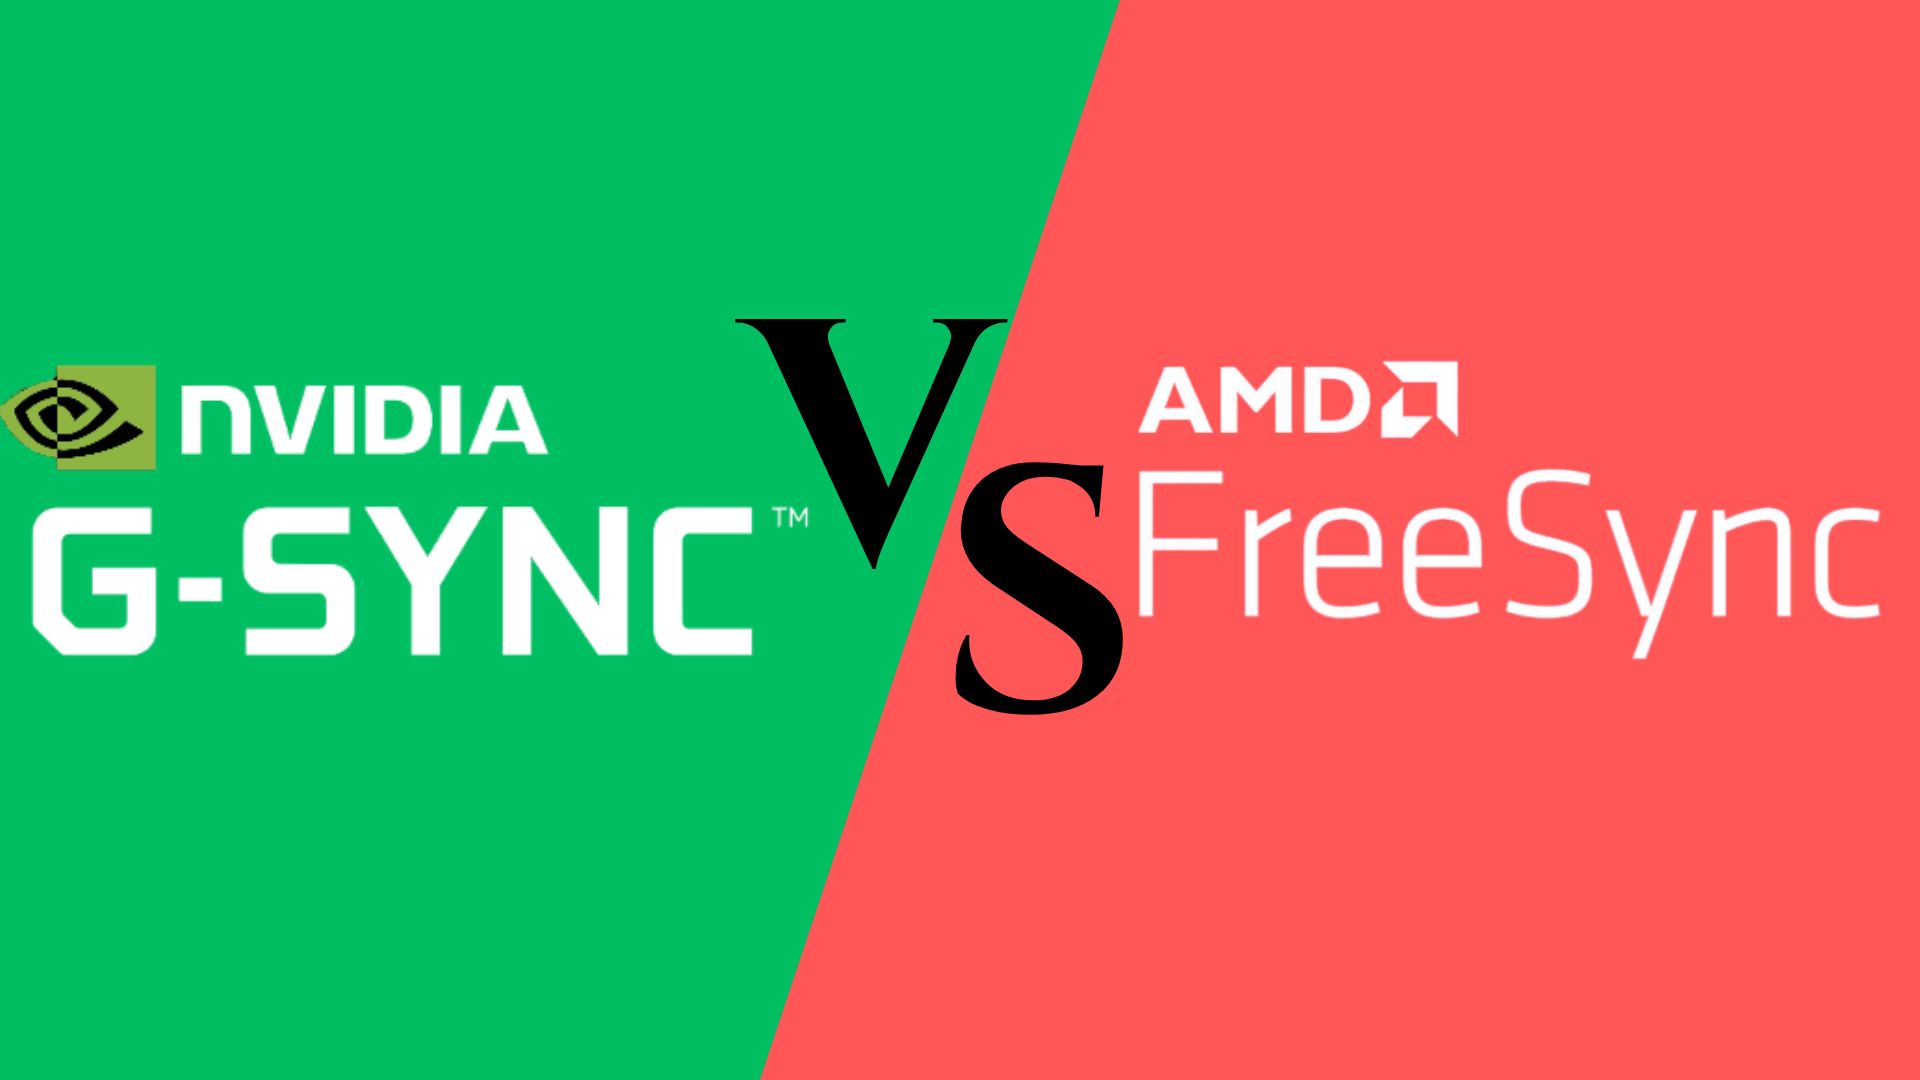


 n
n n
n n
n


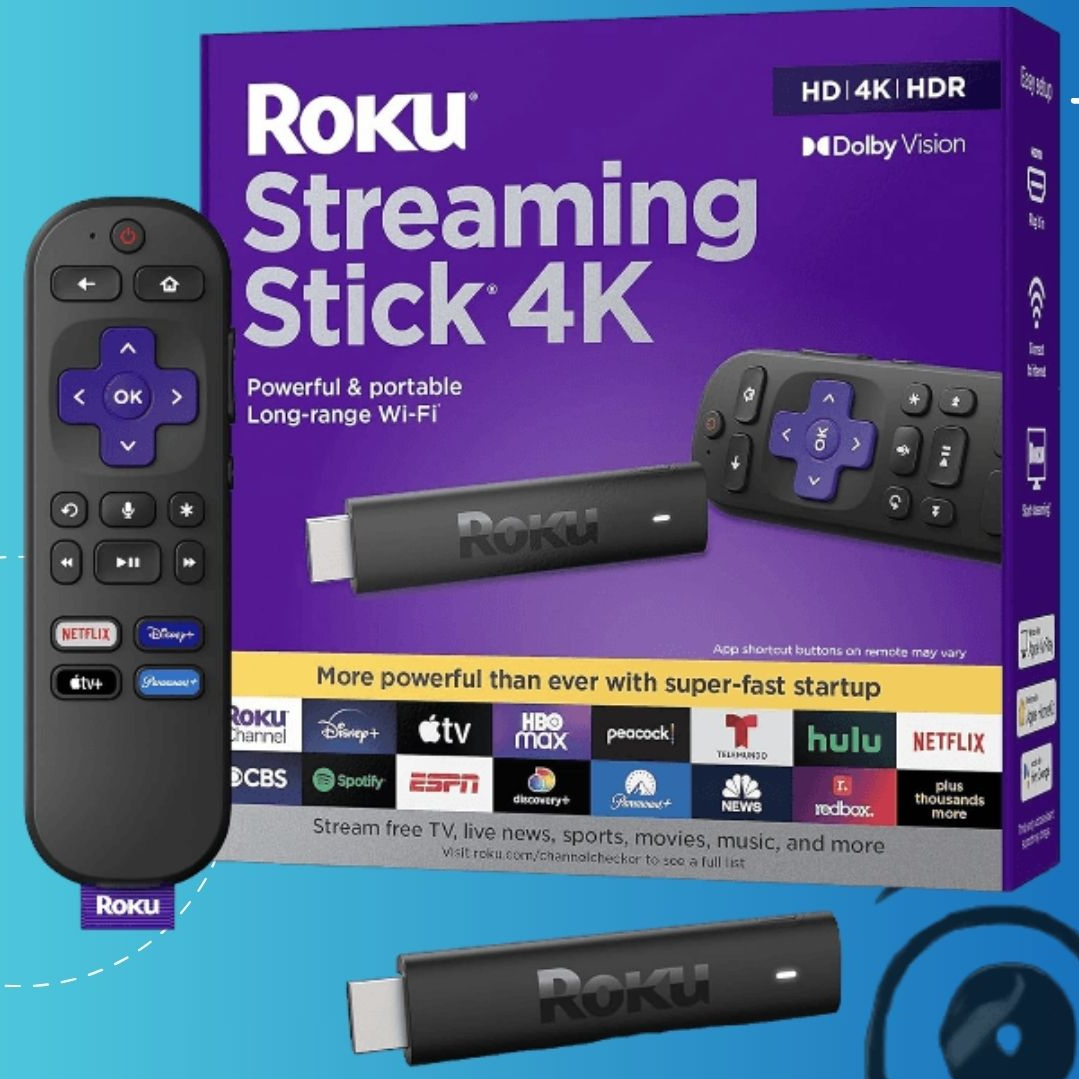 n
n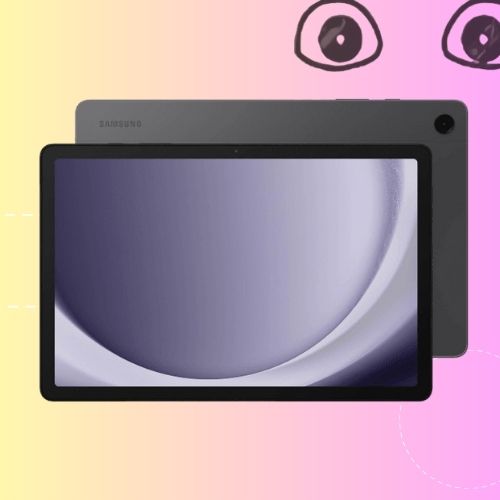 n
n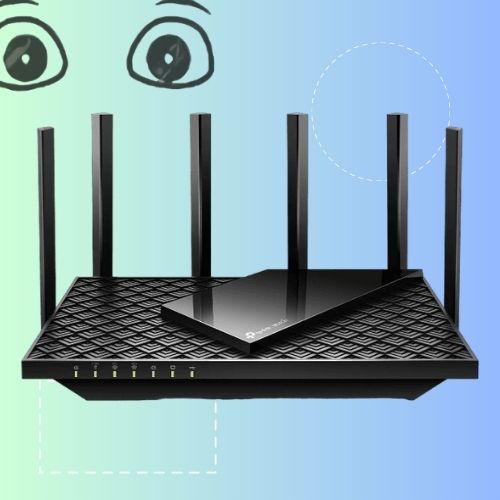 n
n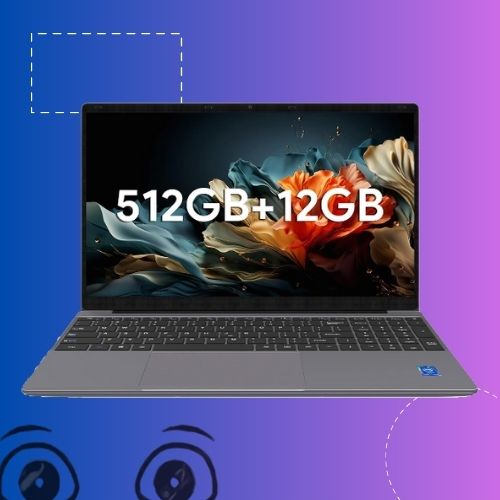 n
n n
n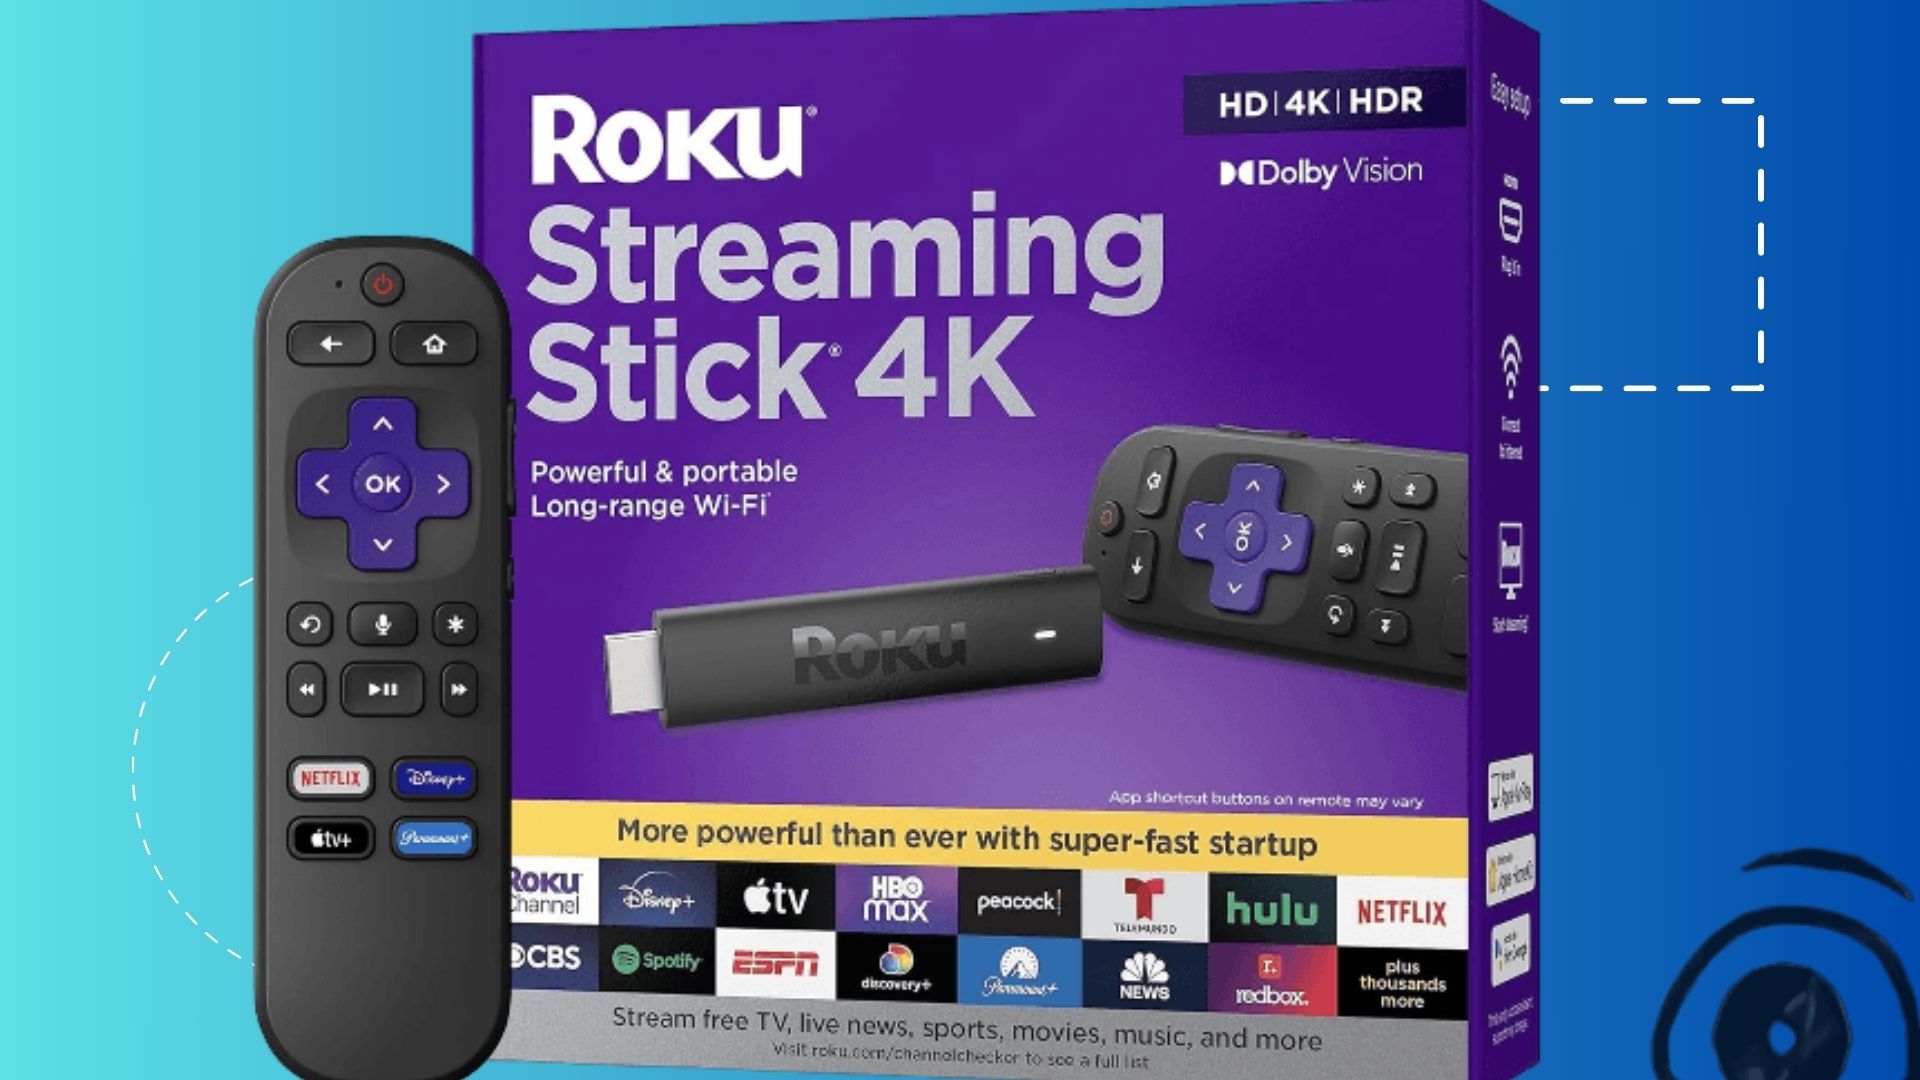
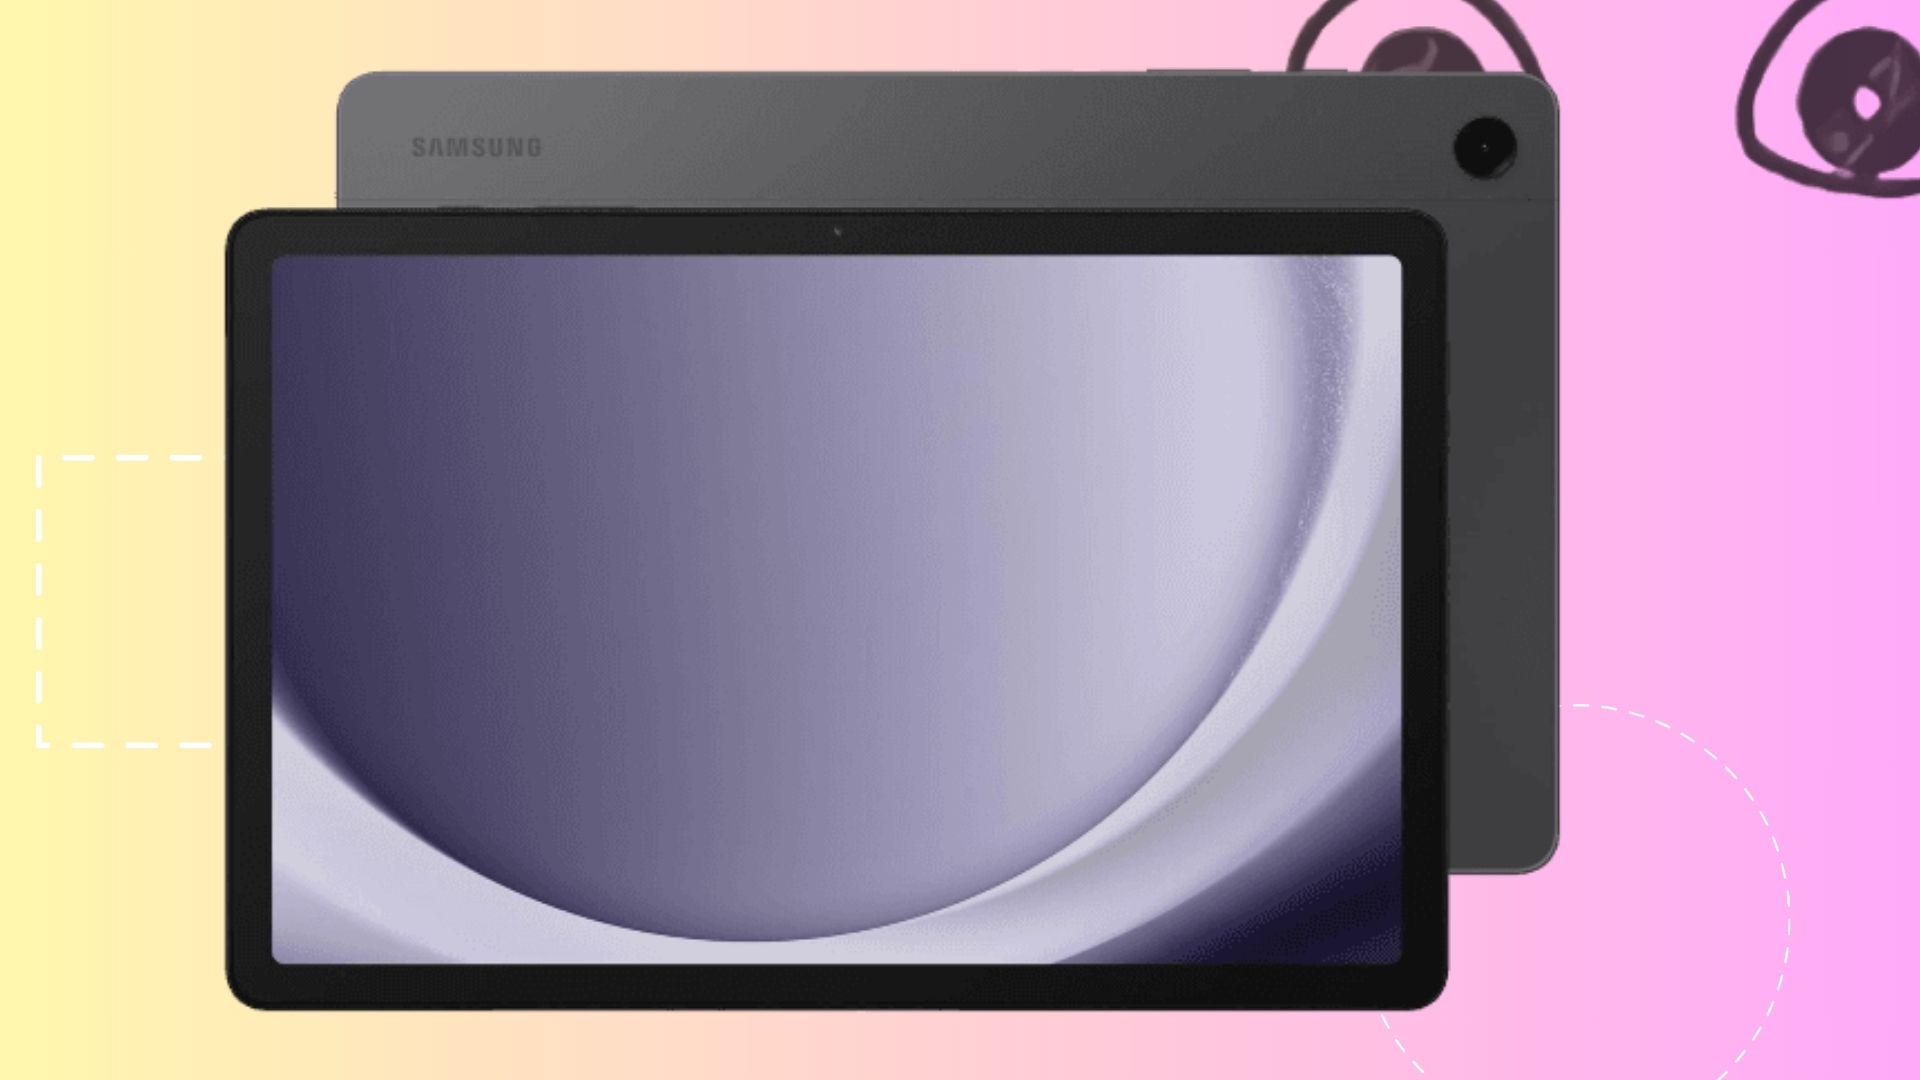
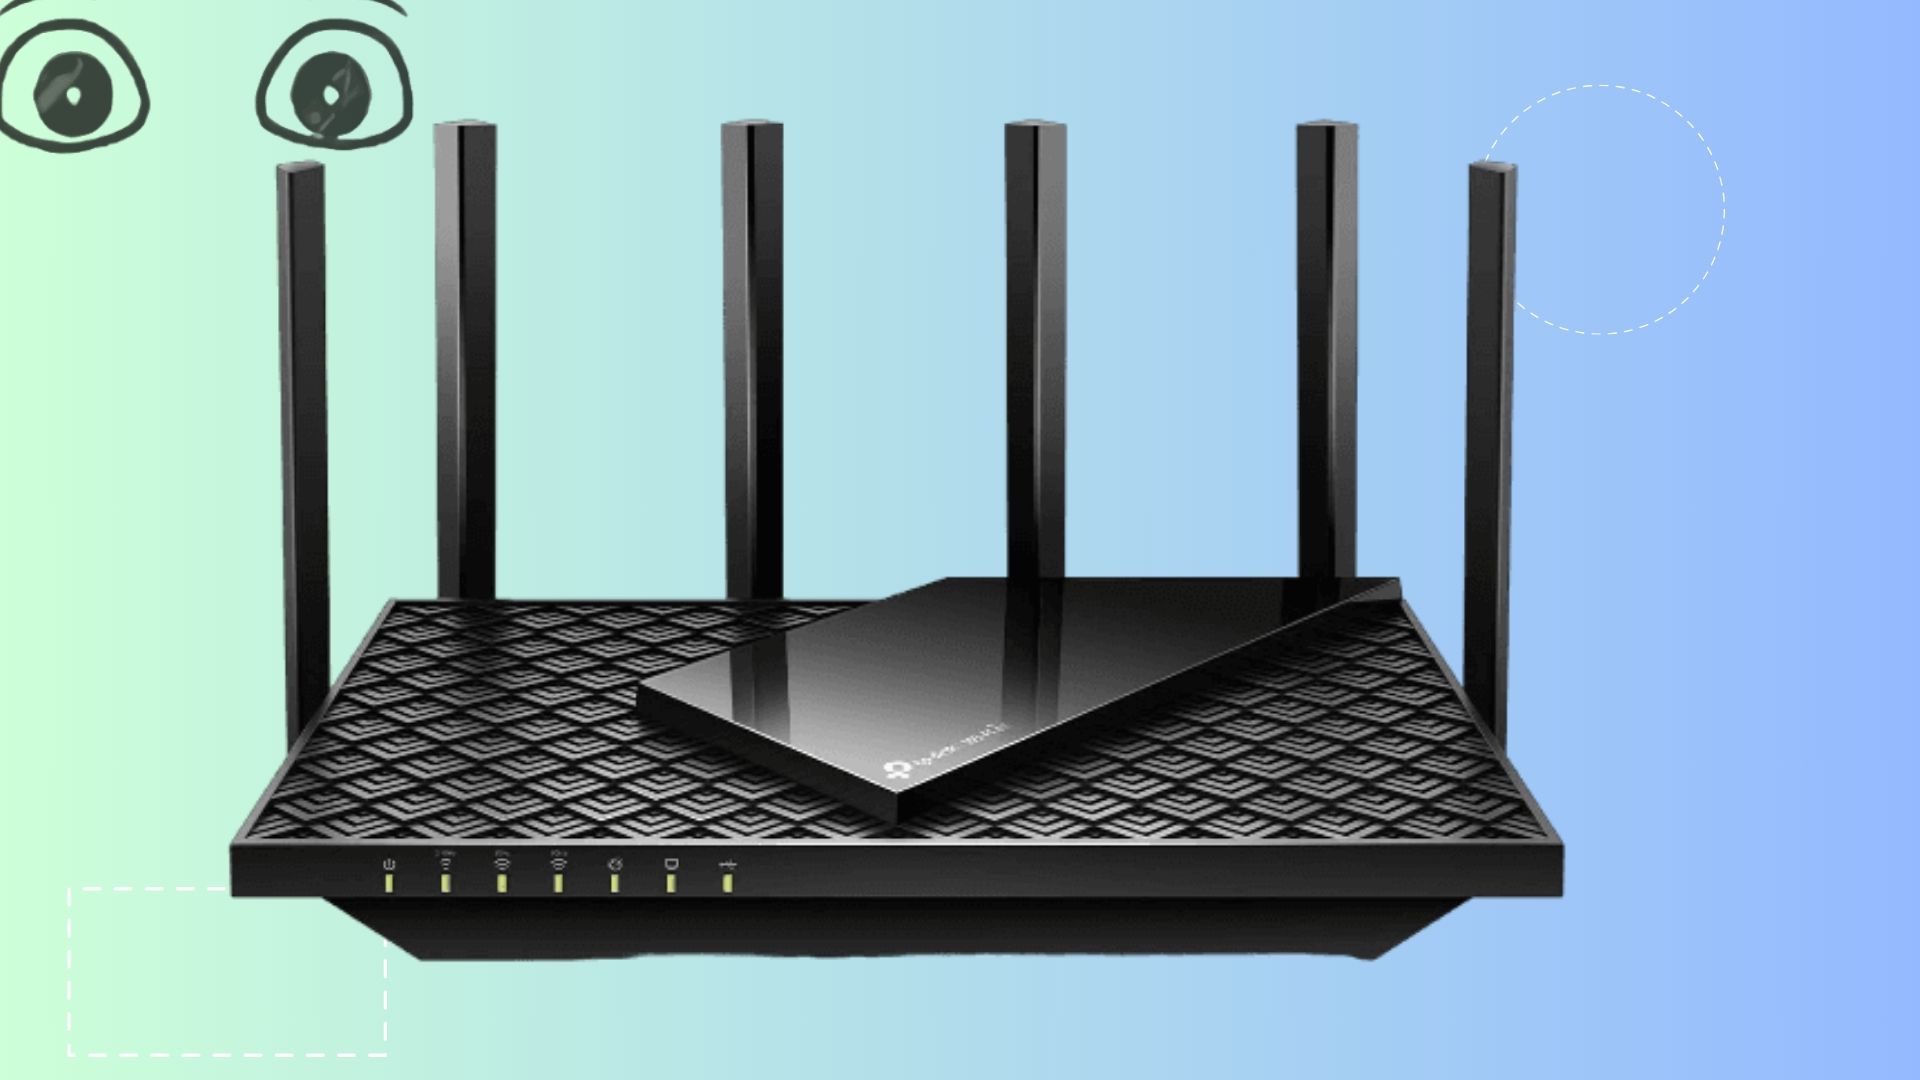
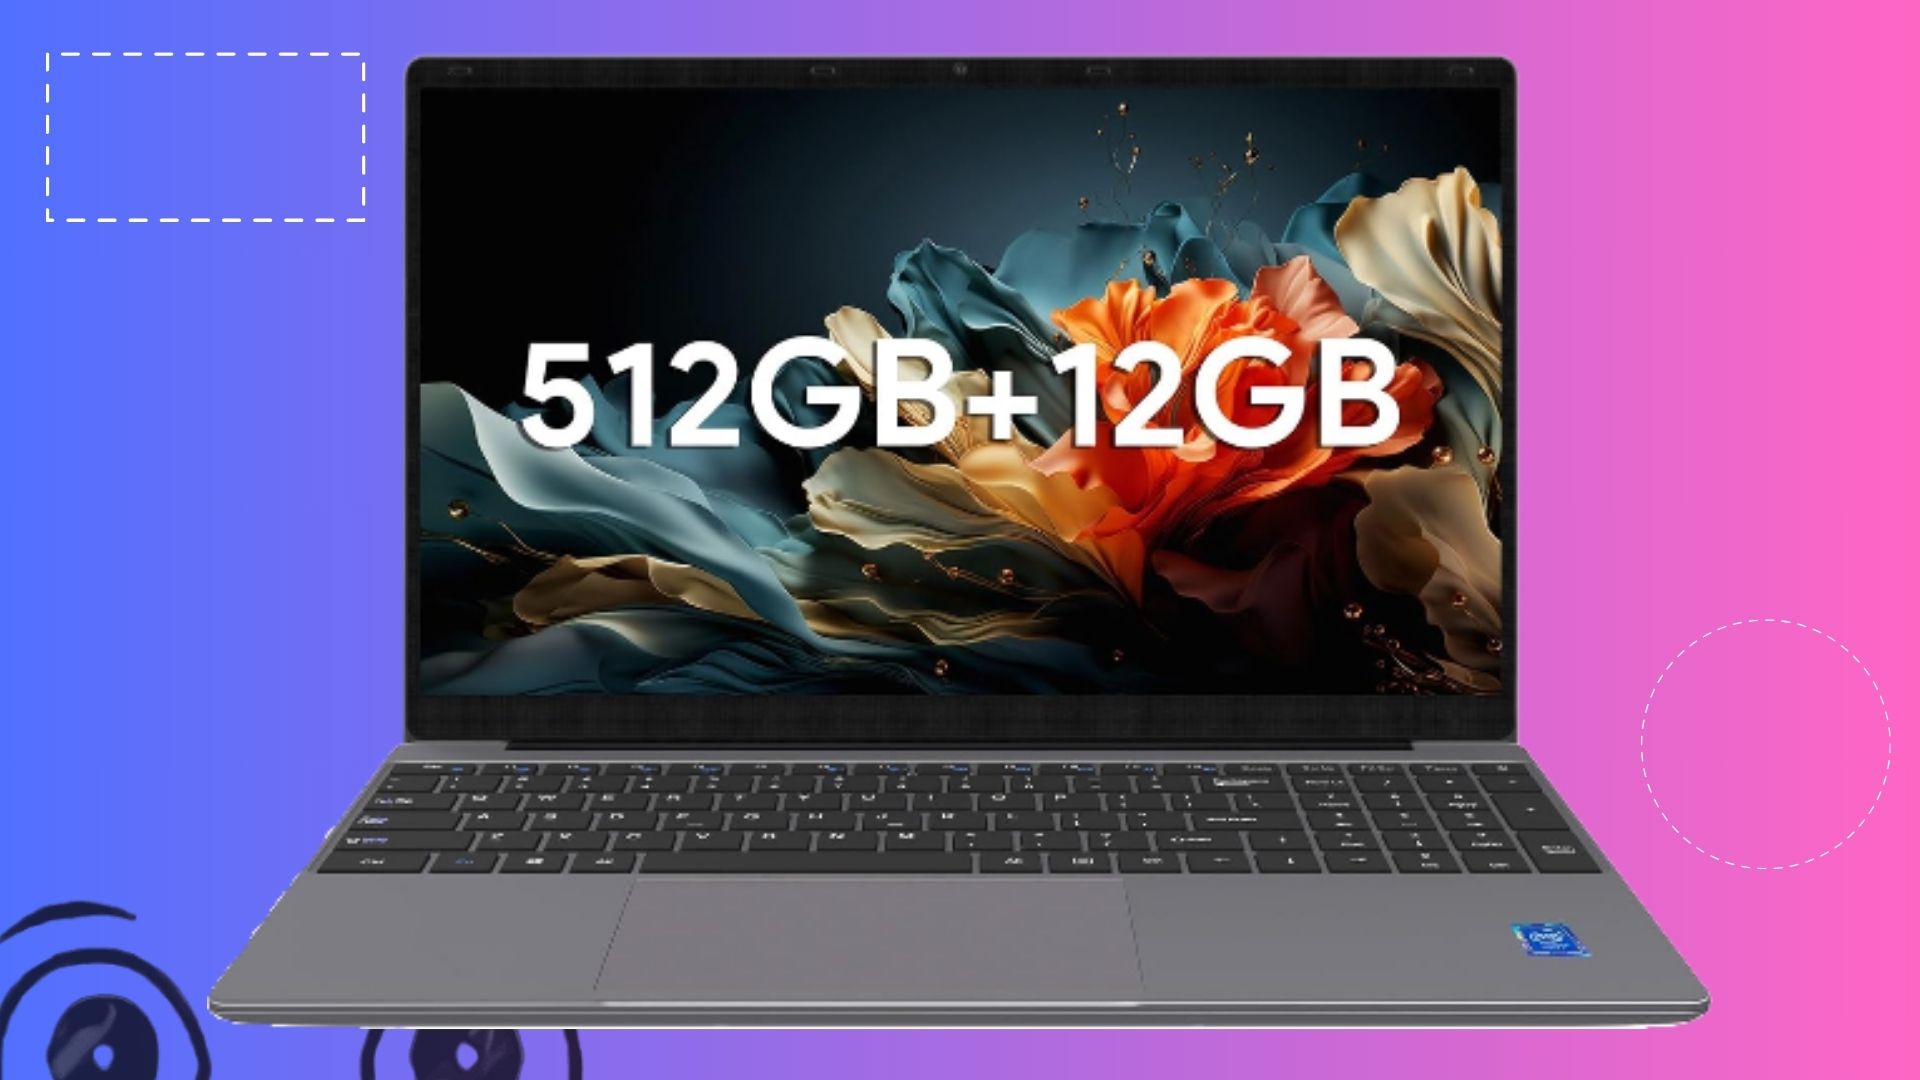

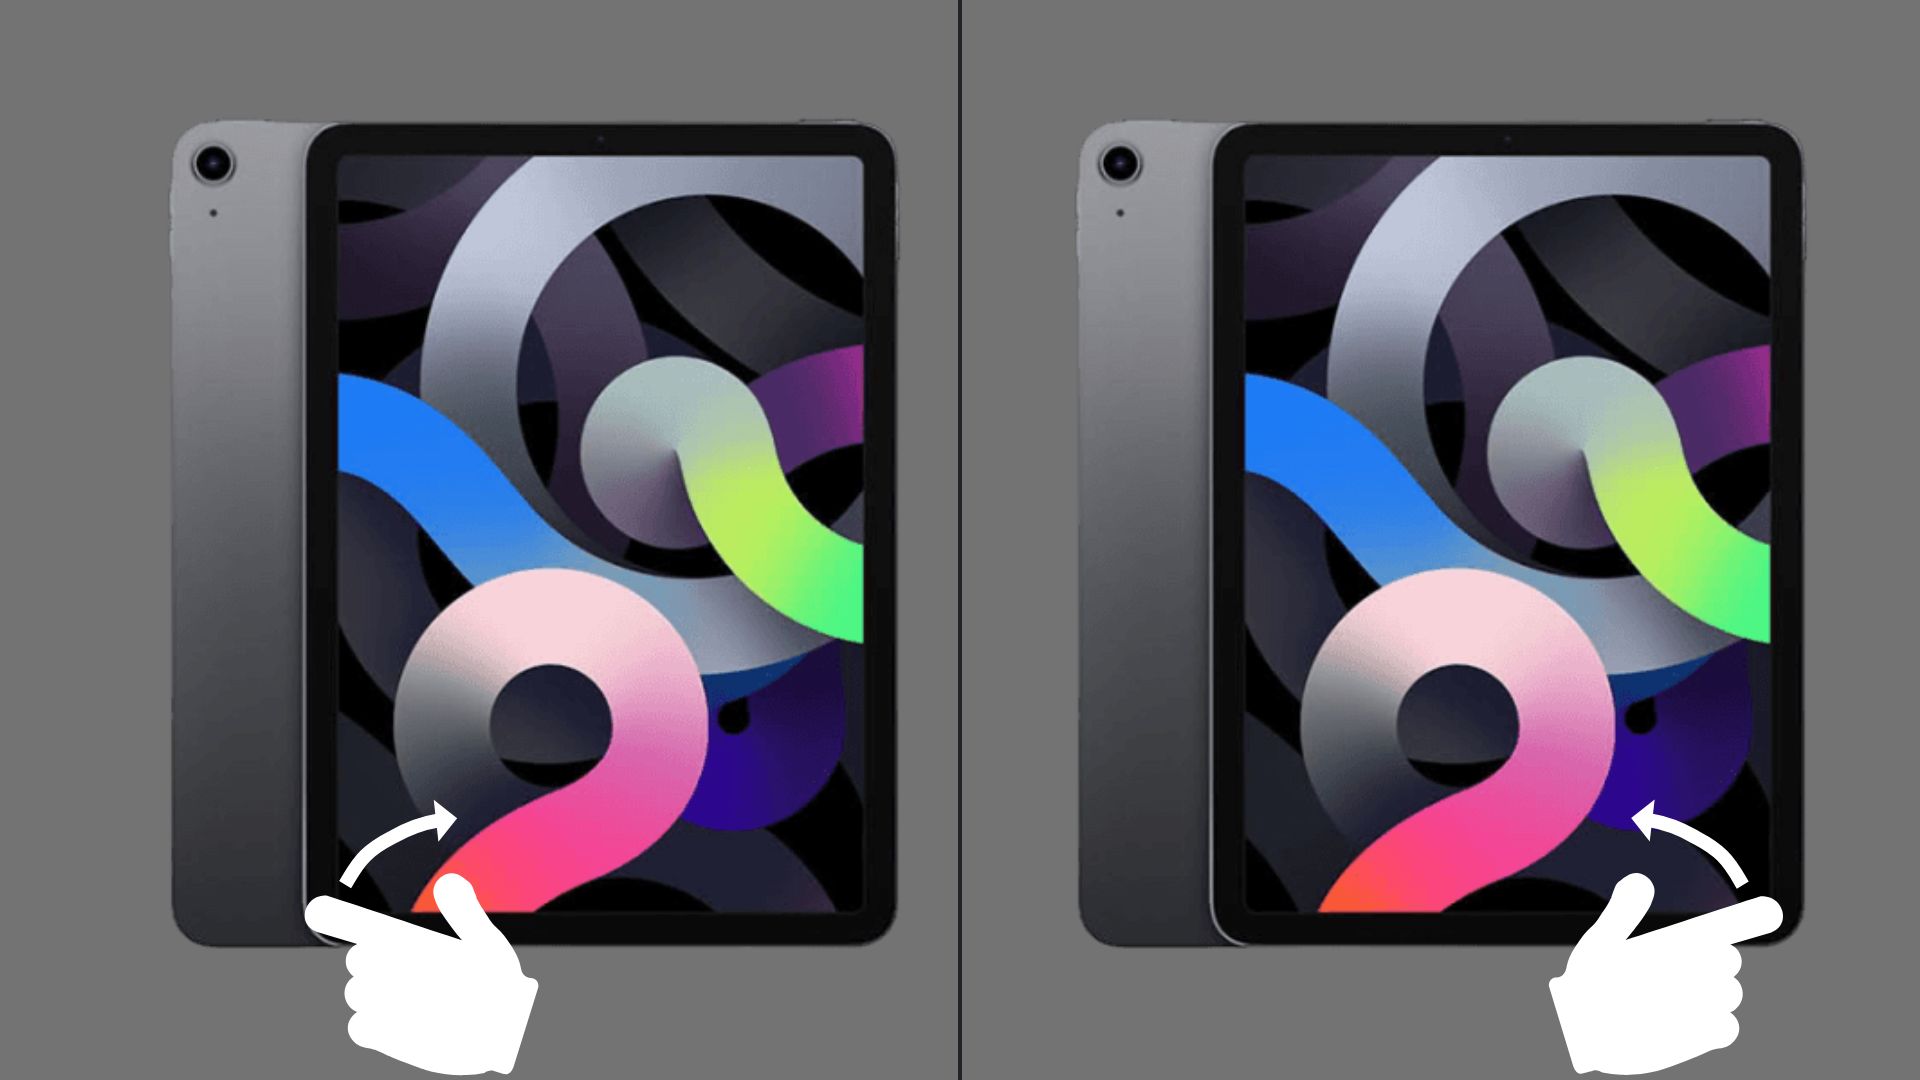
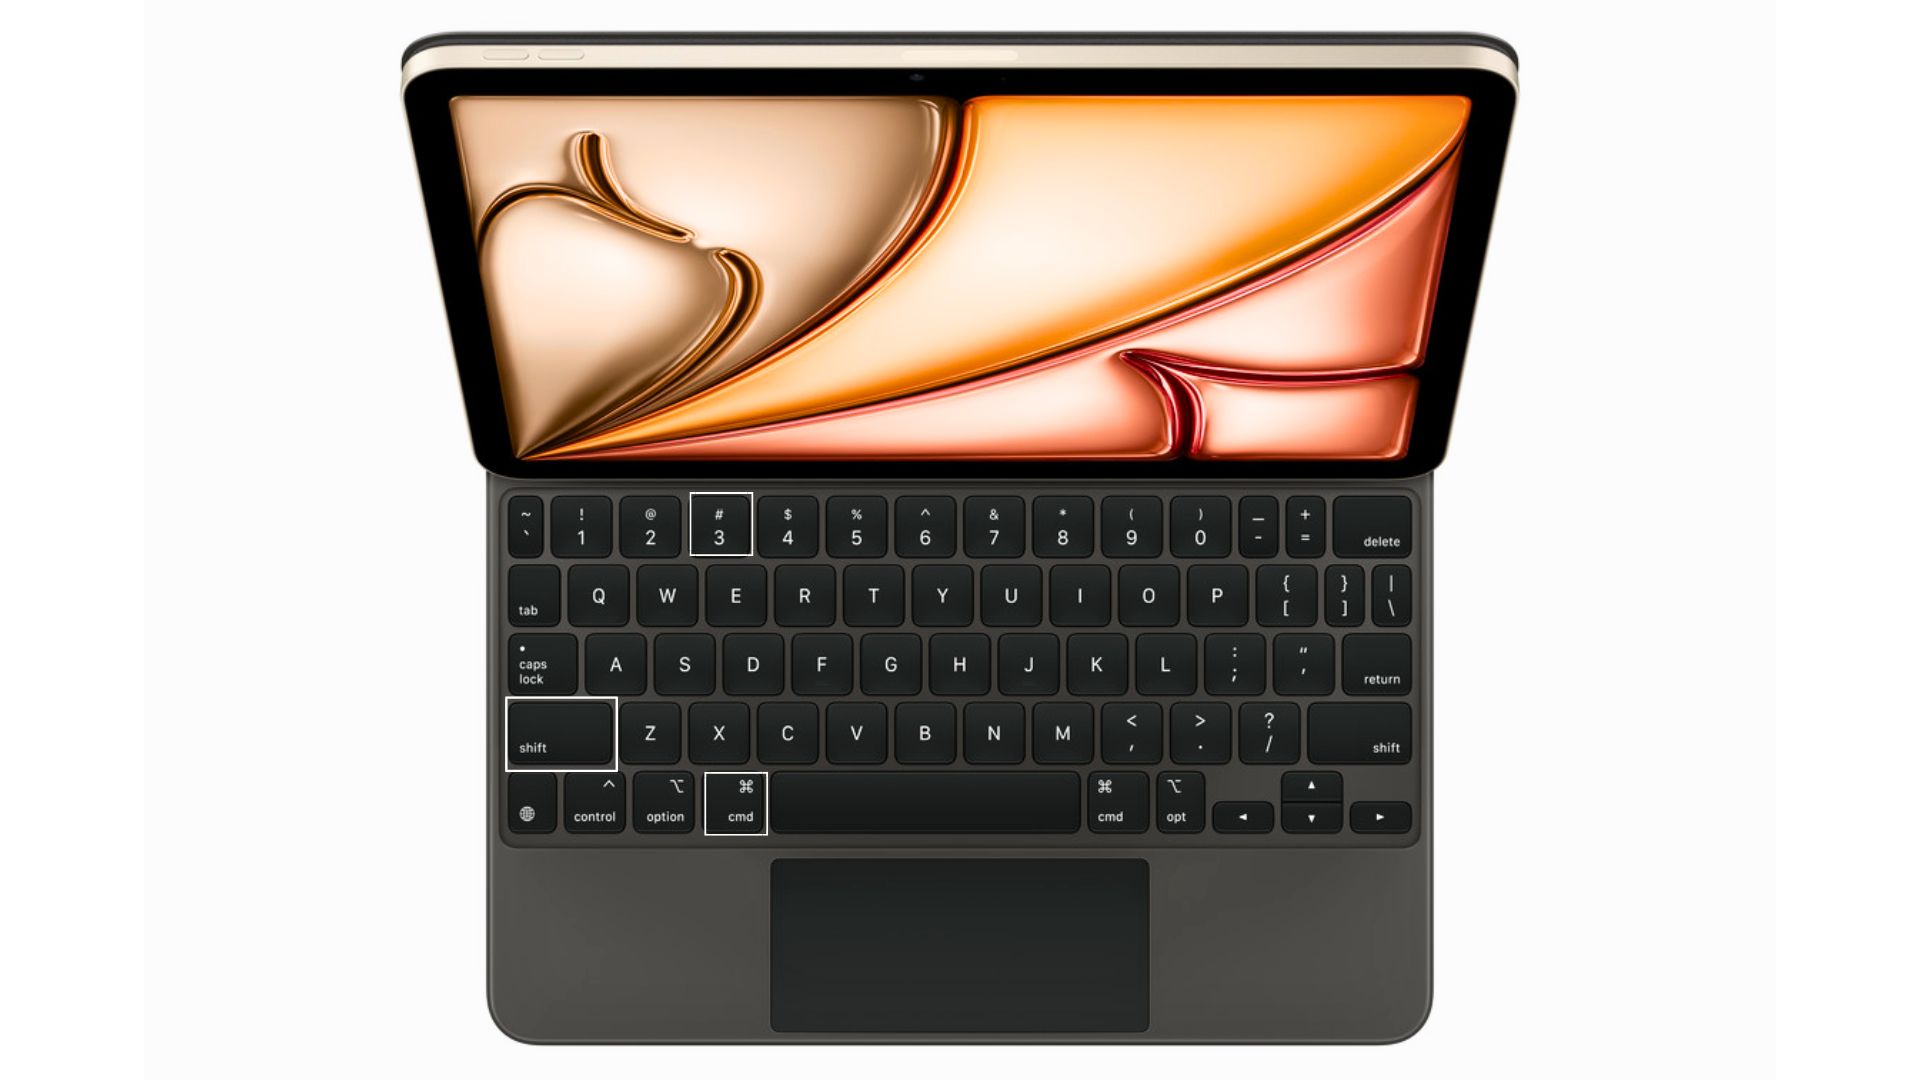
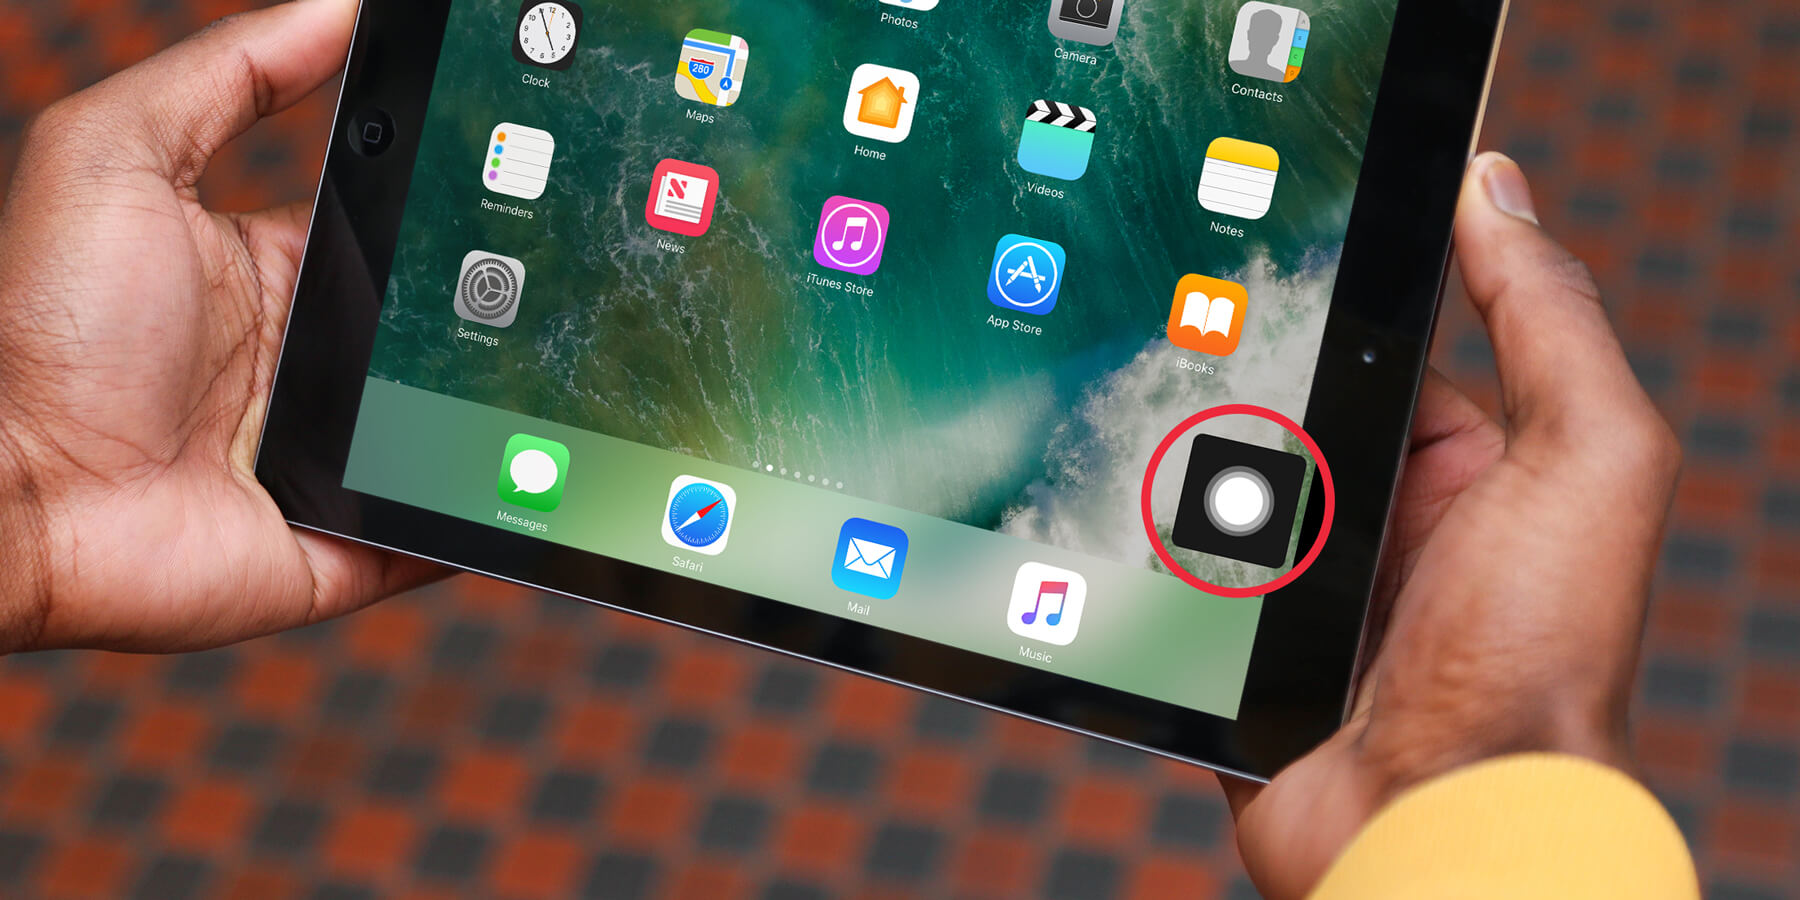
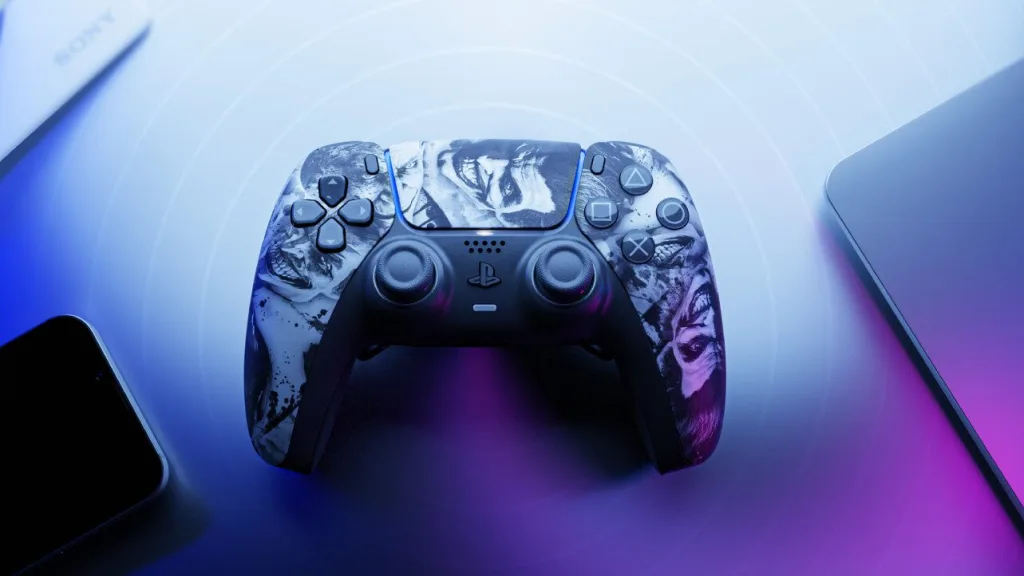
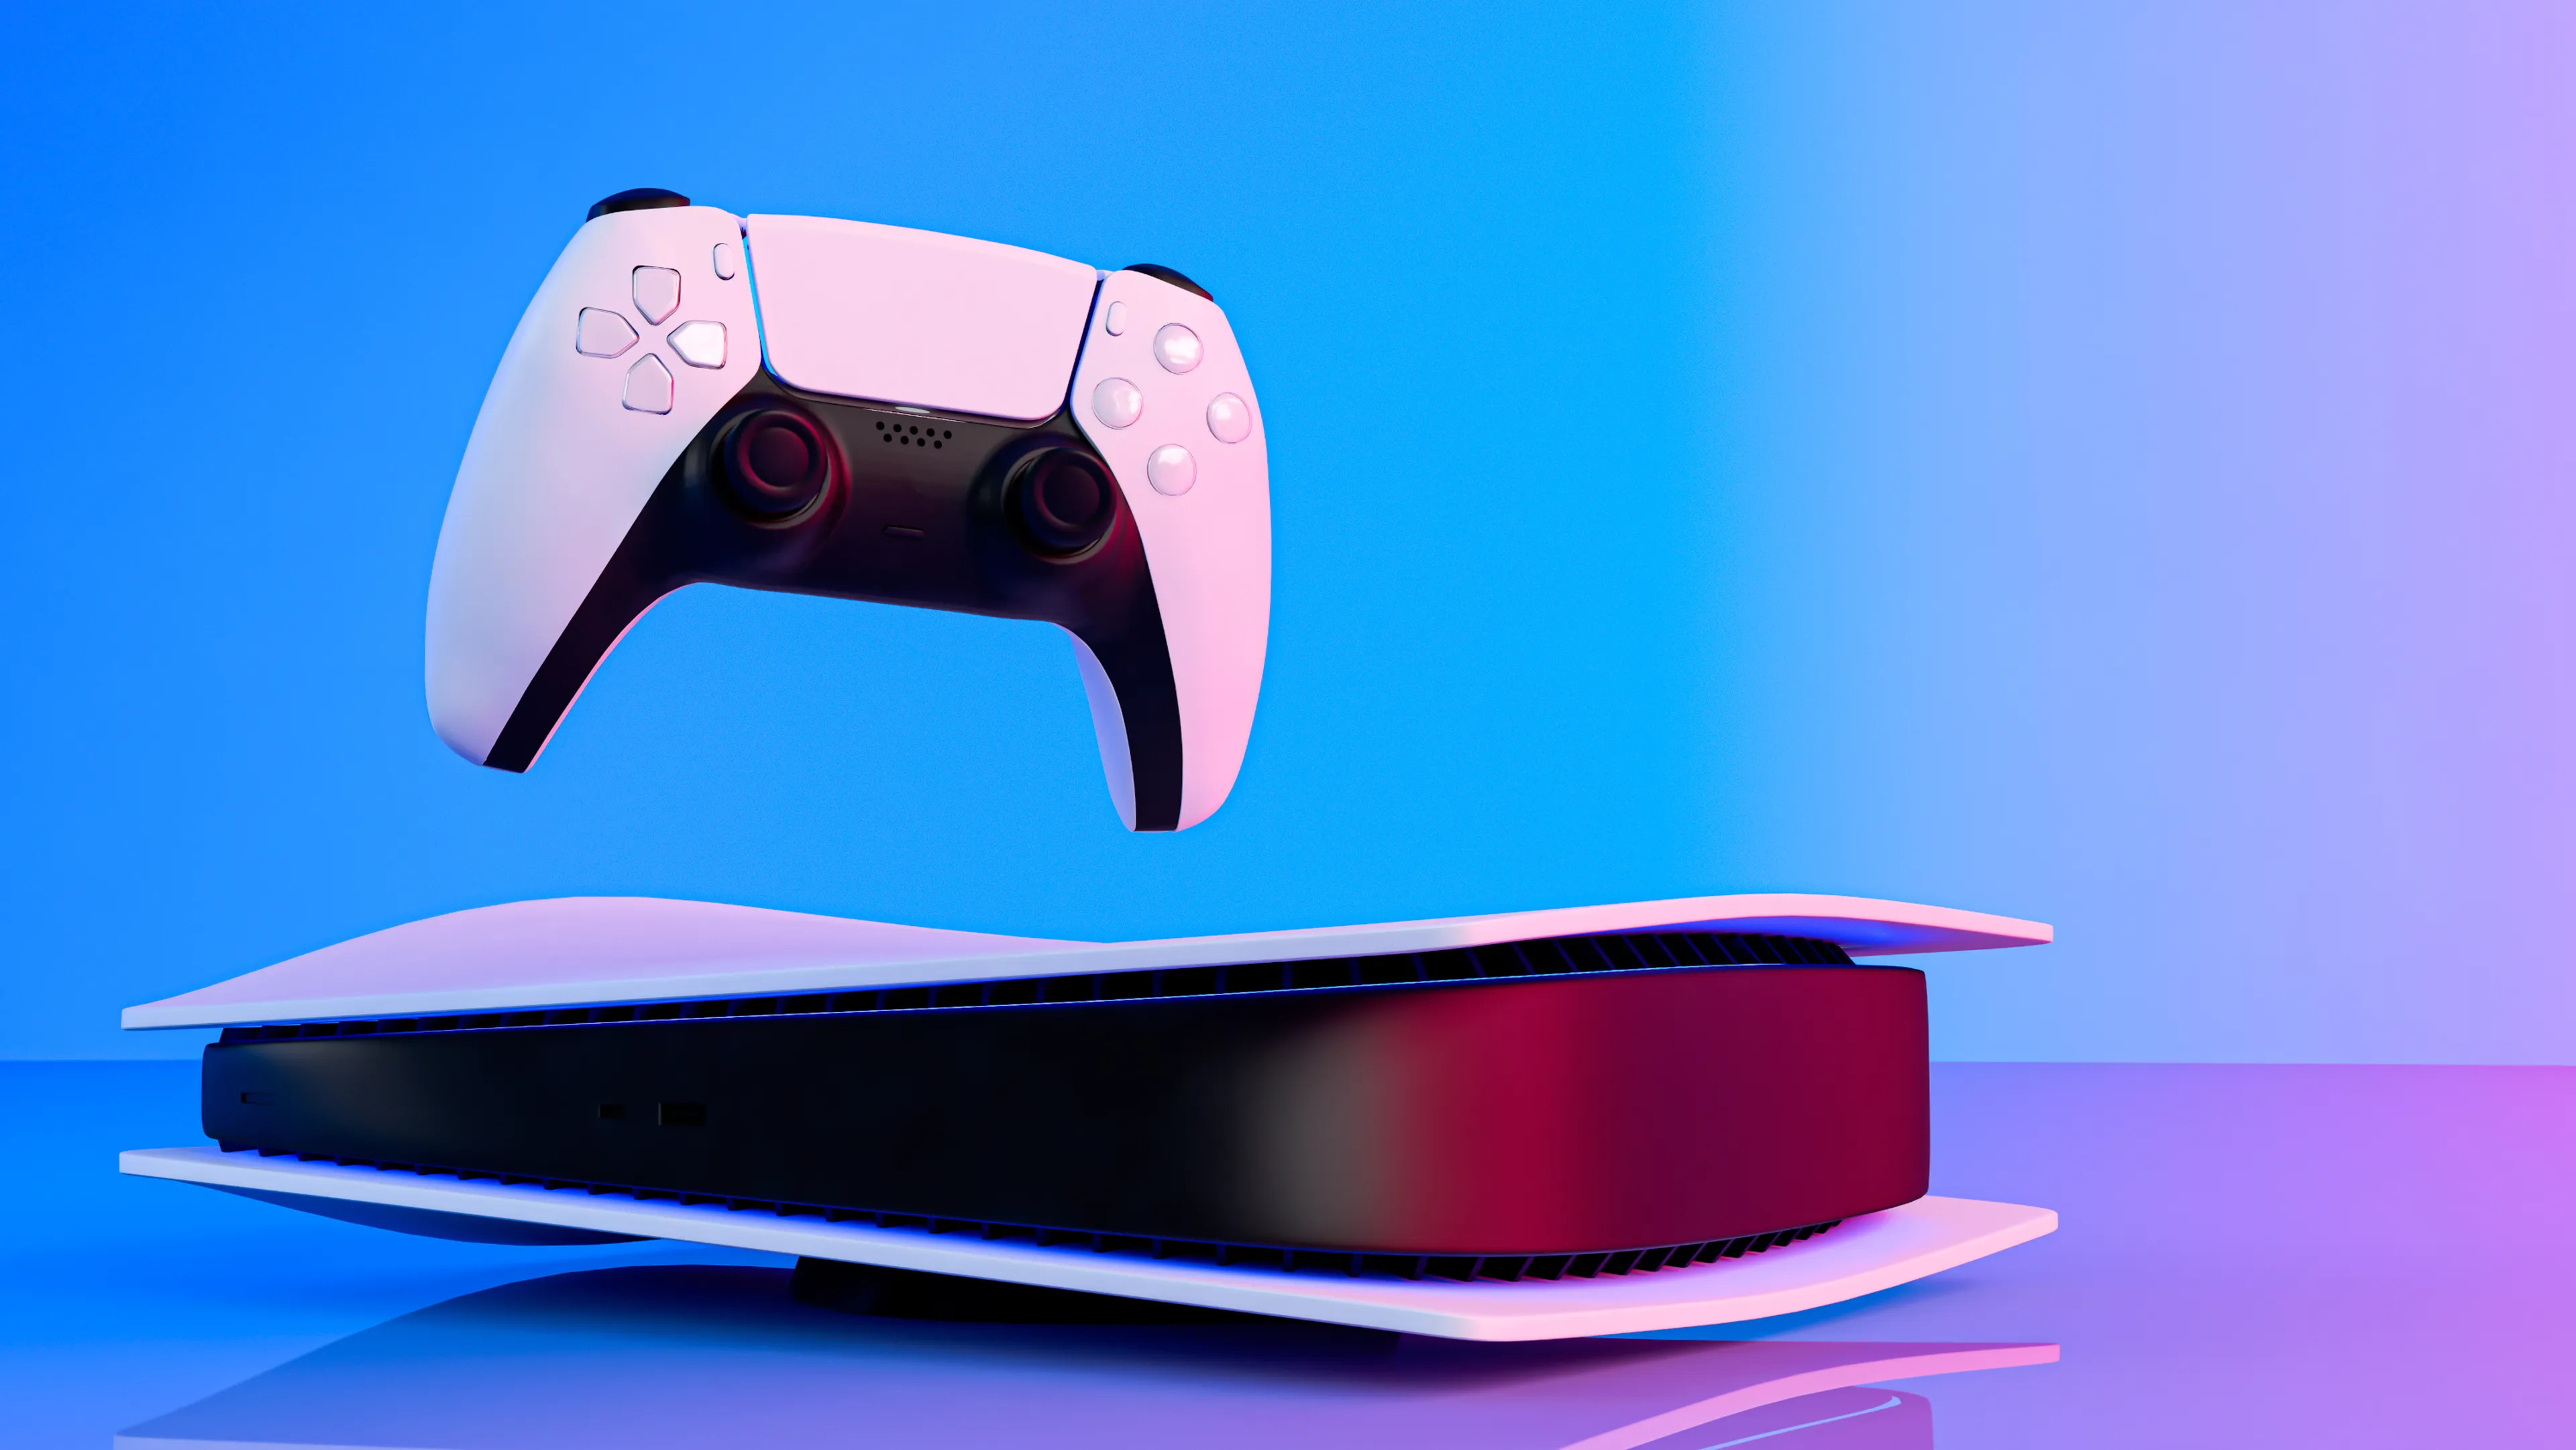
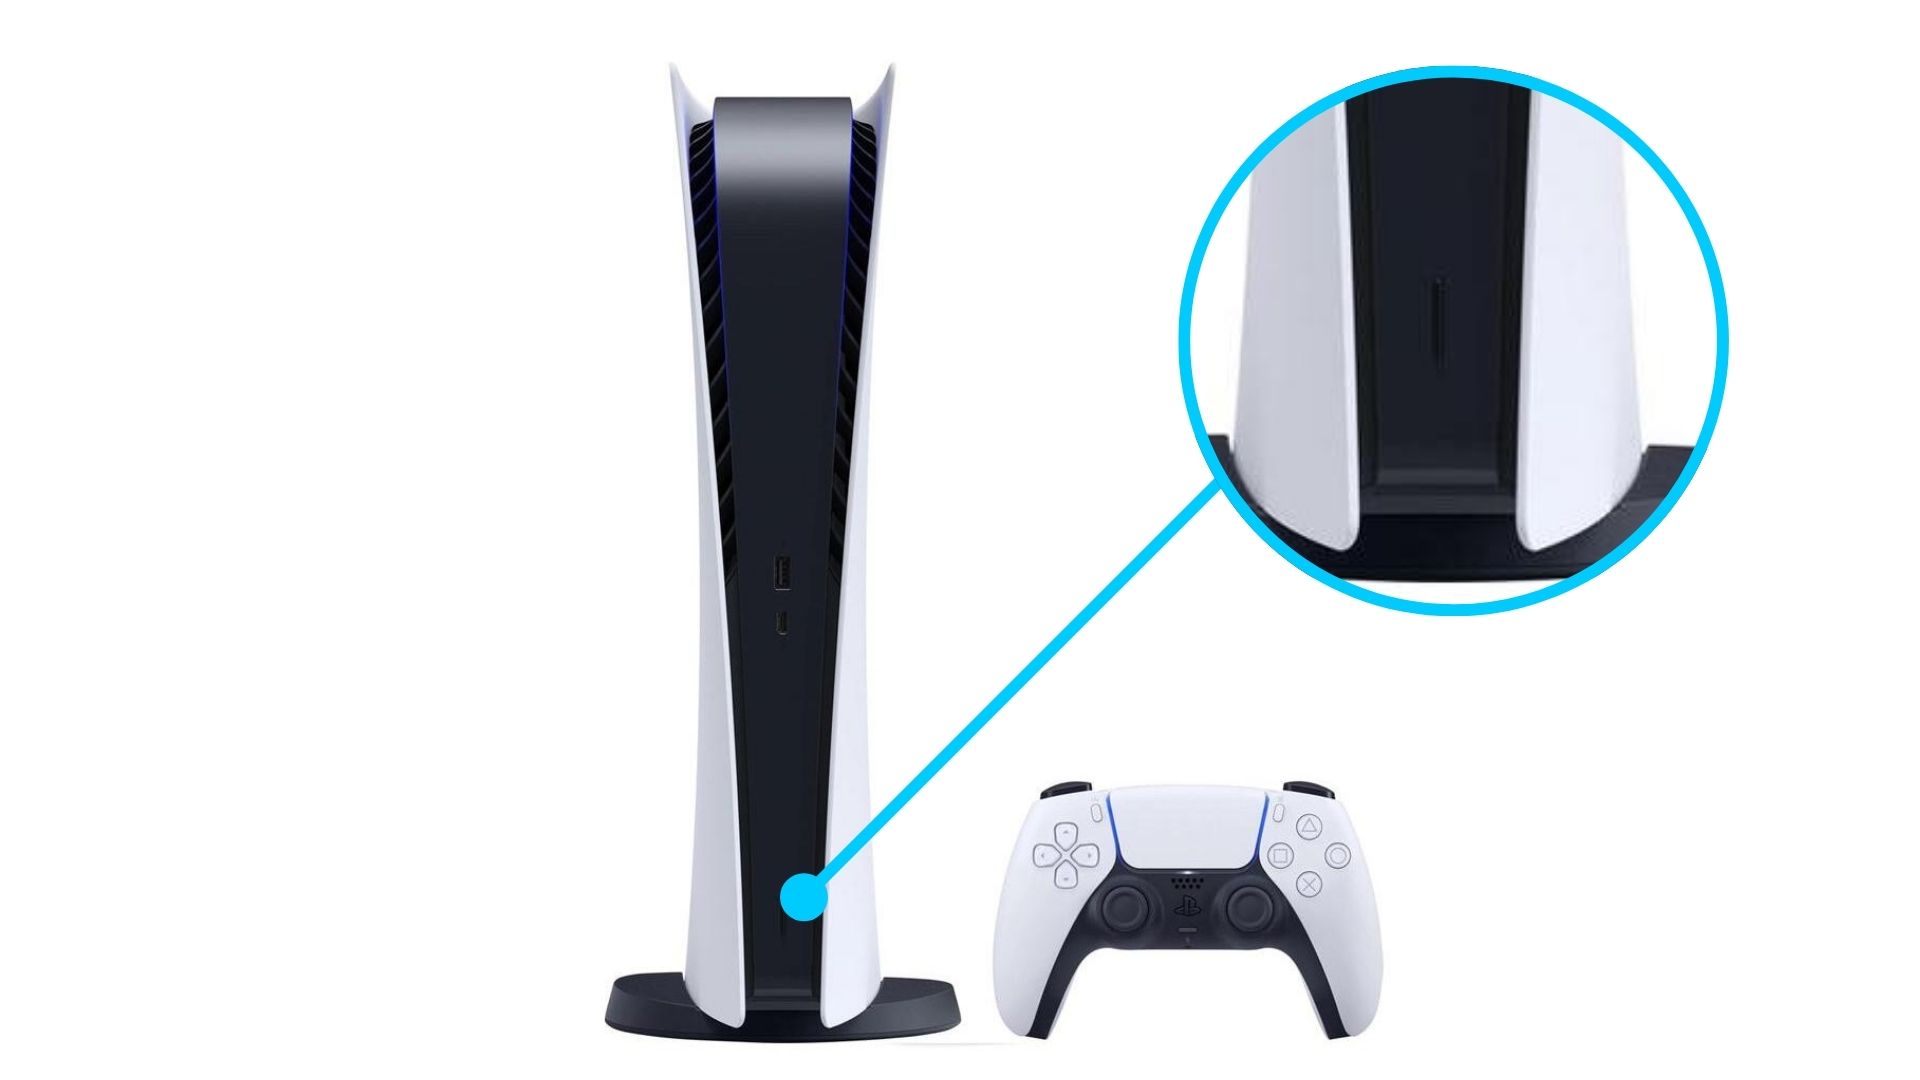
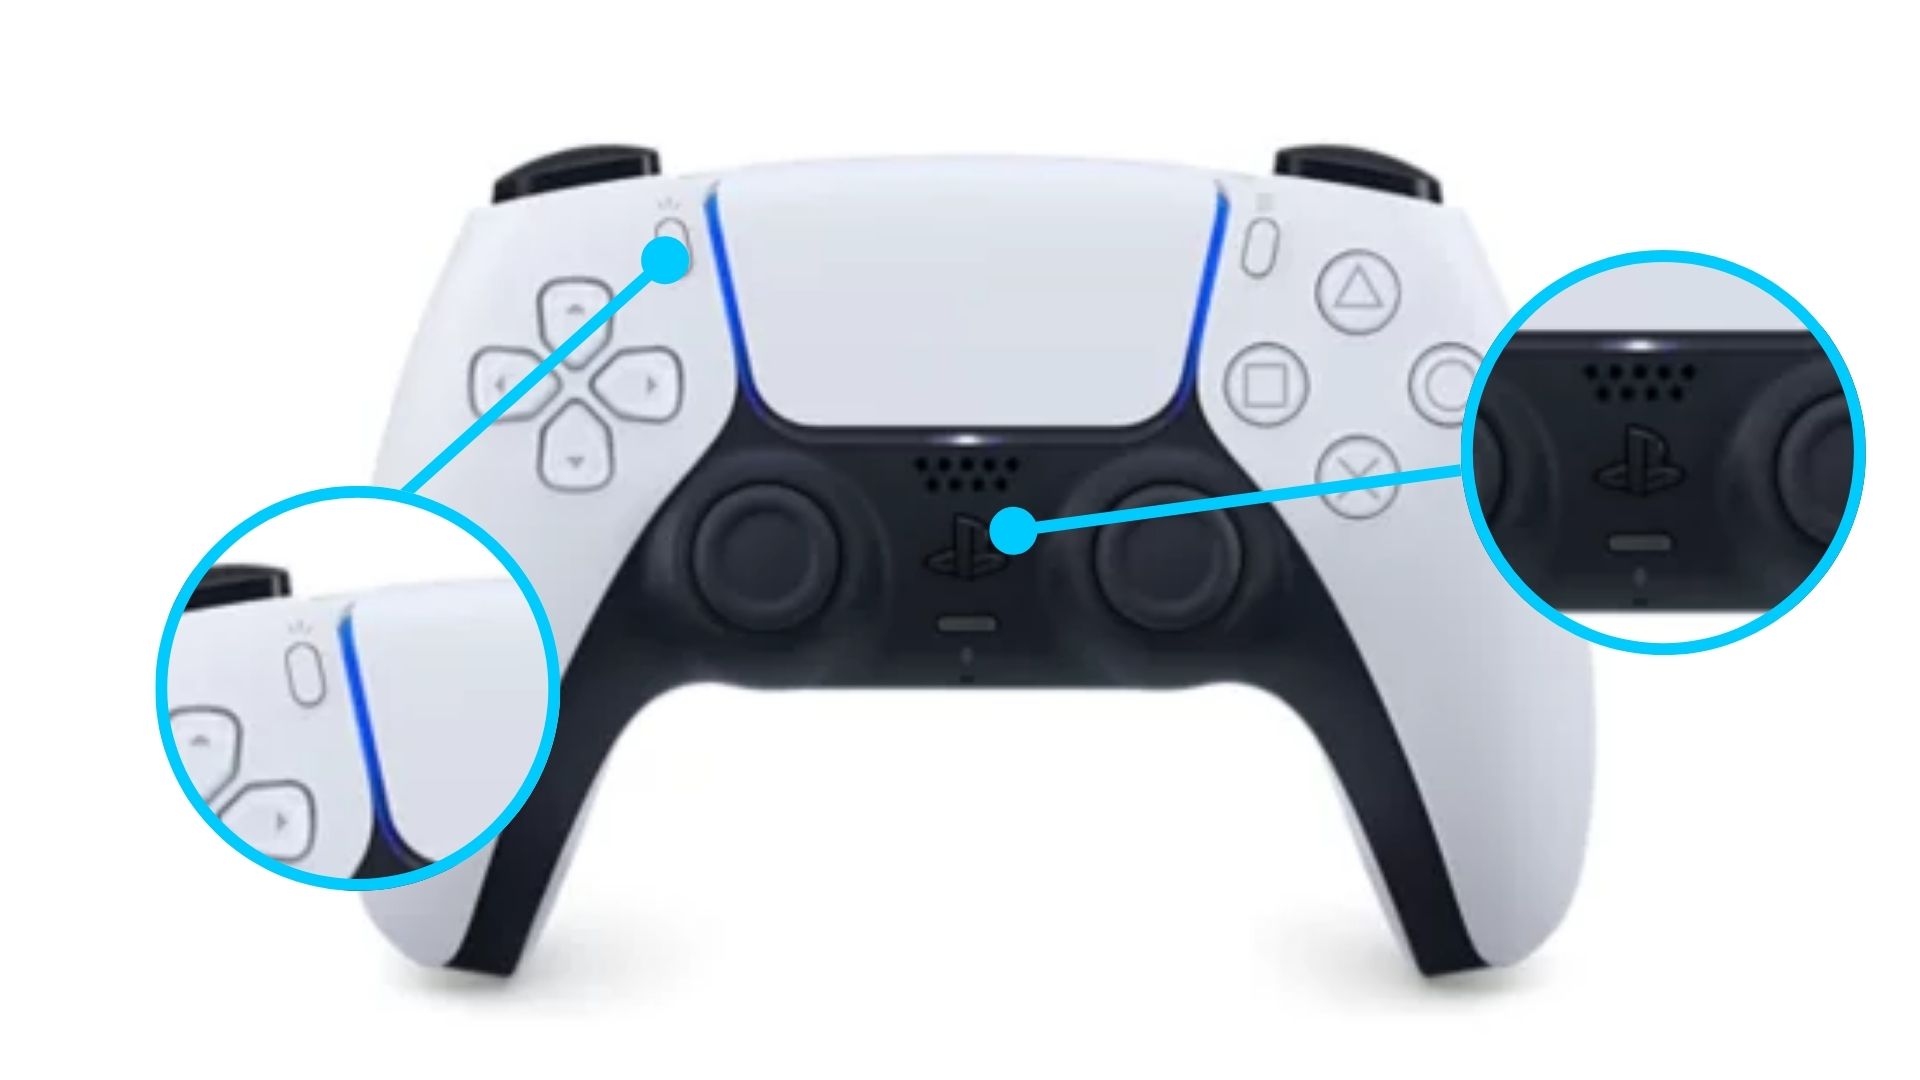
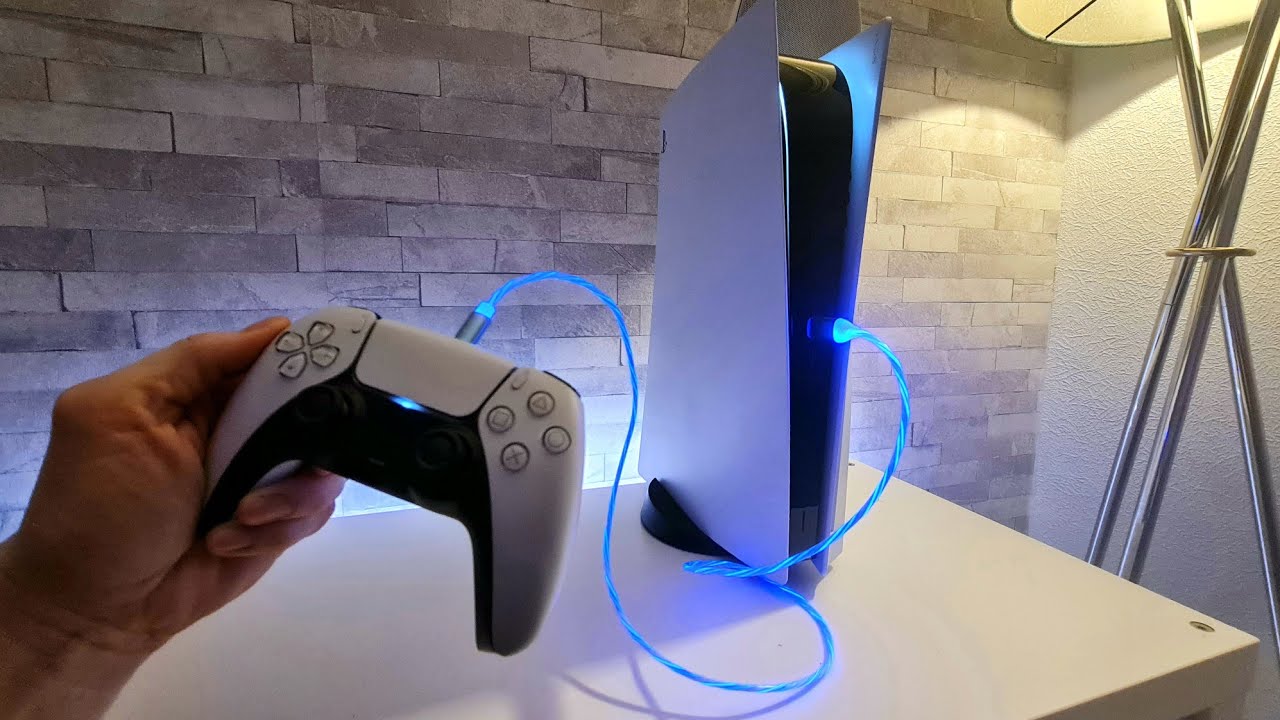
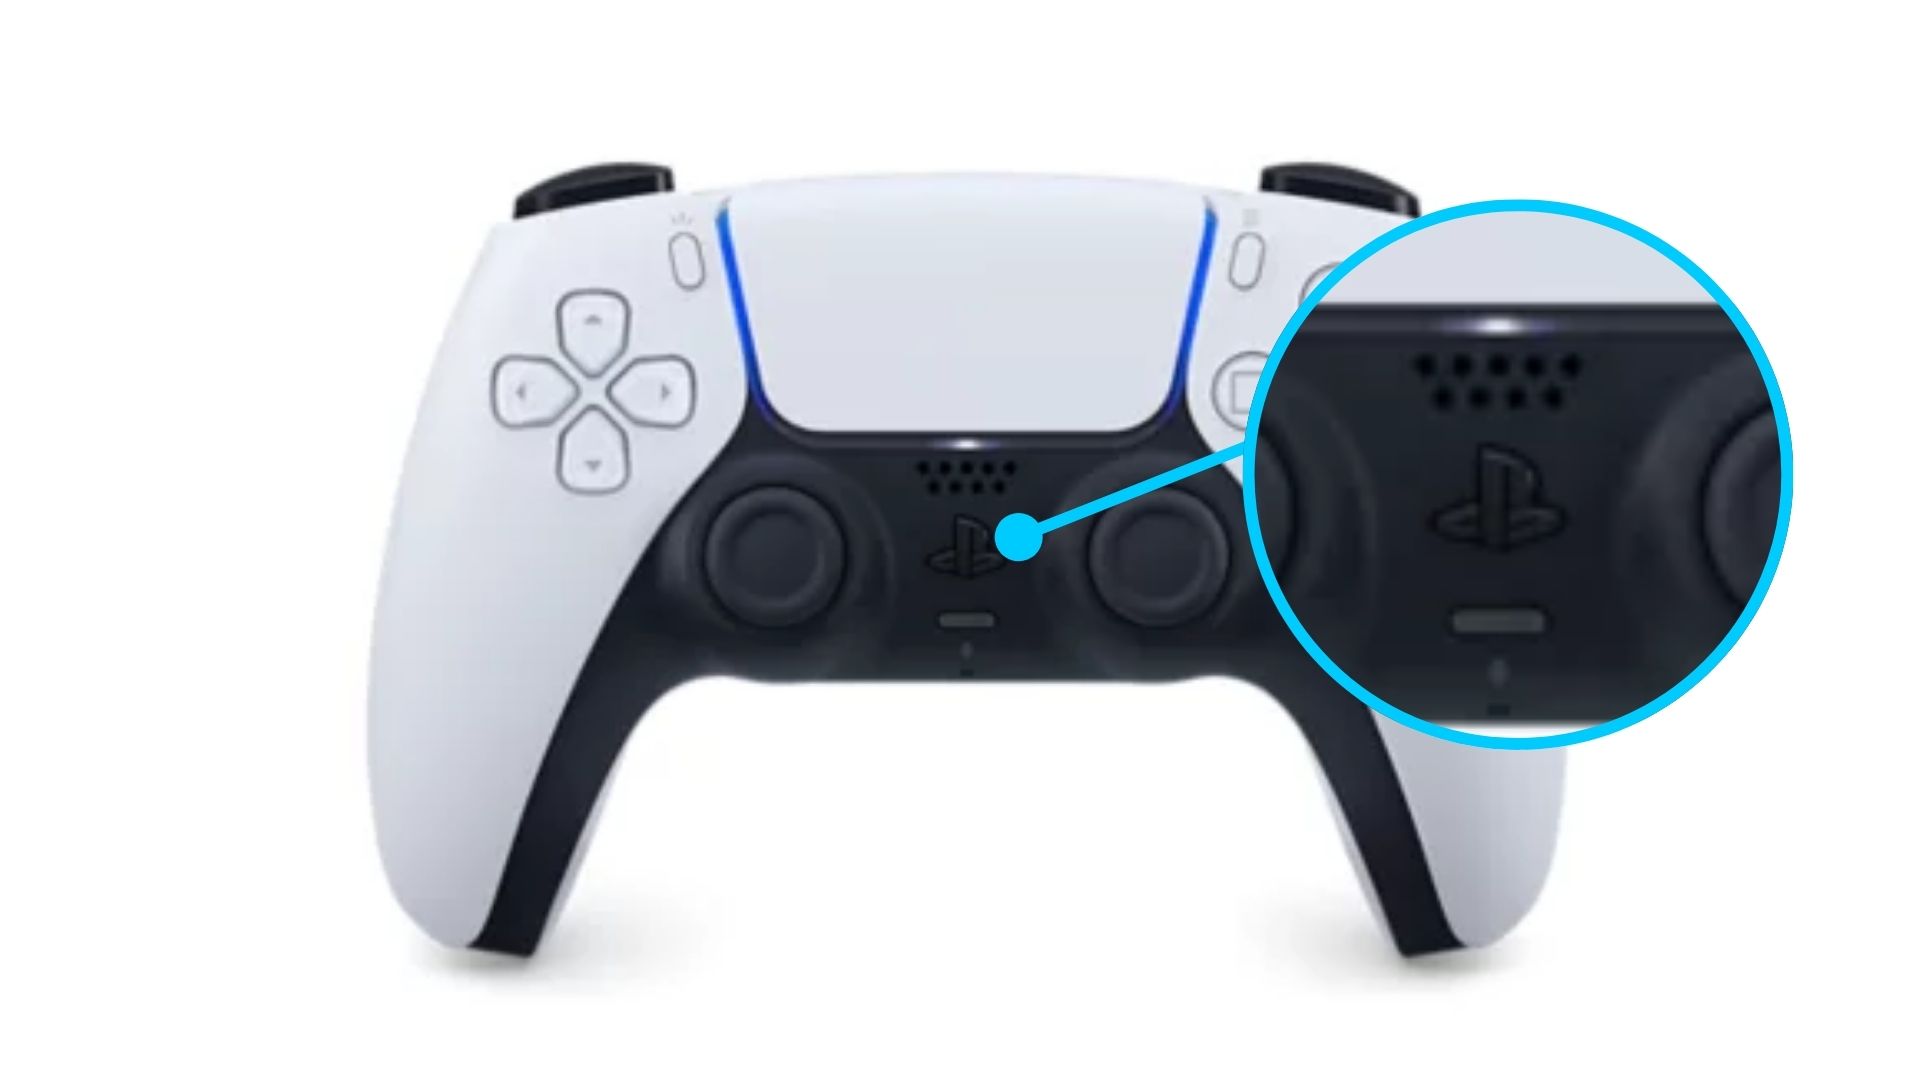
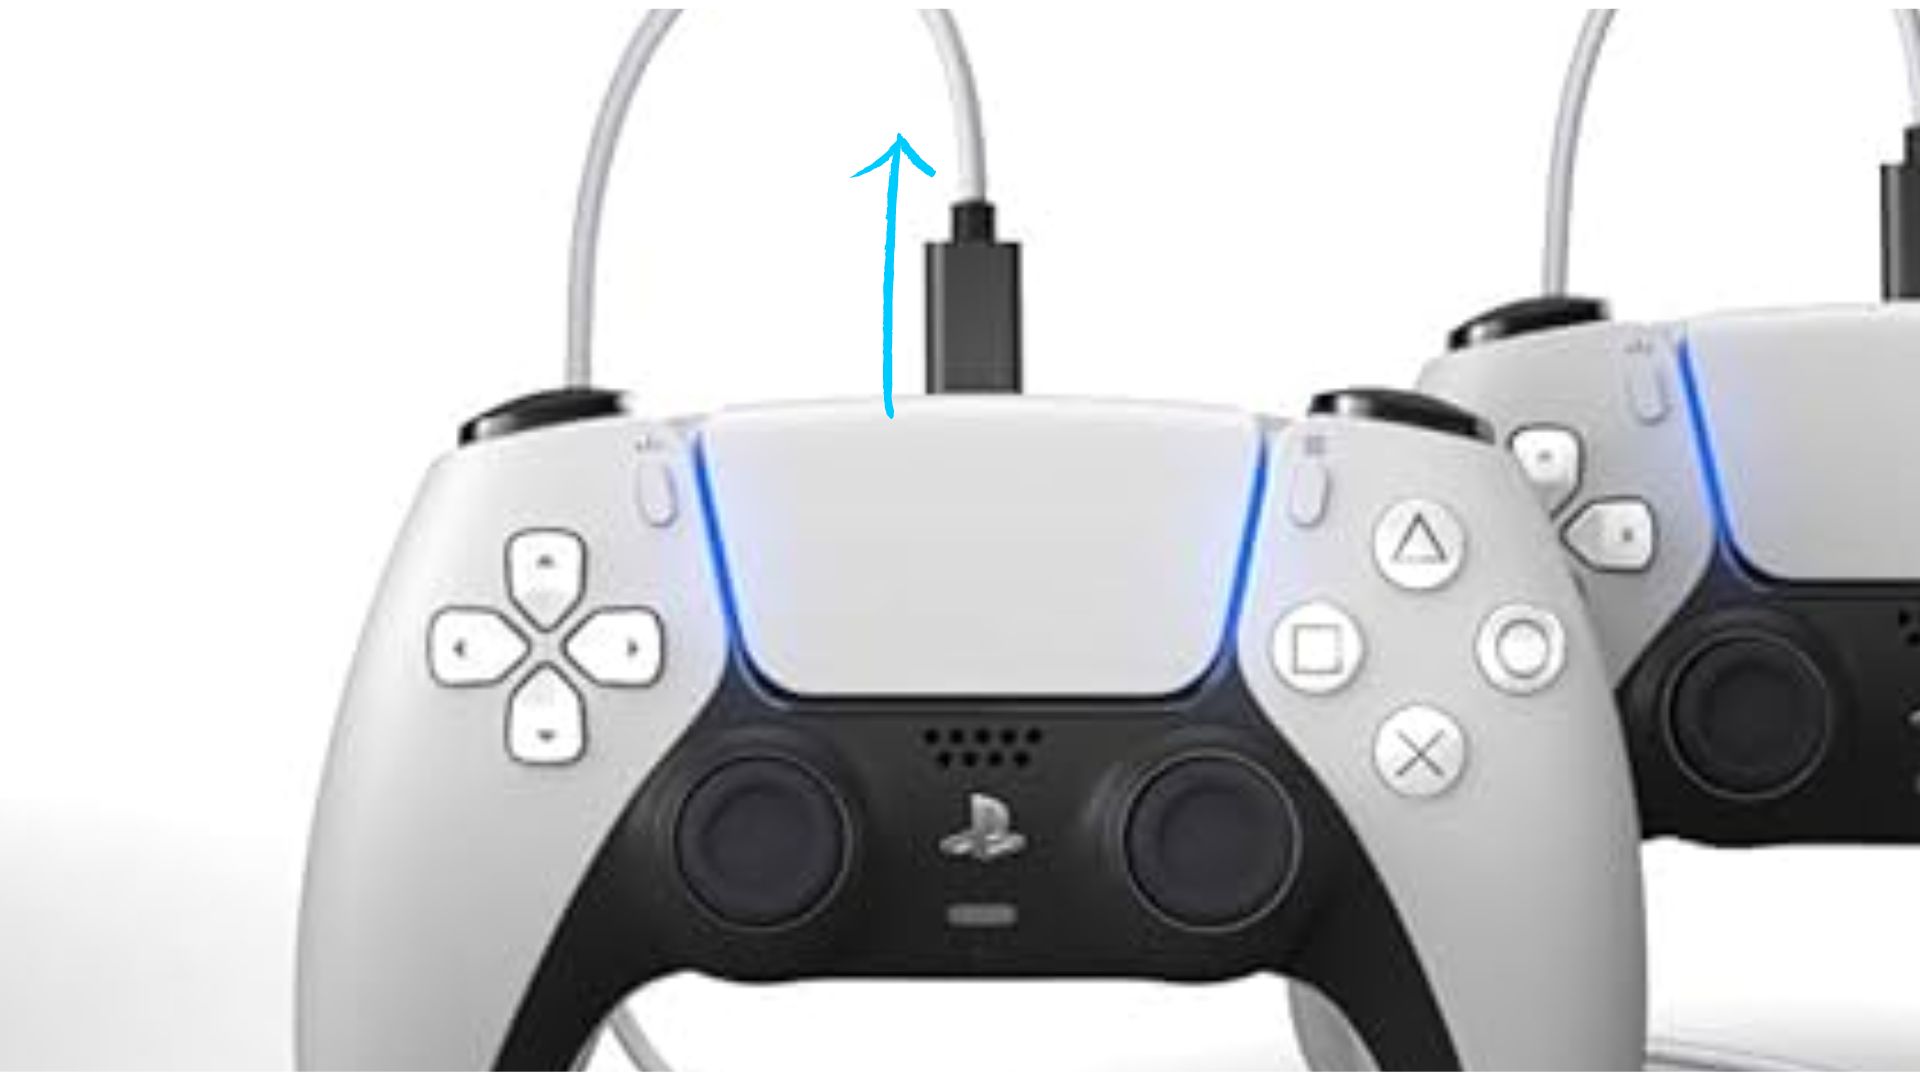


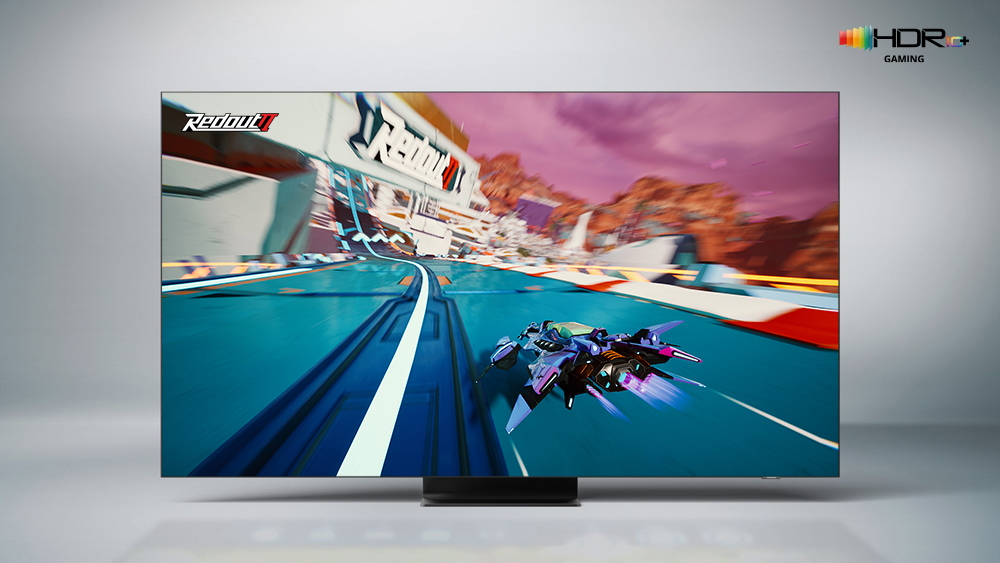


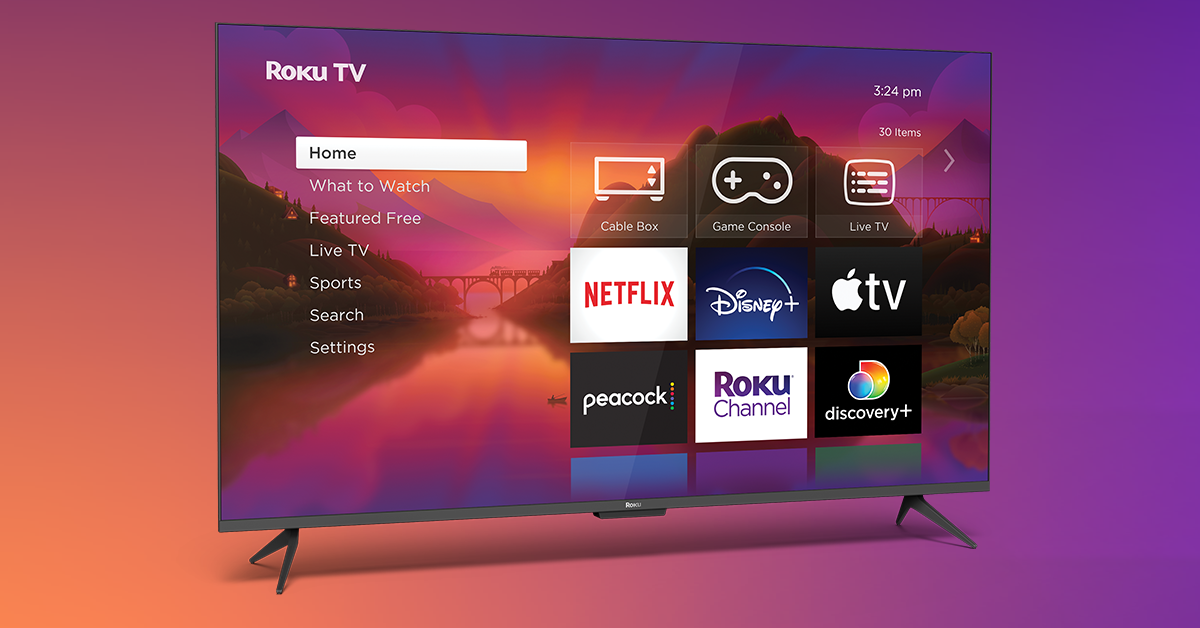
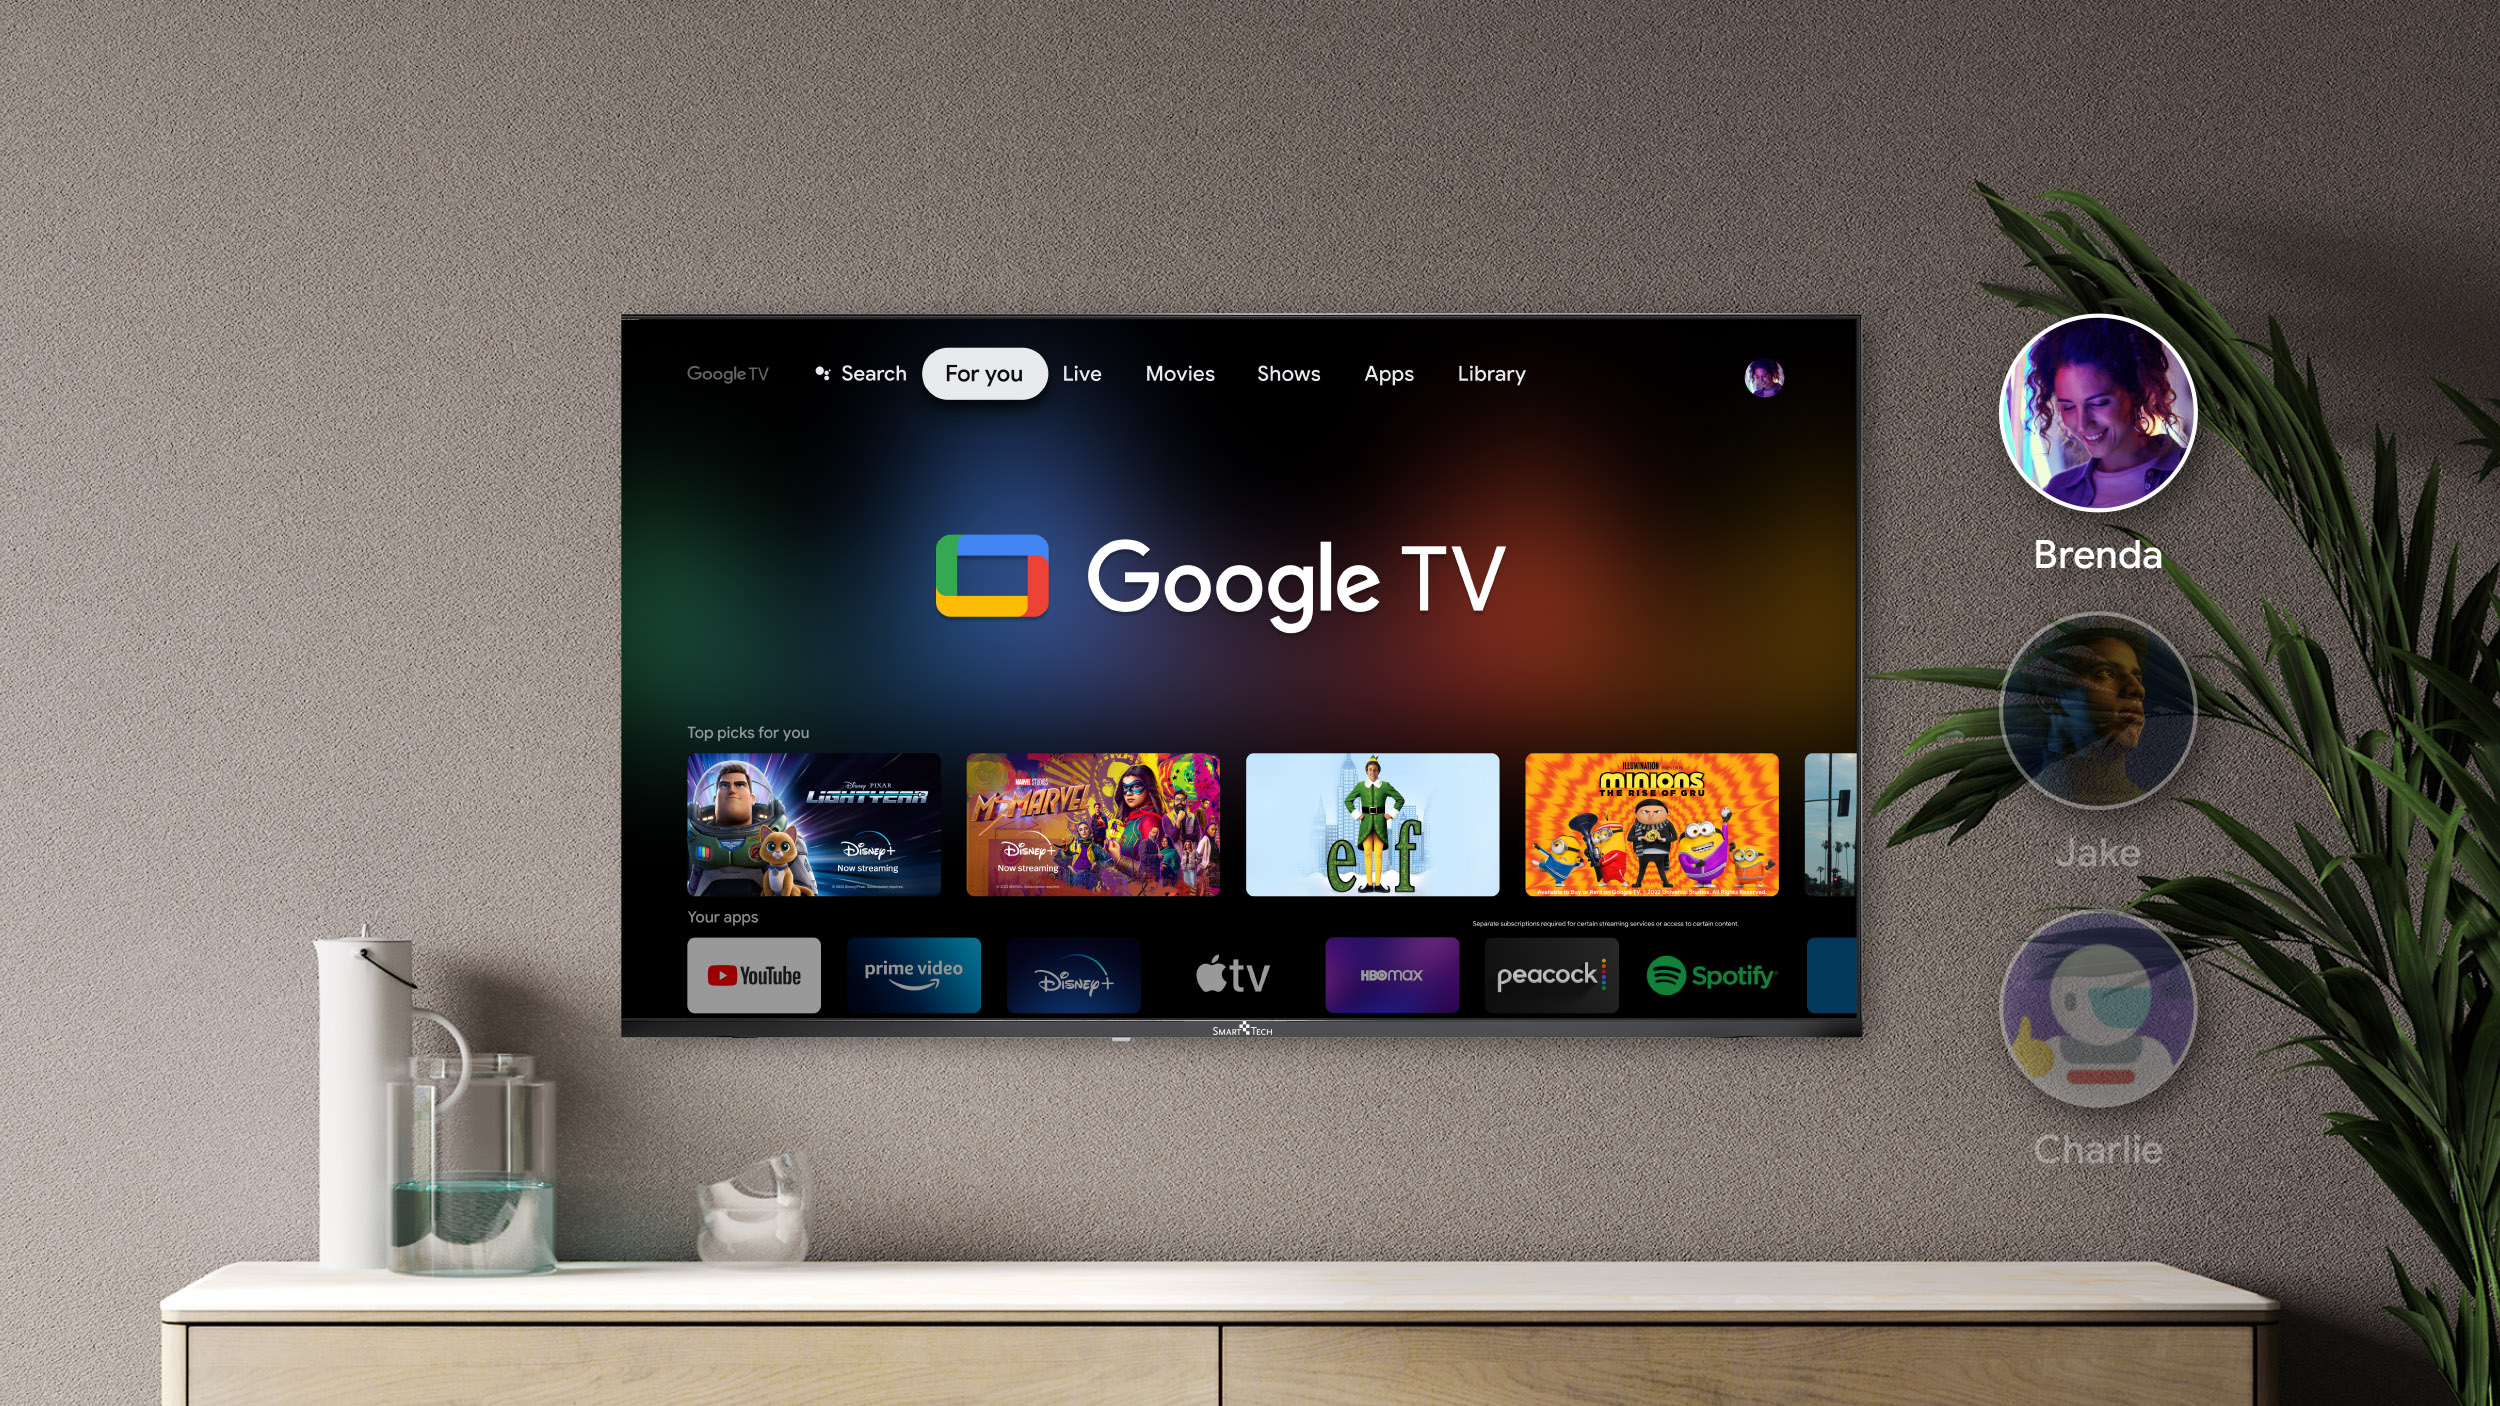
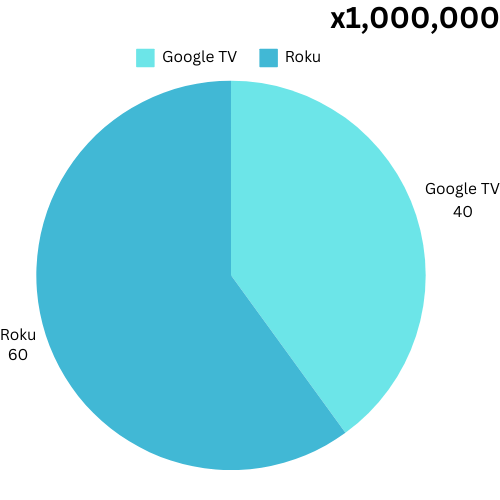
![Tech for teenagers August: Top 5 BEST OLED TV’s in [2024] for around $1000](https://throughtheeyesofateenager.com/wp-content/uploads/2024/08/thumbnail-best-oled-tv-blog-concept.webp)