Power banks can be extremely dangerous. There’s an abundance of stories like this one (by IBTimes): ‘A Thai woman nearly found herself trapped in fire after her power bank exploded beside her while she was asleep.’
This of course makes you worried about the safety of power banks. But fear not, if you use your power bank properly, this wont happen. Using your power bank properly will not only be a lot safer, it will also prolong the power bank’s battery life. And a good place to start might be to stop charging it to 100%. Here’s why.
Quick Summary:
You Shouldn’t charge your power bank to 100% on a regular basis, preferably keep it between 20-80% charge
Don’t make a habit of leaving your power bank charging overnight, doing so can overheat the power bank.
Do the basics like: staying between 20-80% charge, not charging overnight etc. For optimal lifespan.
Lithium-ion batteries perform best between 20-80% charge, because anything above that causes excess stress and anything below might damage the internal chemistry.
Which is why you shouldn’t charge your power bank to 100%, as it will put a lot of extra stress on the battery. Which then in turn poses safety risks and reduces the lifespan of the battery significantly.
Also, don’t leave your power banks charging over night, unless it has extra safety features like overcharge protect. I’ve had a relative who’s phone battery caught fire and caused a house fire a few years ago, due to it being left to charge overnight. It might not be a power bank, but they’re both lithium-ion batteries.
So please, don’t make a habit of leaving it charging overnight. Maybe once-in-a-while is okay, but if it doesn’t have safety features like overcharge protect, it’s best to avoid doing it.
How you should use your power bank instead
Now you know that you shouldn’t charge your battery to 100%, you might be asking yourself: ‘What should I do instead?’.
Well one thing you can do right now is keeping it between 20-80% charge. Making sure that you stay within this reach will significantly improve your power banks lifespan.
According to Varta who’s one of the biggest battery manufacturer in the world: ‘Partial cycles can even prolong the lifetime of your Lithium-Ion battery.’ Or in simpler terms: a not full cycle, so not from 100% to 0% but for example from 80% to 20%, will actually increase the batteries lifespan.
Overcharge protect
As you might have heard, there is a new thing called ‘overcharge protect’, which is meant to be able to protect your power bank’s battery from overcharging.
It works by: ‘using the circuitry to detect when your device’s battery is fully charged and then stop supplying power to prevent any further charging.’ According to this article by brothers4change.com.
Basically, it just makes sure that when the device is fully charged, it will stop charging to prevent damage. Which makes it a lot safer to leave charging, however I still wouldn’t recommend it.
Tips to increase power bank lifespan
So now you know that you shouldn’t charge your power bank to 100%, here are some other tips to improve the lifespan of your power bank:
Don’t go below 20%, going below 20% might damage the internal chemistry. It’s not the end of the world if it does, but just avoid keeping it at 0% for long periods of time. As you might now there have been a lot of cases where batteries have imploded because they were stuck at 0% for so long.
Get a high-quality power bank, getting a high-quality power bank is going to be far more effective at increasing lifespan than any of the other tips. I know it’s expensive, but a good quality power bank will last 5 times as long as a bad quality one. Besides, it’s also a lot safer.
Keep firmware updated, this just makes sure that your power bank is working the best it can. Firmware updates often fix things like: bugs, improve battery management etc.
Doing this will already extend your power banks lifespan drastically, they’re the basics of proper power bank usage. They will make sure your power bank will last at least 2-4 years. Because, we all know how expensive new power banks are these days.
Conclusion
So my recommendation is to not fully charge your power bank, or at least don’t keep it at 100% for extend periods of time. This will only do more harm than good, because it puts excess stress on it’s poor lithium-ion battery.
Other than that, follow these basic tips for proper battery: update firmware, invest in a high-quality power bank, and don’t go to 0%. Again, it isn’t the end of the world if your power bank hits 0%, but it’s best to avoid it or at least don’t keep it at 0% for extended periods of time.
To learn more about power bank safety, click here.
If you’re anything like me, you probably never leave the house without a portable charger. No matter if I’m out on the go, traveling, or just away from home, I do my best to avoid that dreaded low-battery warning.
In 2024, with all the advancements in battery technology, you might still find yourself wondering: Are portable chargers really safe? Could your charger be a ticking time bomb in your pocket?
Quick Summary:
Portable chargers, or power banks, are rechargeable batteries designed to store energy for charging USB devices on the go.
Safety concerns arise from overheating, cheap knockoffs, or damaged units, but risks are low with proper quality chargers.
Proper care, like avoiding overcharging and using reputable brands, ensures safe and reliable performance.
Understanding Portable Charger Overheating: The Basics
The basics of portable chargers overheating is that their internal temperature exceeds safe limits and starts to get overly hot causing sometimes causing a fire.
This is very often due to fast charging, high capacity, or external factors like heat exposure. Low-quality or older models and fast chargers are more prone to overheating due to reduced efficiency or lack of thermal protection.
What Does Overheating Mean?
Overheating occurs when a portable charger’s internal temperature exceeds its safe operating limits. This temperature varies depending on the device, but in general to function safely the temperature has to be between 32°F and 113°F (0°C to 45°C). Temperatures above this range can heavily degrade the internal components and increase safety risks.
Heat in a charger primarily comes from the battery. As energy is stored or discharged, a small amount of heat is generated.
Normally, this heat dissipates harmlessly. But in certain conditions—like extended use or exposure to direct sunlight—can prevent the charger from cooling, which leads to overheating.
Why Do Portable Chargers Heat Up?
Heat is a natural by-product of energy transfer. When charging your device, the power bank converts stored energy into a usable form, a process that inherently generates warmth. So there’s always going to be some heat generated when using a portable charger. However, there are several factors that can amplify this heat:
Charging Speed: Fast-charging models generate more heat than standard chargers.
Capacity: High-capacity chargers store more energy, which can increase heat output.
External Conditions: Hot weather or enclosed spaces reduce a charger’s ability to cool itself.
Get all the latest post on through the eyes of a teenager straight in your inbox.
Subscribe to stay updated, it’s free!
Types of Chargers Prone to Overheating
While overheating can affect any charger, there are certain types that are more at risk than others.
Cheaper models often lack thermal protection, making them more susceptible to overheating.
Older Chargers
Over time, the battery’s efficiency decreases, which can lead to excessive heat buildup.
Fast-Charging Models
Fast-charging generates significant heat, especially during prolonged use.
Warning Signs of Portable Charger Overheating
Warning signs of portable charger overheating include excessive heat, unusual odors, physical deformation like bulging, poor performance, and audible sounds such as hissing or popping. These symptoms indicate potential internal damage or malfunction and should never be ignored.
Spotting these warning signs early can prevent damage and ensure your safety. So here’s everything you need to know about them:
1. Excessive Heat
A portable charger should feel warm during use, but it should never become uncomfortably hot to touch. If it does, stop using it immediately. Then get it checked out or just safely dispose of it at a local e-waste recycle center.
2. Unusual Odors
A burning or chemical smell is a major warning sign. It often indicates internal damage to the battery or other components. This is no joke, if this happens don’t ever try and touch it. The smell can indicate chemicals which could burn through your skin. Instead use gloves if you need to touch it and get rid of it as soon as possible.
3. Physical Deformation
Warped or discolored exteriors suggest the charger has been exposed to excessive heat. Bulging or swelling is particularly concerning, as it may indicate an impending failure.
Here’s everything you should be looking out for:
Warping
Discoloration
Bulging or swelling
Cracks
Leaking substances
4. Poor Performance
If your charger takes longer than usual to charge devices or drains quickly, overheating could be compromising its functionality.
5. Audible Sounds
Hissing, popping, or crackling sounds are clear signs of a malfunction. If you hear these, stop using the charger immediately.
Primary Causes of Portable Charger Overheating
The primary causes of portable chargers overheating include manufacturing defects, exposure to extreme temperatures, overcharging, incompatible accessories, and battery degradation. These factors strain the charger’s components, which increases heat production in the portable charger.
So here’s everything you need to know about these primary causes and how to prevent them.
1. Manufacturing Defects
Not all chargers are the same. Budget-friendly options often skimp on safety features like overheat protection. Poor-quality components can of course also make these chargers prone to overheating.
This is why I always recommend getting a good quality portable charger so you don’t have to worry about this. It might be a lot more expensive, but trust me it’s worth it. If you want to learn more on how to choose a safe portable charger, then click here.
2. Environmental Factors
Hot weather or direct sunlight can quickly push a charger beyond its safe temperature range. Similarly, using a charger in extremely cold conditions can stress the battery, increasing the risk of overheating once it warms up.
So this is exactly how to keep your charger safe from any environmental factors:
Environmental Factor
How to Protect Your Charger
Extreme Heat
Keep it out of direct sunlight and hot areas.
Extreme Cold
Avoid leaving it in freezing temperatures.
Water or Humidity
Store it in a dry place and use waterproof cases.
Dust and Dirt
Clean ports regularly and keep it in a case.
Physical Impact
Handle with care and avoid dropping it.
3. Overcharging
While most modern chargers stop delivering power once fully charged, older or poorly designed models may continue to draw energy. This creates unnecessary heat and can shorten the battery’s lifespan.
I wouldn’t worry too much about it if you have a good quality portable charger from a trusted brand. However if you don’t, then this is something too look out for.
4. Incompatible Accessories
Using a low-quality or mismatched cable can lead to electrical resistance, which generates additional heat. Which is why you should always use the manufacturer’s recommended cables and adapters.
To make it simpler, here are a few cables that I personally recommend and which will work with pretty much any portable charger. These are super fast and efficient as well as being completely safe and from trusted brands.
Lithium-ion batteries degrade over time, losing their ability to efficiently store and discharge energy. As they age, they are more and more likely to overheat during use.
Potential Risks and Dangers of Overheating
The potential dangers of portable chargers overheating include device damage, fire hazards, personal injury, and environmental harm. Excessive heat can damage circuits, cause fires or explosions, lead to burns, and release harmful chemicals if chargers are disposed of improperly.
The dangers of overheating extend far beyond minor inconveniences. Here’s exactly what’s at stake:
1. Device Damage
Excessive heat can damage the internal circuits of both the charger and the connected device. This may lead to performance issues or total failure. However, this is probably the best outcome of your charger overheating.
2. Fire Hazards
In extreme cases, overheating can cause lithium-ion batteries to catch fire or explode. This is rare but not unheard of, especially with low-quality chargers.
This is no joke, between 2021 and 2022 there have been a reported 38 deaths in the US due to portable chargers overheating. Keep in mind this is an estimate I got from various sources so it might be even more or less.
3. Personal Safety
An overheated charger can cause burns or injuries if handled improperly. Even indirect exposure, such as a fire caused by the charger, poses a serious risk. As I said earlier there are around 40 reported deaths in the US due to portable chargers.
4. Environmental Impact
Improper disposal of damaged or overheated chargers can harm the environment. Lithium-ion batteries contain chemicals that are hazardous when released into soil or water.
So if your portable charger does happen to get damaged, then dispose of it properly in a local e-waste center.
What to Do If Your Portable Charger Overheats
If your portable charger overheats, disconnect it immediately, let it cool on a non-flammable surface, and inspect for damage. You can also contact the manufacturer for a replacement if needed, and report significant safety risks to consumer protection agencies.
Here’s everything you need to do step-by-step:
1. Disconnect Immediately
The first step is to unplug the charger from your device and power source. Handle it carefully, as it may be very hot to touch.
2. Let It Cool
Place the charger on a non-flammable surface in a well-ventilated area. Allow it to cool naturally—never attempt to cool it rapidly with water or ice.
3. Inspect for Damage
Once cooled, check the charger for visible signs of damage. If it appears compromised, stop using it and dispose of it safely. Here are the best ways to dispose of your portable charger after it’s been damage. These ways are safer for you and the environment, just be sure to never ever dispose of it in regular bins:
Hazardous Waste Facilities Take the malfunctioning charger to a local hazardous waste disposal site for safe handling.
Specialized E-Waste Recyclers Look for e-waste recycling centers equipped to handle damaged or overheated electronics.
Manufacturer Take-Back Programs Contact the charger’s manufacturer to see if they offer a recycling program for damaged products.
Battery-Specific Drop-Off Points Use battery recycling bins in stores or community centers that accept damaged lithium-ion batteries.
Mail-In Services for Damaged Electronics Use a mail-in program like Call2Recycle, which handles malfunctioning batteries and chargers.
4. Contact the Manufacturer
If the charger is under warranty, reach out to the manufacturer for a replacement or repair. Provide photos and a description of the issue to speed up the process.
5. Document and Report
If the overheating posed a significant safety risk, consider reporting it to consumer protection agencies. This helps hold manufacturers accountable and ensures safer products in the future.
Conclusion
Portable chargers are indispensable in today’s connected world, but their convenience comes with some risks. Understanding why overheating happens, recognizing the warning signs, and adopting safe charging habits can protect you and your beloved devices from harm.
By investing in quality chargers, storing them correctly, and following proper usage guidelines, you can enjoy all the benefits of portable power without the worry.
Yes, using a charger to power devices while it’s actively recharging itself can generate extra heat. This is because the charger is performing two energy-intensive tasks simultaneously—charging itself and discharging energy to your device. To minimize overheating, avoid this practice whenever possible.
If your charger gets wet, do not use it or connect it to a device. Dry it thoroughly and let it sit in a well-ventilated area for at least 48 hours. If there are signs of damage, such as rust or residue, or if the charger becomes hot during use, it’s safer to replace it.
Not necessarily, but they can generate more heat because they store and transfer more energy. High-quality large-capacity chargers are designed with better cooling systems to mitigate this risk. Always choose models with safety features like thermal protection to handle higher capacities safely.
Portable chargers have become essential in 2024, keeping phones, tablets, and gadgets powered when outlets aren’t available. However, safety concerns are on the rise, with 37% of consumers expressing worries about potential risks.
While these devices are total lifesavers during commutes, trips, or busy days, not all portable chargers are the same.
This article explores the safety of portable chargers, helping tech lovers, frequent travelers, and anyone with battery anxiety make informed decisions. Learn about potential risks, how to choose a safe charger, and best practices to stay powered up safely.
Quick Summary:
Portable chargers store energy in rechargeable batteries and allow you to charge devices via USB. Which makes them ideal for travel, outdoor activities, and emergency situations.
Safety risks include overheating, short circuits, and explosions, but following safety guidelines and selecting quality brands can reduce these hazards.
To choose a safe charger, look for certifications like UL or CE and prioritize brands with a good reputation. Also ensure the charger has safety features like overcharge protection.
A portable charger, is a compact backup battery that stores energy to recharge devices like phones and tablets on the go. They vary by type, from compact chargers for short trips to high-capacity, solar, or wireless options. With all of them using rechargeable batteries to transfer power efficiently.
What Exactly Is a Portable Charger?
A portable charger is a compact device that stores electrical energy to recharge your gadgets. It basically functions as a backup battery, ready to provide juice to your phone or tablet whenever you’re away from an outlet. These chargers are essentially power banks, designed to give you peace of mind when your device is running low. If you want to know more about portable chargers and the difference between portable chargers and power banks, click here.
Portable chargers come in all shapes and sizes, and their functionality can vary. From solar charged portable chargers to simple power banks, they all have a rechargeable battery inside that charges your devices.
Types of Portable Chargers
Not every portable charger is made for the same purpose. There are different types that serve various needs. Here are a few notable ones you should know about:
Compact Chargers: These are the lightweight, everyday chargers you toss into your bag or pocket. They typically hold enough power to charge your phone once or twice and are great for short trips.
High-Capacity Chargers: Larger in size, these chargers can power devices multiple times over. If you’re the type of person who needs a charger for your phone, tablet, and laptop, this type is ideal.
Solar Chargers: Perfect for outdoors, solar chargers harness sunlight to recharge. While they aren’t the fastest option, they are excellent for hiking or camping when no outlets are around.
Wireless Chargers: These chargers let you power up without plugging in a cable. They’re perfect for devices that support wireless charging, but keep in mind that they tend to be slower.
How Do They Work?
Portable chargers use lithium-ion or lithium-polymer batteries to store power. When plugged into an outlet, the charger stores energy. Once it’s full, it can transfer that energy to your device when you need it.
Simple, right? But there’s more to it. Inside these devices, there are circuit boards that regulate how power flows, making sure your phone doesn’t get overloaded.
Get all the latest post on through the eyes of a teenager straight in your inbox.
Subscribe to stay updated, it’s free!
Understanding how they work can help you appreciate the importance of choosing a good, safe product.
Potential Safety Risks of Portable Chargers
Portable chargers are generally safe if purchased from reputable brands, as these include safety features like overcharge protection. Avoid cheap or counterfeit chargers, as they often lack these safeguards and can overheat, short circuit, or even pose fire risks.
So here’s everything you need to know to stay safe when buying a portable charger:
Lithium-Ion Batteries: The Double-Edged Sword
Most portable chargers use lithium-ion batteries, which are popular for their ability to store a lot of energy in a compact form. However, lithium-ion batteries can be dangerous if mishandled.
If one of these batteries is punctured or overcharged, it can overheat, potentially leading to a fire or explosion.
It’s essential to purchase your charger from a reputable brand to avoid such risks. Cheap, off-brand chargers might cut corners when it comes to quality control, which is a risk you don’t want to take.
Overheating: A Red Flag
A little warmth during charging is fine, but if your portable charger is getting too hot to touch, than you should immediately unplug it. Overheating is a big issue because it can damage the charger or cause it to catch fire.
The best way to avoid overheating is to buy a charger with built-in safety features like overcharge protection and thermal sensors.
Here are some of my best tips to avoid buying an unsafe charger:
Choose certified chargers: Look for certifications like UL or CE for safety assurance.
Stick to trusted brands: Avoid cheap, off-brand options without a reputation for quality.
Check the specs: Ensure the voltage and wattage match your device’s requirements.
Buy from reliable retailers: Shop at trusted stores to avoid counterfeit products.
Counterfeit Chargers: A Major No-No
While you may find counterfeit chargers on bargain websites or in discount stores, they’re not worth the risk. These products may look like just like the real ones, but they often lack crucial safety features.
Poor-quality components, faulty wiring, and lack of proper testing can lead to short circuits, overheating, or even fires. Stick to trusted brands and retailers to ensure you’re getting a quality product. Here are some of my favourite brands and why you should check them out:
Brand
Why You Should Check Them Out
Anker
Known for durable chargers with safety features like overcharge protection and advanced testing.
Belkin
Offers certified chargers with excellent build quality and compatibility with multiple devices.
Aukey
Combines affordability with reliable performance and essential safety certifications.
Apple
Perfect if you have an iPhone, with chargers designed specifically to meet their performance needs.
Samsung
Trusted for high-quality chargers optimized for their own devices and many other brands.
Short Circuit Risks
A short circuit happens when electricity flows along an unintended path, which can cause the device to malfunction.
A cheap charger or damaged cables can easily cause a short circuit. Even though most modern chargers have built-in protections against this, it’s always best to inspect your charger and cables for damage before use. You don’t have to get to paranoid over it, but just check every now and then.
Manufacturing Issues
Even reputable brands occasionally slip up. Defects during manufacturing can lead to faulty chargers, which may pose safety risks. It’s important to always stay updated on any product recalls if something happened to be defect. Also check for reviews or certifications, if you’re unsure about the authenticity of a charger.
How to Choose a Safe Portable Charger
To choose a safe portable charger, look for safety certifications like UL, CE or FCC. Also choose trusted brands and beware of too-good-to-be-true deals, and look for safety features one the manufacturer’s website or the packaging.
So, here’s everything you need to keep in mind:
1. Look for Safety Certifications
Always check for certifications like UL, CE, or FCC. These labels indicate that the charger has been tested for safety and meets specific standards. A charger without these certifications is a red flag.
If you can’t find these certifications on your portable chargers, then try to find it on the packaging or the manufacturer’s website. You can also search for them in their databases like the FC searchable database, or the UL searchable database.
CE certification does not have it’s own searchable database, so you’ll have to look on the packaging for that one. However, if you portable charger has a FC and UL certificate, then I’d say it’s pretty safe.
These are all the logo of the certifications you should look out for. If you don’t see any of these labels on your portable charger, than that’s an indication that they haven’t been properly tested.
2. Choose Trusted Brands
Brands like Anker, RAVPower, and Belkin have built a reputation for high-quality, safe products. They undergo extensive testing, and you can rely on their safety features. Investing in a well-known brand might cost a bit more, but it’s worth it for the peace of mind.
To make it even easier, here’s a quick list of some more of my favourite portable charger brands:
Aukey
RavPower
Zendure
Baseus
Goal Zero
3. Understand the Battery Capacity
Don’t just go for the highest capacity charger you can find. Higher capacity doesn’t always mean better, especially if it results in a bulky, difficult-to-carry charger.
Consider how many times you need to charge your device and choose a charger that fits your needs. A 5,000mAh charger is perfect for a backup for your phone, while a 10,000mAh charger might be more suitable for tablets. For laptops I’d recommend somewhere between 20,000- and 50,000 mAh. To learn more about how many mAh your laptop needs, click here.
4. Look for Safety Features
Safety features like overcharge protection, overheat sensors, and short-circuit prevention are non-negotiable when it comes to portable chargers. These features keep your device and your charger safe, especially when you’re charging overnight or in a pocket.
If a portable charger doesn’t have this, I’d advise you to look somewhere else. This ensures your phone and charger (and you) stay safe.
5. Beware of Too-Good-to-Be-True Deals
If the price is too low for the specs or the brand doesn’t have a good track record, consider it a warning. Counterfeit chargers are often priced significantly lower than their legitimate counterparts. Stick to what you know, and be wary of rock-bottom prices.
Best Practices for Portable Charger Safety
Now that you know how to pick a safe charger, let’s cover how to keep it safe and functioning well:
1. Store Your Charger Properly
Heat is one of the biggest enemies of portable chargers. So, store them in a cool, dry place. Also avoid leaving them in direct sunlight or near heat sources like radiators or ovens.
Here are some places I’d recommend storing your charger to avoid it overheating:
Desk drawer
Nightstand
Backpack pocket
Laptop bag
2. Avoid Overcharging
While most modern chargers have overcharge protection, it’s still a good practice not to leave them plugged in for too long. Charging overnight occasionally is fine, but don’t make a habit of it.
3. Check Cables and Ports Regularly
Inspect your charger and cables for any visible signs of damage. If you notice any fraying or wear on the cables or connectors, it’s time to replace them.
Never use a damaged charger or cable. This is one of the easiest ways to cause either a short circuit or to get electrocuted. Trust me, you don’t want 20 V going through your body while trying to plug in your phone.
4. Follow Manufacturer’s Guidelines
Manufacturers often provide guidelines on optimal charging conditions. For instance, they might advise charging between 20% and 80% for longer battery life. Stick to these recommendations if you want to get the most out of your portable charger.
To make it easy here are some of my recommendations that will ensure the safety and longevity of your portable charger:
Recommendation
Details
Avoid extreme temperatures
Keep the charger in a cool, dry place to prevent overheating or damage.
Don’t overcharge
Unplug the charger once it’s fully charged to extend battery lifespan.
Use the right cables
Ensure the cables are compatible and not worn out to avoid malfunctions.
Store it properly
Store the charger in a safe place, away from sharp objects or moisture.
Regular maintenance
Charge the battery regularly, even if it’s not in use, to keep it active.
5. When to Replace Your Charger
If your portable charger is bulging, leaking, or showing signs of overheating, it’s time to throw it in the bin. Don’t try to fix a damaged charger yourself, as this can be extremely dangerous.
Myth-Busting Portable Charger Safety
Let’s tackle some common myths you might have heard about portable chargers.
Myth 1: Portable Chargers Are Banned on Planes
False! As long as your portable charger is under 100Wh (watt-hours), it can be carried onto an airplane no problem. Most portable chargers fall well within this limit.
Do always check the airline’s specific rules, as it might be different in your country.
Myth 2: Cheap Chargers Are Just as Safe as Expensive Ones
While it might be tempting to go for the cheapest option, you’re often sacrificing safety. Counterfeit chargers or poorly made products can be dangerous. Quality chargers from trusted brands are worth the extra investment.
Myth 3: All Chargers Overheat
Overheating isn’t a given. If your charger is overheating regularly, it might be a sign of a defective product. A good charger will always stay cool during regular use.
Are Portable Chargers Safe – Conclusion
Portable chargers are, a safe and practical solution to keep your devices powered up on the go. However, with so many options available, it’s crucial to understand the risks involved.
By choosing a reputable charger, and following safety guidelines, you can enjoy the convenience of always having power without the worry.
So, whether you’re heading to school or traveling don’t let a low battery ruin your day. Find a safe, reliable portable charger, and power up with confidence.
Portable chargers generally last between 2 to 3 years, depending on usage and care. Factors like how often you charge it, how well you maintain it, and the environment in which it’s used (extreme temperatures, moisture, etc.) can affect its lifespan. Over time, the battery’s capacity will decrease, so you might notice that it holds less charge after a couple of years of heavy use. To maximize the lifespan, avoid letting the battery drain completely or staying at 100% for too long.
Yes, you can charge some laptops with portable chargers, but there are limitations. Laptops usually require more power than phones or tablets, so you’ll need a high-capacity power bank with a USB-C or specialized laptop charging port. Make sure the charger supports the required wattage for your laptop, as most standard power banks won’t provide enough juice for a full charge. Be sure to check the specifications for both your laptop and charger to ensure compatibility.
It’s generally safe to leave a portable charger plugged in overnight, especially if the charger has built-in safety features like overcharge protection. However, to extend the lifespan of the charger and reduce any risk of overheating, it’s better not to leave it plugged in for prolonged periods once it’s fully charged. Modern power banks typically stop charging once they reach full capacity, but it’s always a good idea to check the product’s manual for safety guidelines.
Imagine this: you’re in the middle of an important school project, fully focused, and then—bam—a low battery warning pops up. No power outlet in sight, and your laptop’s about to die. It’s a scenario we’ve all dreaded, but there’s good news: portable chargers aren’t just for phones anymore.
These handy devices have evolved to handle laptops too, giving you a reliable backup when you’re on the go. In 2024, portable power solutions are more popular than ever, but can they really keep your laptop running?
Let’s explore everything you need to know to stay charged and stress-free, no matter where you are.
Quick Summary:
A portable charger for laptops provides extra power on the go, typically using USB-C PD technology for fast, efficient charging.
Laptop-specific power banks require higher wattage and capacity compared to phone chargers, with models ranging from 30W to 150W.
To choose the right charger, consider your laptop’s power needs, capacity requirements, and any additional features like fast charging or multiple ports.
Understanding Laptop Portable Chargers: The Basics
So can portable chargers charge your laptop? Yes, portable chargers can charge your laptop, but it must be a laptop-compatible power bank with higher voltage (12V-20V) and output (30W-150W).
This is so it can meet your laptop’s power needs. Standard phone chargers won’t work due to insufficient power capacity and output.
If you’re just looking at mAh, then I’d say a portable charger between 20,000 mAh and 50,000 mAh will do. Anything less than that, like 10,000 mAh won’t be enough to fully charge your laptop.
What Is a Portable Charger for Laptops?
A portable charger for your laptop is basically a bigger version of the ones you use for your phone. This is so it can be more powerful so it actually has enough juice to charge your laptop.
Get all the latest post on through the eyes of a teenager straight in your inbox.
Subscribe to stay updated, it’s free!
These bad boys can range in size, and capacity depending on the brand and model. But they all have this in common: they store power in a high-capacity battery and transfer it to your laptop via a cable.
So, whether you’re sitting on the bus or chilling in a coffee shop, a portable charger is going to be your bestfriend.
Standard Power Banks vs. Laptop-Compatible Chargers
Here’s where things get a little tricky. Standard power banks, the ones most people use for charging their phones, won’t cut it for laptops. Laptops require much more power to charge efficiently.
While a typical phone charger outputs around 5V, laptop chargers can need anywhere from 12V to 20V. So, if you want to charge your laptop, you’ll need a charger that can handle this higher output.
Laptop-specific chargers are built with more powerful batteries and outputs to meet the needs of larger devices. It’s like trying to fill a huge swimming pool with a tiny garden hose versus a fire truck’s water supply. One will take forever, while the other will do the job quickly.
The Key Requirements for Laptop Charging
When choosing a portable charger for your laptop, there are some technical things you need to keep in mind.
First, you need to make sure the charger has enough wattage to keep your laptop powered up. You also want to consider the connector type (USB-C, barrel plug, etc.), and the charger’s capacity.
Look for one that provides a higher output, typically between 30W and 100W. This ensure you’re giving your laptop enough power. If you have a gaming laptop or something with heavy specs, you’ll need a charger that can handle even more juice. Some gaming laptops will need up to 150W, depending on the model.
Here are all the key requirements you need to keep in mind:
Sufficient Wattage – Ensure the power bank can deliver enough wattage for your laptop, typically around 30 to 100 Watts. Gaming laptops or high-performance models may require up to 150W.
Compatible Connector Type – Verify that the power bank supports your laptop’s input type (e.g., USB-C, barrel plug).
High Capacity – Opt for a power bank with a large capacity to support longer usage and multiple charges.
High Output – Look for a power bank that offers a high output to keep your laptop powered efficiently.
Laptop-Specific Needs – Consider your laptop’s unique power requirements, especially if it has heavy specs or gaming capabilities.
Compatibility Factors for Laptop Charging
So, to charge your laptop, ensure the portable charger matches your laptop’s wattage needs (30W-100W+) and connector type (USB-C PD or proprietary). Check your laptop’s specs to confirm compatibility, especially if it uses older connectors or specific charging tech like MagSafe.
You should be able to find your laptop’s charging requirements in the device manual or on the manufacturer’s website.
Wattage Requirements for Different Laptops
Not all laptops are created equal when it comes to power requirements. A simple ultrabook might only need 30W to charge, while a powerhouse gaming laptop could require 100W or more.
So, before you go shopping for a portable charger, you’ve got to know how much wattage your laptop needs. If your charger doesn’t meet those needs, it won’t charge your laptop efficiently—if at all.
To make it easy, here’s a table of the wattage requirements for each type of laptop. However, this is only a estimate, so I would advice you to look at the manufacturer’s website for precise wattage requirements.
Laptop Type
Wattage Requirement
Ultrabooks
30W – 60W
MacBooks (newer models)
30W – 60W
Gaming Laptops
100W+
Older MacBooks (pre-USB-C)
60W – 85W
Dell / Lenovo Laptops
45W – 90W
For example, MacBooks tend to require between 30W to 60W, while something like a gaming laptop may need 100W or more. A portable charger that can provide 60W might work just fine for some laptops, but won’t cut it for others. Check your laptop’s specs before buying a charger.
USB-C Power Delivery (PD) Technology
This is where things get super convenient. If you’ve got a newer laptop (especially one from Apple or Dell), it likely uses USB-C Power Delivery (PD).
USB-C PD allows your laptop to charge faster through a single cable, and many modern portable chargers support this tech.
USB-C is fast, efficient, and universal, which makes it a great option for charging on the go. Many of today’s portable chargers use USB-C PD to deliver enough power to keep your laptop running 24/7. Without needing any separate cables or adapters.
Connector Types and Compatibility
Now, here’s where you’ll need to pay extra attention. Not all laptops use USB-C for charging. While many new models use USB-C PD, older laptops, and some other brands still rely on proprietary barrel connectors.
Especially if you’re using a Dell, Lenovo, or an older Apple laptop, you may need a charger that comes with different connector types. Or maybe even a special adapter.
Just for perspective, here’s a list of just the most common laptop connector types:
USB-C / USB-C Power Delivery (PD)
Barrel Connector (Round Charging Port)
MagSafe (Apple)
DC-In (Dell, Lenovo, HP)
Proprietary Connectors (Various brands)
Thunderbolt 3/4 (USB-C variant for high-speed charging)
Mini-USB / Micro-USB (Older devices)
Before you buy, make sure to check what kind of connector your laptop uses. Some chargers come with interchangeable tips, so they’ll work with multiple devices, while others are specific to certain brands.
You don’t want to buy a charger only to realize it doesn’t fit your laptop. Trust me, that’s a disappointment I’ve had to learn the hard way.
Variations Across Brands
Apple, Dell, Lenovo… each brand has its quirks when it comes to charging. Even within a brand, different models might require different chargers. For example, while newer MacBooks charge via USB-C, older MacBooks (like the MacBook Pro) used a special MagSafe connector.
So make sure the charger you choose is specifically designed for your laptop’s model.
How to Choose the Right Portable Charger for Your Laptop
To choose the right portable charger for your laptop, first, check your laptop’s wattage requirements. Then aim for a charger with equal or higher wattage for faster charging. Also, look for a charger with a high capacity (at least 20,000mAh) and extra features like multiple ports or safety protections.
If your portable charger has all these things, then you will have no problem keeping your laptop charged.
Calculating Your Laptop’s Power Requirements
Before making a purchase, you’ll need to figure out exactly how much power your laptop needs to stay charged.
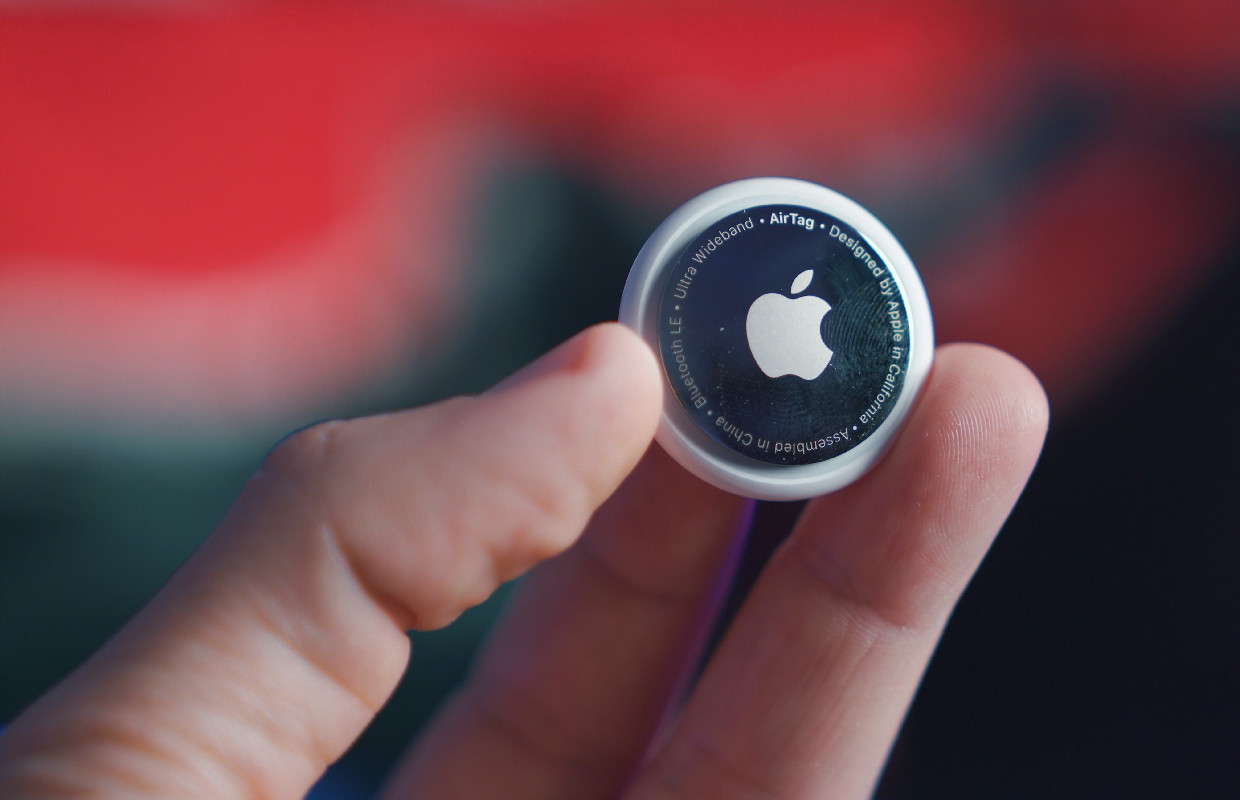
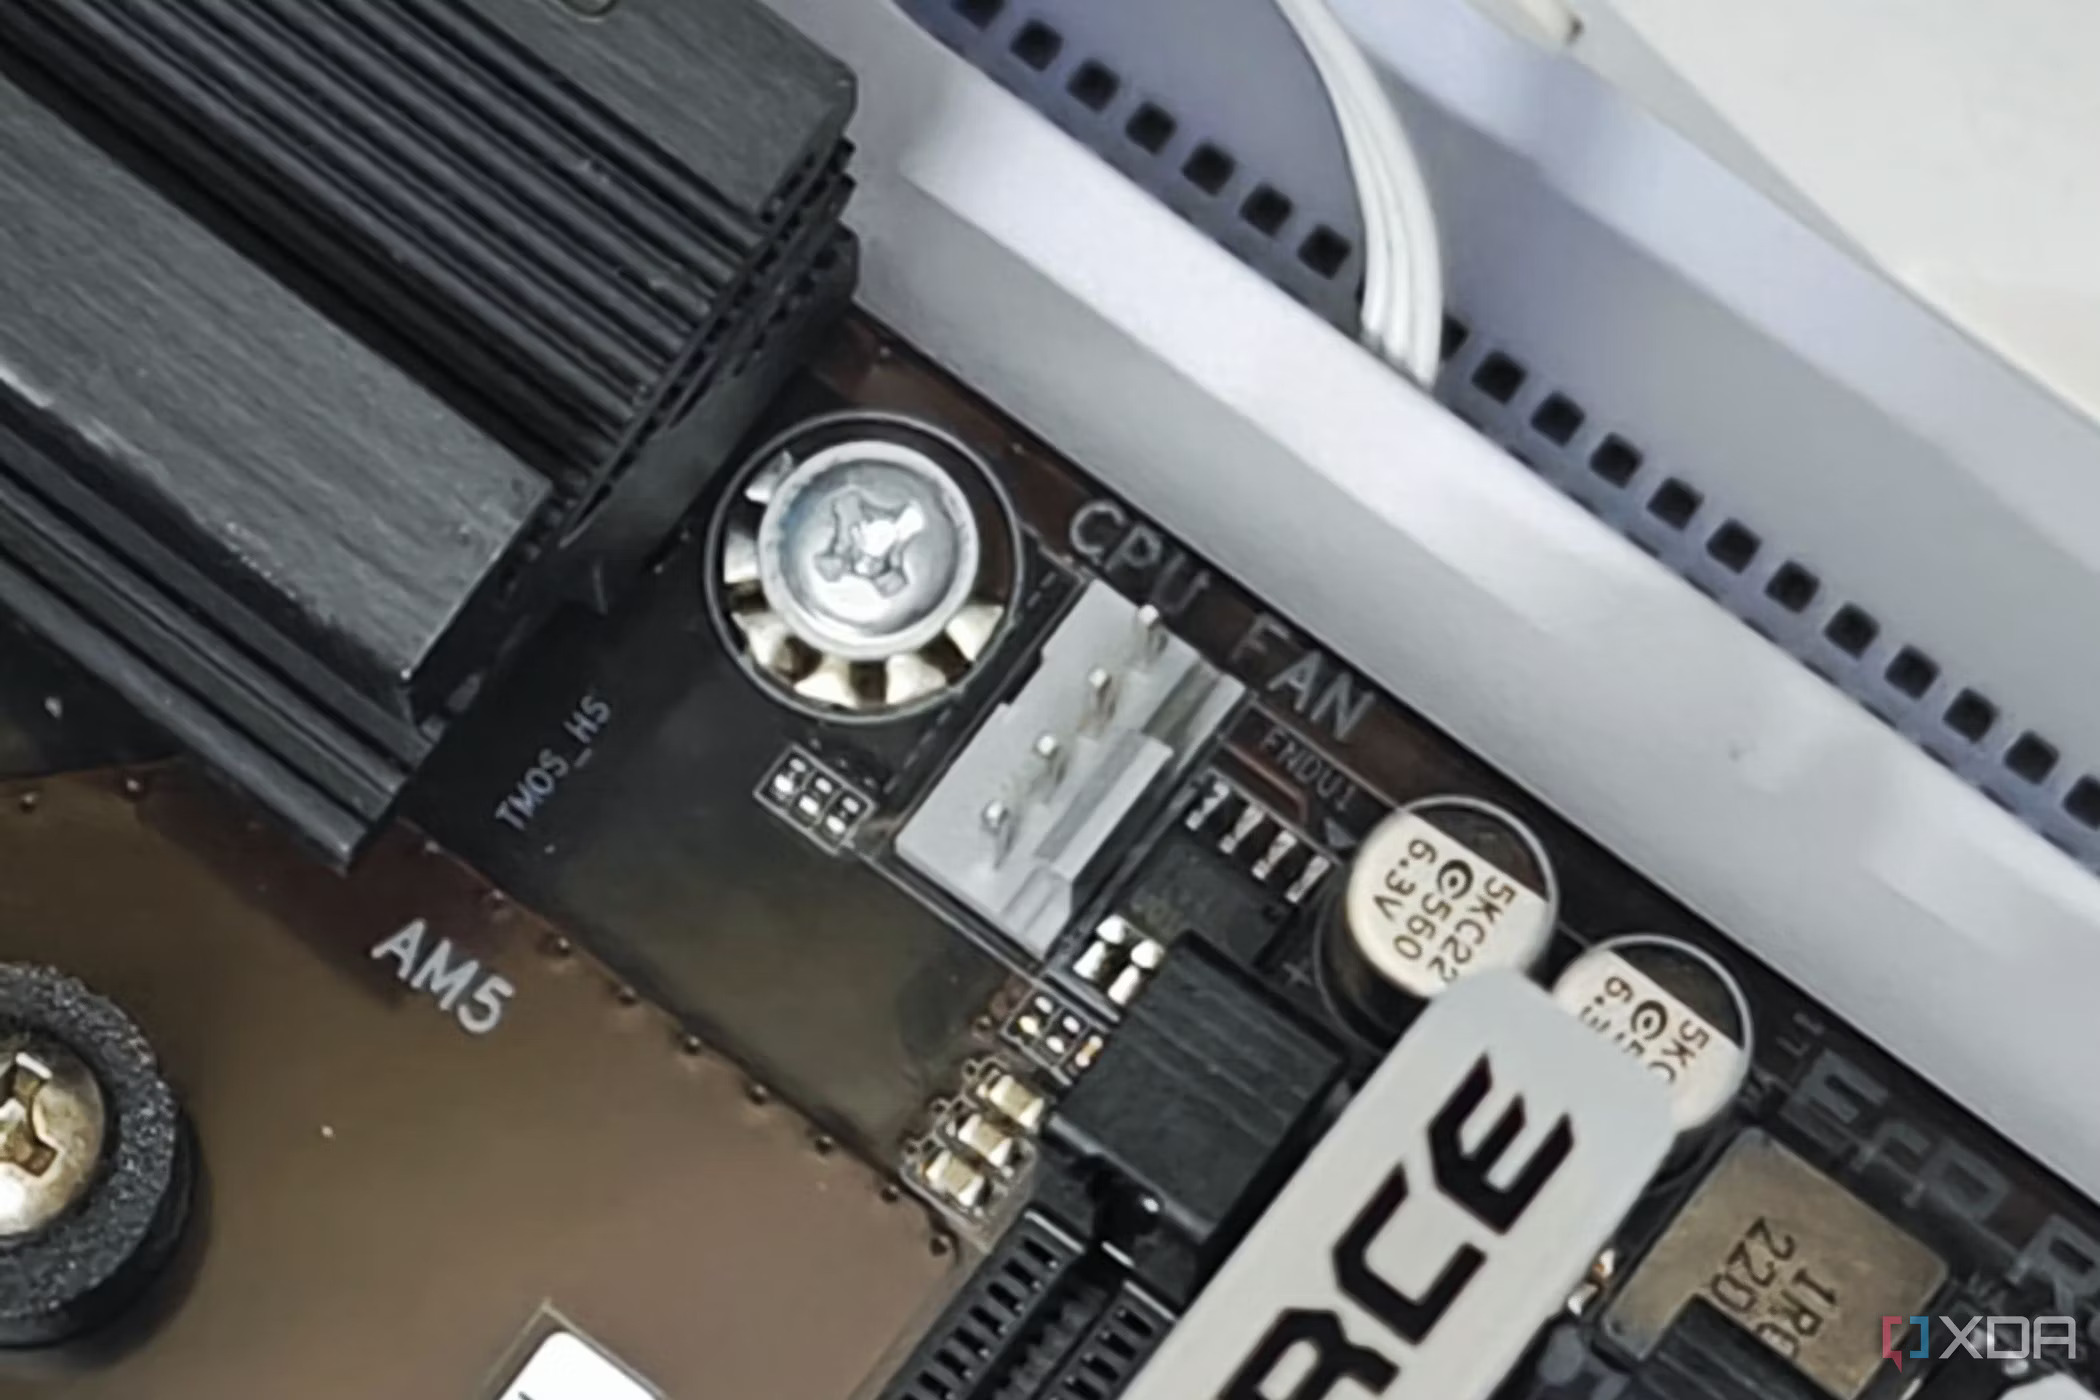
You can usually find this info in your laptop’s manual or on the manufacturer’s website. Pay attention to the wattage, which is usually listed as something like “45W” or “65W.” This is the power your laptop needs for optimal charging.
It’s not actually this hard, I just thought it was a cool photo.
Once you have that info, aim for a portable charger that provides the same wattage—or higher. The higher the wattage, the faster your laptop will charge. However, if the wattage is way higher, your laptop may not be able to handle it.
Minimum Wattage Recommendations
Here’s a general rule of thumb when it comes to wattage:
Standard laptops: 30W to 60W
High-end laptops (gaming, media creation): 90W to 100W
Power-hungry laptops (gaming or mobile workstations): 150W or more
If you’re not sure what your laptop needs, go with a charger that supports USB-C PD, and try to match or exceed the wattage your laptop requires.
Battery Capacity Considerations
The capacity of a charger is measured in mAh (milliamp hours) or Wh (watt hours). For laptop charging, you’ll want something with a high capacity—at least 20,000mAh or 50Wh.
Here’s about the amount of mAh & Wh you can expect to need to charge your laptop type:
Laptop Type
Recommended mAh
Recommended Wh
Ultrabooks
20,000 – 30,000 mAh
50 – 75 Wh
MacBooks (newer models)
20,000 – 30,000 mAh
60 – 75 Wh
Standard Laptops
30,000 – 40,000 mAh
75 – 100 Wh
Gaming Laptops
40,000 – 50,000 mAh
100 – 150 Wh
High-End Workstations
50,000 mAh or more
150 Wh or more
This ensures that your charger has enough juice to power your laptop multiple times without running out. If you’re using a charger with lower capacity, you might find yourself needing to recharge it more frequently.
Additional Features to Look For
Portable chargers aren’t just about charging speed and capacity. Consider looking for extras like multiple charging ports or fast-charging technology. Or maybe even a digital display to see how much power you have left.
Some chargers even come with built-in safety features, like temperature control, overcharge protection, and short-circuit prevention. Which are a great way to ensure that you’re portable charger stays safe.
Price Range and Value for Money
Portable chargers for laptops range from budget-friendly options around $50 to premium models that can cost over $200.
While it’s tempting to grab the cheapest option, remember, you’re charging a pricey laptop. So, make sure you invest in a charger that’s reliable and built to last. A mid-range charger will likely offer the best balance between price and performance.
Top Portable Charger Recommendations for Laptops in 2024
When looking for the best portable charger for your laptop, there’s a lot to consider. Factors like power output, battery capacity, and additional features like fast-charging are very important.
Limitations and Potential Issues with Laptop Portable Chargers
Portable chargers for laptops can have limitations like slower charging speeds, reduced lifespan over time, and compatibility issues with certain models. To avoid risks like overheating or damage, I advice you choose a reputable brand with proper safety features.
So here’s a list of the key things you need to look out for when buying a portable charger for a laptop:
1. Charging Speed Variations
One thing you should keep in mind is that charging speeds can vary. Even if your charger has the required wattage, some might charge your laptop slower than others.
Portable chargers have limited lifespans, just like your laptop’s battery. Over time, their capacity may decrease. Which means they won’t be able to hold as much charge as they did when they were new.
So, make sure to take care of your charger by not overcharging it and keeping it in good condition. Trust me, you don’t want to spend $100 on a charger just for it to die in a few short years or maybe even months.
3. Compatibility Issues
Not all portable chargers are universally compatible. Some might not work with specific laptop models, especially older ones. It’s important to double-check whether the charger supports your laptop’s power profile before buying it.
I would also recommend checking if it’s possible to return the charger, if it isn’t compatible.
4. Potential Risks
There are risks with any electronic device, and portable chargers are no exception. Cheap chargers can sometimes overheat or cause damage to your laptop if they don’t have the right safety features. Stick with reputable brands and avoid knockoffs.
Please don’t buy any super cheap chargers that are low-quality – I know from first hand experience how wrong that can go.
Conclusion
So, can portable chargers charge laptops in 2024? Absolutely! But, choosing the right charger can a challenge. To ensure you’re getting the best one, remember to check the wattage, battery capacity, and compatibility with your laptop.
A good portable charger can be a lifesaver for anyone who needs their laptop to keep running while on the go. With a little research and the right tech, you’ll be prepared for whatever battery-draining moments life throws at you.
Portable chargers are generally safe if they meet your laptop’s wattage and voltage requirements. Using an incompatible charger could potentially harm your laptop’s battery, so always check for compatibility before use.
The charging time depends on the portable charger’s wattage and your laptop’s battery capacity. High-wattage chargers (e.g., 65W or 100W) charge laptops faster, often within 1-3 hours. Lower wattage chargers may take longer.
Most phone power banks lack the required wattage and USB-C PD technology to charge a laptop. However, some high-capacity power banks designed for laptops may also charge phones, providing more flexibility.
In 2024, teen smartphone ownership has hit new heights, and the numbers are pretty mind-blowing. The average teen spends a massive 7 hours and 22 minutes glued to their smartphone every single day! That’s nearly a third of their entire day, dedicated to scrolling through social media, chatting with friends, watching videos, or gaming.
Smartphones have gone from being just a cool gadget to a daily essential in the life of a teenager. Whether it’s taking photos, staying up to date with the latest trends, or catching up on the latest YouTube videos. These devices have become the ultimate all-in-one tool for entertainment and connection.
But how many teens actually own these pocket-sized powerhouses? Well, the numbers show that almost every teenager in the US now has one (though ownership rates may vary in other parts of the world).
It’s no longer just about having a phone to make calls; it’s about having a mini-computer in their pocket that does it all. With smartphones becoming more affordable and accessible, it’s no wonder teen ownership has skyrocketed. From school assignments to social networking, teens rely on their smartphones for almost everything. Which blurs the line between leisure and productivity.
In 2024, a staggering 95% of teenagers own a smartphone, which is like saying everyone in high school has one. It’s not even a luxury anymore – it’s a necessity for us teens.
With so many apps, games, and social platforms, it’s no surprise that phones are pretty much glued to our hands. Plus, smartphones have become more affordable and accessible, so it’s not just for those with bigger budgets. Whether you’re gaming, scrolling through TikTok, or catching up on school assignments, the smartphone will always be there.
Get all the latest post on through the eyes of a teenager straight in your inbox.
Subscribe to stay updated, it’s free!
When you compare that to previous years, the jump is pretty insane. As shown in the graph below, in 2015 only about 73% of teens had smartphones. Fast forward to today, and that number has skyrocketed by over 20%. Even from 2020, when 88% of teens owned a smartphone, there’s been a noticeable increase.
It shows just how much tech has become an essential part of us teens daily lives. The rise in ownership isn’t just about phones getting cooler but about how we’re using them for more things. from studying to staying connected during the pandemic and beyond.
These statistics are estimates and may not be definitive. For the most accurate and up-to-date information, please refer to the sources listed below. (Image credit: Throughtheeyesofateenager.com)
What’s also cool is seeing how smartphone ownership breaks down by age. Among 13-14-year-olds, around 85% have a phone, but once you hit 15-17, that jumps up to 98%. It’s basically a must-have by the time you hit high school.
And when you look at the gender split, there’s a slight difference. 96% of teen girls own a phone compared to 93% of boys. It’s a small gap, but it reflects how digital communication and social media might play a bigger role for some girls, especially with the rise of platforms like Instagram and Snapchat. However, this is such a small difference that it doesn’t really mean much.
These statistics are estimates and may not be definitive. For the most accurate and up-to-date information, please refer to the sources listed below. (Image credit: Throughtheeyesofateenager.com)
Factors Influencing Teen Smartphone Adoption
Parental decisions and family dynamics play a huge role in smartphone ownership among teenagers. In many families, getting a smartphone for your teen is almost like a rite of passage. According to recent studies, about 70% of parents say they feel comfortable giving their kids a smartphone by the age of 13. I personally got my first smartphone by the time I was around 12 years old (I’m 15 now), which was considered pretty late at the time. This comfort often stems from the desire to stay connected, especially as kids head out into the world more independently.
In a survey, nearly 60% of parents reported that they believe having a smartphone improves family communication. They say having a smartphone makes it easier to keep track of their teens and ensuring safety. Here’s a quick overview of how family dynamics influence smartphone decisions:
Family Dynamic
Percentage of Parents Supporting Smartphone Ownership
Families with younger kids
45%
Families with teens
70%
Single-parent families
55%
These statistics are estimates and may not be definitive. For the most accurate and up-to-date information, please refer to the sources listed below. (Image credit: Throughtheeyesofateenager.com)
Socioeconomic factors also play a crucial role in determining smartphone ownership among teens. In families with higher incomes, ownership rates can reach up to 98%, while in lower-income households, it drops to about 80%. This disparity highlights how access to technology can vary significantly based on financial resources.
Many families may prioritize smartphones for educational purposes, especially with the rise of online learning tools. However, it’s not just about owning a device; it’s also about having access to reliable internet and apps that support learning.
Peer pressure and social norms are huge when it comes to smartphones. A whopping 85% of teens report feeling pressure to have the latest device to fit in with their friends. Which I as a teenager myself can relate to. This social influence shapes not only what phones us teens want but also how we use them.
With remote learning becoming the norm, educational requirements have shifted significantly. Around 72% of teens say they rely on their smartphones for schoolwork and online classes. I personally don’t use my smartphone for schoolwork but I do often use it for checking my homework or tests for the coming week.
Having a smartphone isn’t just about social media; it’s also about staying on top of assignments and connecting with classmates for group projects. As we navigate this tech-filled world, it’s clear that smartphones are more than just gadgets. They’re essential tools for our everyday life.
Smartphone Usage Patterns Among Teenagers
The average daily screen time for teens is astonishingly high, sitting at around 7 hours and 22 minutes! This number includes everything from scrolling through social media to binge-watching shows and playing video games.
With so much time spent on screens, it’s clear that smartphones have become central to teenage life. Interestingly, a survey found that 60% of teens believe they spend too much time on their devices, yet they find it hard to cut back. This might be because smartphones are our main connection to friends and entertainment, making it very tricky to put them down.
When it comes to the most popular apps and activities, social media reigns supreme. Platforms like TikTok and Instagram dominate, with about 75% of us teens using them daily. Gaming follows closely, with popular titles like Roblox and PUBG captivating millions of teens daily life. Here’s a quick look at the top activities teens engage in on their smartphones:
Activity
Percentage of Teens Engaging Daily
Social Media
75%
Gaming
65%
Streaming Videos
70%
Messaging Apps
80%
These statistics are estimates and may not be definitive. For the most accurate and up-to-date information, please refer to the sources listed below. (Image credit: Throughtheeyesofateenager.com)
Usage patterns can vary significantly between weekdays and weekends. On weekdays, screen time averages about 6 hours, mainly due to school-related tasks and socializing. However, on weekends, that number can jump to over 8 hours as teens have more free time to indulge in entertainment. This shift highlights how our schedules shape our screen habits. Which makes the weekends a prime time for binge-watching and gaming marathons.
While smartphones offer numerous benefits, their impact on academic performance can be a double-edged sword. About 60% of teachers report that smartphone distractions during class lead to lower grades for some students. On the other side, many students use their phones for educational resources. With 65% saying they rely on apps for studying and completing assignments. This means smartphones can be both a helpful tool and a source of distraction. Which further emphasizes the importance of balancing screen time with academic responsibilities.
Health and Social Implications of Teen Smartphone Ownership
Excessive smartphone use can seriously impact mental health, especially among teens. Research shows that teens who spend over four hours a day on their phones are 30% more likely to experience anxiety or depression. It’s not just about the time spent; it’s also the nature of social media interactions. Around 60% of teens report feeling pressured to respond to messages immediately, leading to a constant state of stress. This can create a vicious cycle where the need to stay connected actually makes us feel more isolated.
The effects of prolonged screen time extend beyond mental health into physical well-being. About 50% of teens experience eye strain, headaches, or neck pain due to so many hours spent looking at screens. The blue light emitted by our devices can also disrupt our sleep patterns. Which makes it harder to catch that much needed sleep. In fact, studies show that teens with high screen time report sleeping an average of 1.5 hours less per night compared to their peers. Here’s a quick list of common physical issues related to screen time:
Eye strain: 50%
Headaches: 45%
Sleep disruption: 70%
Neck/back pain: 40%
When it comes to social skills, smartphones can be a double-edged sword. While they help us stay connected, they can also hinder our ability to engage in real face-to-face conversations. A surprising 75% of teens feel that their communication skills have declined due to their reliance on texting and social media. Many would rather send a quick message than have a phone call or meet up in person. Personally I don’t really enjoy messaging and I would way rather talk face-to-face to someone.
Cyberbullying is another serious issue affecting about 40% of teens. The anonymity of online platforms makes it easier for bullies to target their victims. To tackle these issues, schools are increasingly focusing on digital citizenship and online safety education. It’s crucial for teens to learn how to navigate online spaces responsibly and know when to seek help if they encounter bullying online.
Parental Control and Monitoring of Teen Smartphone Use
Parental control apps and features have become increasingly prevalent as parents seek to manage their teens’ smartphone use. Recent studies indicate that around 65% of parents use some form of monitoring or control app. These apps can restrict screen time, filter content, and track teens location. Which makes the parents feel more secure about their kids’ online activities. However, while these tools can be helpful, they often raise questions about privacy and trust. It’s important for families to discuss how these features work and why they are being used.
When it comes to the effectiveness of smartphone usage limits set by parents, the results can be pretty mixed. A survey found that 70% of teens reported that they often ignore or bypass these limits, citing that they find ways around restrictions. However, some teens do acknowledge that limits help them manage their time better. With about 40% saying they appreciate having boundaries, even if they push back against them. Here’s a table summarizing the effectiveness of these limits:
Response to Limits
Percentage of Teens
Often ignore or bypass limits
60%
Appreciate having boundaries
40%
These statistics are estimates and may not be definitive. For the most accurate and up-to-date information, please refer to the sources listed below. (Image credit: Throughtheeyesofateenager.com)
Communication between parents and teens about responsible smartphone use is crucial for fostering a healthy relationship with technology. Interestingly, only 40% of parents regularly discuss digital habits with their teens. This lack of dialogue can lead to misunderstandings and conflicts regarding smartphone use. Here’s a quick list of key challenges parents face in monitoring their teens’ smartphone activity:
Privacy concerns: Many teens feel that monitoring invades their privacy.
Technological know-how: Some parents struggle to keep up with the latest apps and trends.
Resistance from teens: Teens may push back against limits or monitoring, viewing it as control.
Balancing trust and oversight: Parents want to ensure safety without damaging their relationship with their teens.
By addressing these issues openly, parents and teens can create a more balanced and understanding approach to smartphone use.
2024 Teen Smartphone Ownership: conclusion
In conclusion, the landscape of teen smartphone ownership is more prevalent than ever. With staggering statistics revealing that 95% of 15- to 16-year-olds (in the US) now own smartphones. This tech surge comes with its own set of challenges, from the excessive daily screen time averaging over seven hours. To concerns about mental health, physical well-being, and social interactions.
Yet, it’s not all negative; open communication between parents and teens, along with effective monitoring strategies, can help mitigate these issues. As we navigate this digital age, fostering responsible smartphone use is essential. So, the next time you spot a teenager immersed in their device, remember just how integral smartphones have become to their daily lives—and maybe take a moment to reflect on your own screen time, too! Also be sure to check the sources linked below for the most relevant information.
There are several effective parental control apps that help manage teen smartphone usage. Popular options include Norton Family, which offers web filtering, time management, and location tracking. Qustodio provides detailed activity reports and the ability to block inappropriate content. Bark focuses on monitoring social media interactions and alerting parents to potential issues like cyberbullying or self-harm. Each app has its strengths, so parents should choose one that aligns with their specific needs and their teen’s tech habits.
To communicate effectively, create an open environment where teens feel comfortable sharing. Start conversations by expressing concerns without judgment, and ask about their feelings regarding smartphone use. Collaboratively set limits and establish regular check-ins to reinforce trust and encourage open dialogue about digital habits.
Smartphones offer educational benefits, providing access to learning resources and apps like Duolingo and Khan Academy. They also enhance communication, allowing teens to maintain friendships and support networks. Additionally, platforms like TikTok encourage creativity and self-expression, contributing positively to personal development when used responsibly.
The Apple Pencil is a great way to make for some extra productivity. The Apple Pencil is great for writing stuff by hand for example, but connecting it might be a bit challenging in the beginning. However, you don’t have to worry because I’ve made a quick and easy tutorial on how to do so on all the different Apple Pencils so after this post you’ll know exactly what to do!
nnnn
Quick tutorial: connecting your Apple pencil to your iPad
nnnn
n
Check Compatibility: n
n
Make sure your iPad and Apple Pencil are compatible.
Complete guide: connecting your Apple pencil to your iPad
nnnn
Connecting your Apple Pencil to your iPad allows you to make use of its full potential, from taking handwritten notes to creating some amazing digital artwork. Here’s a detailed, step-by-step guide to help you pair your Apple Pencil with your iPad, depending on the model of your Apple Pencil and iPad plus some troubleshooting tips if you run into any issues.
nnnn
1. Check Compatibility
nnnn
Before you begin, make shure that your iPad and Apple Pencil are compatible with each other. Here’s a compatibility breakdown:
Remove the Cap: Gently pull off the cap from the back end of your Apple Pencil to reveal the Lightning connector.
nnnn
Connect to iPad:n
n
For iPads with a Home Button: Plug the Lightning connector of your Apple Pencil directly into the Lightning port on your iPad.
nnnn
For iPads without a Home Button: Use the USB-C to Apple Pencil Adapter. Plug the Lightning end of the Apple Pencil into the adapter, and then connect the adapter to the USB-C port of your iPad.
n
n
nnnn
Tap Pair: Once connected, a pairing prompt will appear on your iPad screen. Tap the “Pair” button to complete the connection process.
nnnn
Confirm Connection: After pairing, you should see a confirmation on your iPad, and your Apple Pencil is ready to use.
Locate the Magnetic Connector: On the side of your iPad, below the Volume buttons, find the magnetic connector.
nnnn
Attach the Apple Pencil: Place the flat edge of your Apple Pencil against the magnetic connector on the iPad. It should snap into place magnetically.
nnnn
Automatic Pairing: The Apple Pencil will automatically pair with your iPad when attached. Ensure that the Pencil is charged; it will show the battery status on your iPad when it’s connected.
nnnn
Check for Connection: Once paired, you can start using your Apple Pencil immediately. The iPad will recognize the Pencil’s presence, and you can start writing or drawing.
nnnnn
4. Pairing the Apple Pencil (USB-C)
nnnnn
Ensure iPadOS Update: Make sure your iPad is running iPadOS 17.1 or a newer version. Check this by going to Settings > General > Software Update.
nnnn
Open the Cap: Remove the cap from the end of the Apple Pencil (USB-C) to expose the USB-C port.
nnnn
Connect the Cable: Insert a USB-C cable into the USB-C port on your Apple Pencil. Connect the other end of the USB-C cable to the USB-C port on your iPad.
nnnn
Follow On-Screen Instructions: Your iPad may display a pairing prompt. Follow any on-screen instructions to complete the pairing process.
nnnn
Verify Connection: Once paired, the Pencil should work immediately, and you should be able to check its battery status on your iPad.
nnnnn
5. Troubleshooting Connection Issues
nnnn
If your Apple Pencil isn’t connecting, try these troubleshooting tips:
nnnnn
Check for Physical Damage: Inspect both your Apple Pencil and iPad for any visible damage. Replace any broken components as necessary.
nnnn
Close and Reopen Apps: Sometimes, a glitchy app can prevent pairing. Close any open apps and try reconnecting the Apple Pencil.
nnnn
Restart Your iPad: Restart your iPad by holding down the power button and sliding to power off. Turn it back on and attempt to pair the Apple Pencil again.
nnnn
Charge Your Apple Pencil:n
n
Apple Pencil (1st Generation): Ensure it is properly connected to the Lightning port for at least 20 minutes to charge.
nnnn
Apple Pencil (2nd Generation): Make sure Bluetooth is turned on (go to Settings > Bluetooth), and allow it to charge for 20 minutes.
n
n
nnnn
Clean Charging Port: For the 1st Generation Apple Pencil, check the Lightning port on your iPad for dust or debris. Clean it gently with a cotton swab or compressed air.
nnnn
Forget and Re-Pair:n
n
Go to Settings > Bluetooth.
nnnn
Find your Apple Pencil in the list of devices, tap the information button (blue “i”), and select “Forget this Device.”
nnnn
Try to pair your Apple Pencil again from scratch.
n
n
nnnnn
If you’ve tried these steps and still have issues, consider scheduling a repair or seeking assistance from a professional technician.
nnnn
nnnnn
Get all the latest post on through the eyes of a teenager straight in your inbox.
nnnn
Subscribe to stay updated, it’s free!
nnn
nnnn
Conclusion
nnnn
By following these detailed steps, you can successfully connect your Apple Pencil to your iPad and start taking advantage of its features. Whether you’re drawing, writing, or marking up documents, your Apple Pencil will enhance your iPad experience. If you encounter any difficulties, the troubleshooting tips should help resolve common issues. Enjoy your creative and productive journey with your Apple Pencil and iPad!
nnnnnnnn
What are the differences between Apple Pencil (1st Generation) and Apple Pencil (2nd Generation)?
nnnn
Choosing between the Apple Pencil (1st Generation) and the Apple Pencil (2nd Generation) largely comes down to a few key differences that come down to your needs and preferences. The biggest difference is in their charging methods. The 1st Generation Apple Pencil charges via the Lightning connector, either by plugging it directly into your iPad or through a small adapter. This can look a bit awkward and messes with the iPad’s smooth look. On the other side, the 2nd Generation Apple Pencil features wireless charging, it attaches magnetically to the side of any compatible iPad. This method not only keeps the Pencil charged with ease but also eliminates the need for any cables or adapters, providing a more cleab and up-to-date experience.
nnnn
Design differences between the two models are also quite noticable. The 1st Generation Apple Pencil has a glossy finish with a removable cap that covers the Lightning connector, which some might find less convenient. The 2nd Generation Apple Pencil, on the other hand, has a matte finish and a flat edge that attaches magnetically to your iPad. This design reduces the risk of losing parts and keeps the Pencil in place while charging, adding to its convenience and aesthetics. Additionally, the 2nd Generation Pencil supports a double-tap feature to switch between tools, a function which isn’t available on the 1st Generation model, improving efficiency for tasks that require a lot of tool changes.
nnnn
Compatibility is another important thing to consider. The 1st Generation Apple Pencil is compatible with older iPads like the iPad (6th generation and later) and some iPad Pro models that feature a Lightning port. Meanwhile, the 2nd Generation Apple Pencil is designed for newer iPads, including the latest iPad Pro models and the iPad Air with a magnetic connector. This means if you’re using an older iPad, the 1st Generation Pencil will be your best option, but for those with the latest iPad models, the 2nd Generation Pencil offers a more integrated and seamless experience.
To find out which Apple Pencil is compatible with your iPad, check the Apple website or your iPad’s specifications. Generally, the 1st Generation Pencil works with older iPad models that have a Lightning port, while the 2nd Generation Pencil is compatible with newer iPads with a magnetic connector. The Apple Pencil (USB-C) works with iPads that have a USB-C port.
Most apps designed for drawing or note-taking, such as Notes or Procreate, support Apple Pencil. However, some apps might not be fully optimized for it. Check the app’s description in the App Store to see if it supports Apple Pencil features.
If your Apple Pencil isn’t working, try restarting your iPad, making sure the Pencil is charged, and checking the Bluetooth connection. If it’s still not working, you might need to clean the iPad’s charging port or contact Apple Support for further assistance.
Taking a screenshot on you’re iPad can be really handy if you want to shar would you’re looking at or just want to save it for later. So that’s why today I’m going to explain exactly how to screenshot on iPads in 2024. After reading this post you will know exactly how to screenshot an iPad. You will also learn which iPads or versions of IOS can take screenshots. Finally, you will also understand how to screenshot in 3 different ways like for example on a keyboard or even how set it up so you can take a screenshot with just swiping.
nnnn
How to screenshot on iPad Quick summary
nnnnn
Locate the Top button and the Volume Up button
nnnn
Press both buttons at the same time
nnnn
Quickly release both buttons
nnnn
Look for the screenshot preview in the lower-left corner
nnnn
Tap the preview to edit or swipe left to dismiss it.
Screenshotting on your iPad is a great way to save important information. You can share what you’re seeing. Or just keep a record of something you want to save. Whether you’re using it for work, or personal use. Here’s a detailed guide on how to take a screenshot on your iPad.
nnnnn
Locate the Buttonsn
n
First, you need to find the Top button. It’s sometimes called the Power/On button. You also need to find the Volume Up button on your iPad. The Top button is located on the top left of your iPad. The Volume Up button is also on the left side of the device, beside the Volume Down button. Make sure you have a good grip on your iPad to avoid dropping it during the process.
n
n
nnnnnnnnnn
Press the Buttons at the Same Time
n
n
With your iPad in your hand, press both the Top/Power button and the Volume Up button at the same time. It’s important to press them together to capture the screenshot properly. Make sure you don’t press them too hard or too soft—just a firm, simultaneous press should do the trick.
n
n
nnnnnnnnnn
Quickly Release the Buttonsn
n
Once you’ve pressed both buttons, release them quickly. You should hear a camera shutter sound and see a brief flash on the screen. This indicates that the screenshot has been successfully taken. If you don’t see the flash or hear the sound, make sure you pressed both buttons again.
n
n
nnnn
Find the Screenshot Previewn
n
After taking the screenshot, a small preview of the screenshot will be in the bottom left corner of the screen. This preview will be visible for only a few seconds before it disappears. If you tap on it, you’ll enter the editing mode. You can crop, draw, or make other changes to your screenshot there. If you don’t tap on the preview, it will still be saved automatically so don’t worry about that.
n
n
nnnnnThis is shown on a phone, on a iPad it would be in the bottom left corner (Image credit: IOS Gadgets Hacks)nnnnn
Access the Screenshot in the Photos Appn
n
To view or share your screenshot later, open the Photos app on your iPad. Go to the “Recents” album or the “Screenshots” album (some may not have that). Your screenshot will be there, ready for you to view, edit, or share. You can also use the “Share” button within the Photos app to send it via email, message, or social media.
n
n
nnnnn
And you’re done! With these steps, you can easily capture and manage screenshots on your iPad. Taking a screenshot is quick & easy. Whether you’re saving an important document, or just something you want to remember. Taking a screenshot is a great way to do so.
n
nnnnnnnn
n
Other ways to screenshot on iPad
nnnn
If you wanna know more ways to screenshot on an iPad like on a keyboard for example, then the following tips are for you. I have listed 3 other ways to take a screenshot on an iPad that are worth checking out.
nnnnnnnn1. How To Take A Screenshot On iPad With A Swipe Gesture?n
nnnnn
Another and far easier way of taking screenshots on an iPad is to use something called a ”swipe gesture”, a swipe gesture is a gesture of you swiping up or down, or sideways, etc. So we can also use this gesture for taking screenshots, all you’ll need is an iPad that supports iPad OS 15 and you’re good to go! So here’s a quick and easy-to-understand list which shows you exactly how to do so:
nnnnn
Open Settings: Tap on the Settings app on your iPad.
nnnn
Tap Multitasking & Gestures: Navigate to Home Screen & Dock > Multitasking & Gestures.
nnnn
Turn on Swipe Finger from Corner: Ensure that the toggle for Allow Multiple Apps is turned on.
nnnn
Customize Corner Gestures:n
n
Tap on Left Corner Swipe or Right Corner Swipe.
nnnn
Select Screenshot from the list of options.
n
n
nnnn
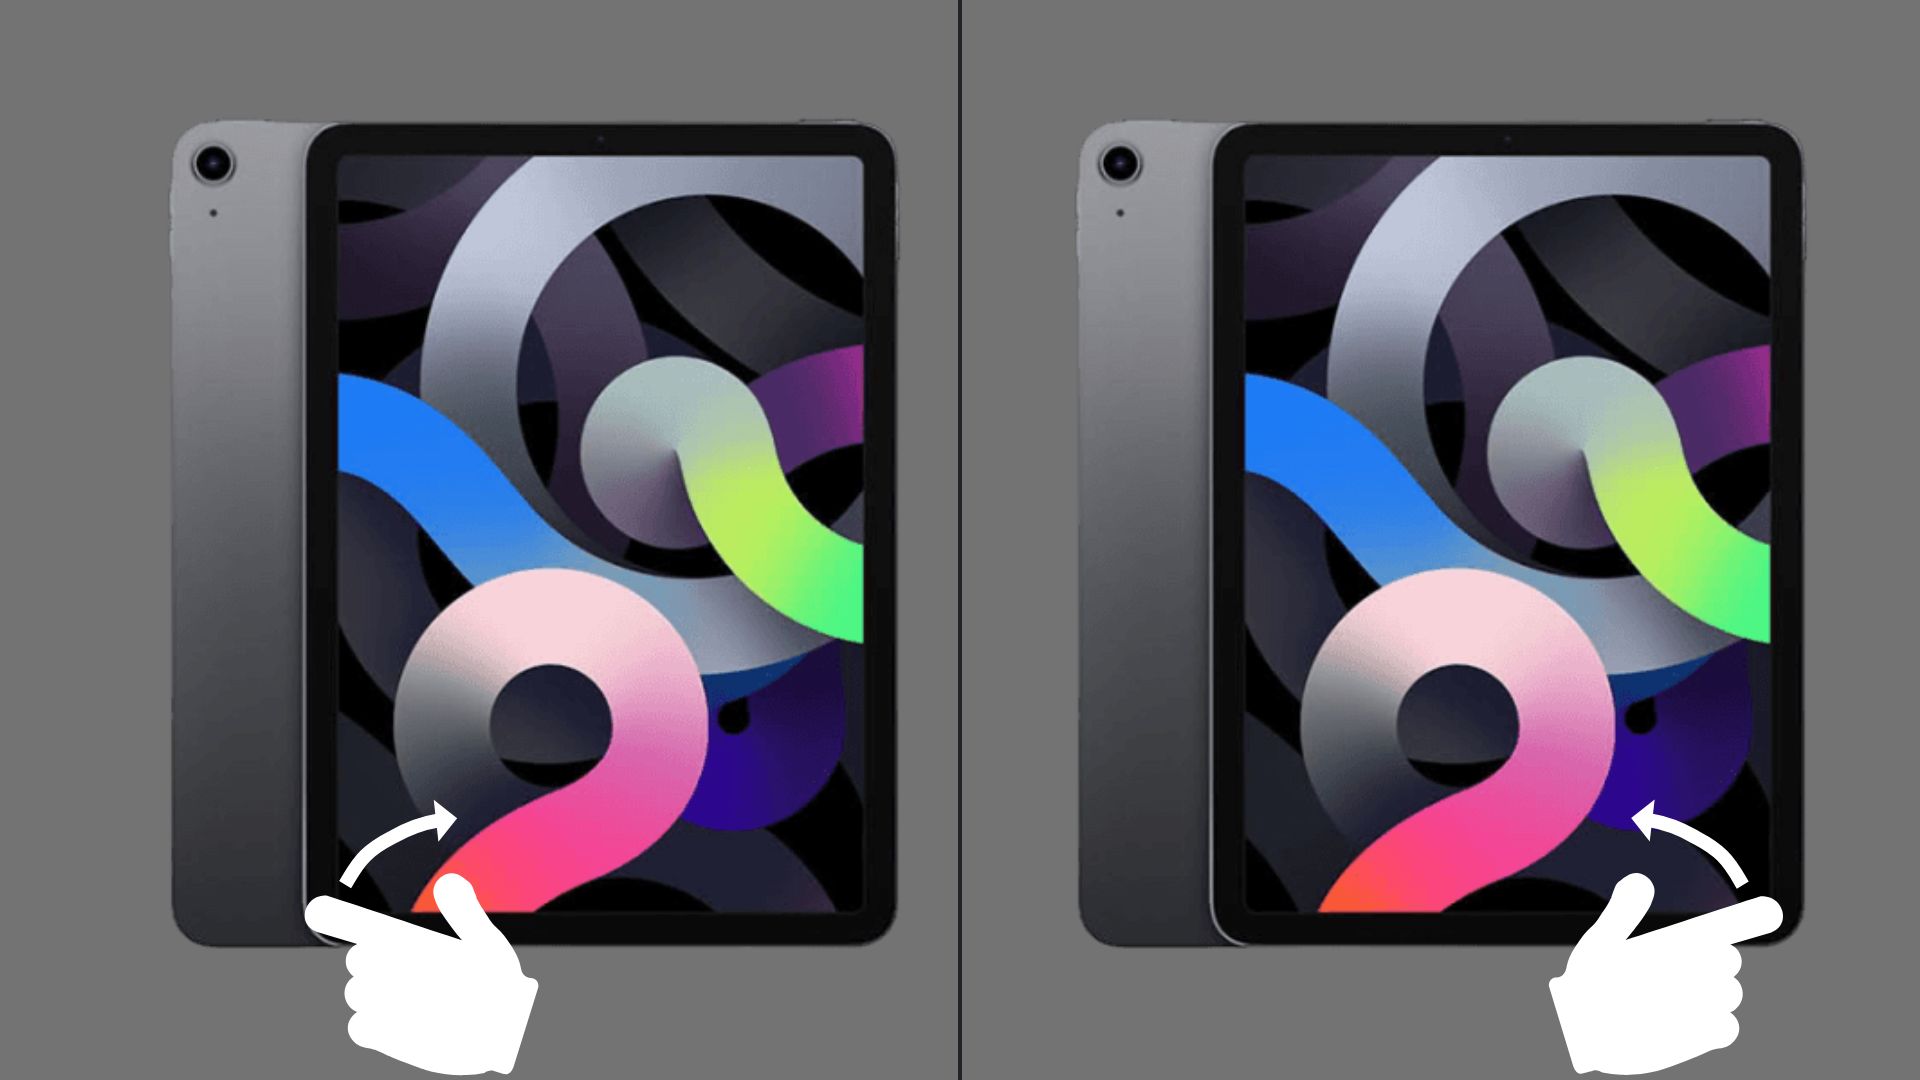
Swipe from a Corner: Swipe your finger from the bottom left or bottom right corner of the screen, depending on which corner you set up for taking a screenshot.
nnnn
Screenshot Taken: A screenshot will be taken and saved to your Photos app.
nn
nnnnnnnnn2. How To Screenshot On iPad Keyboard?n
nnnnn
Now for those who have a keyboard connected to their iPad, taking a screenshot is just as easy. So if your iPad has an external keyboard and has iPad OS 13 or later, then follow this guide:
nnnnn
Connect Your Keyboard: Ensure your external keyboard is properly connected to your iPad.
nnnn
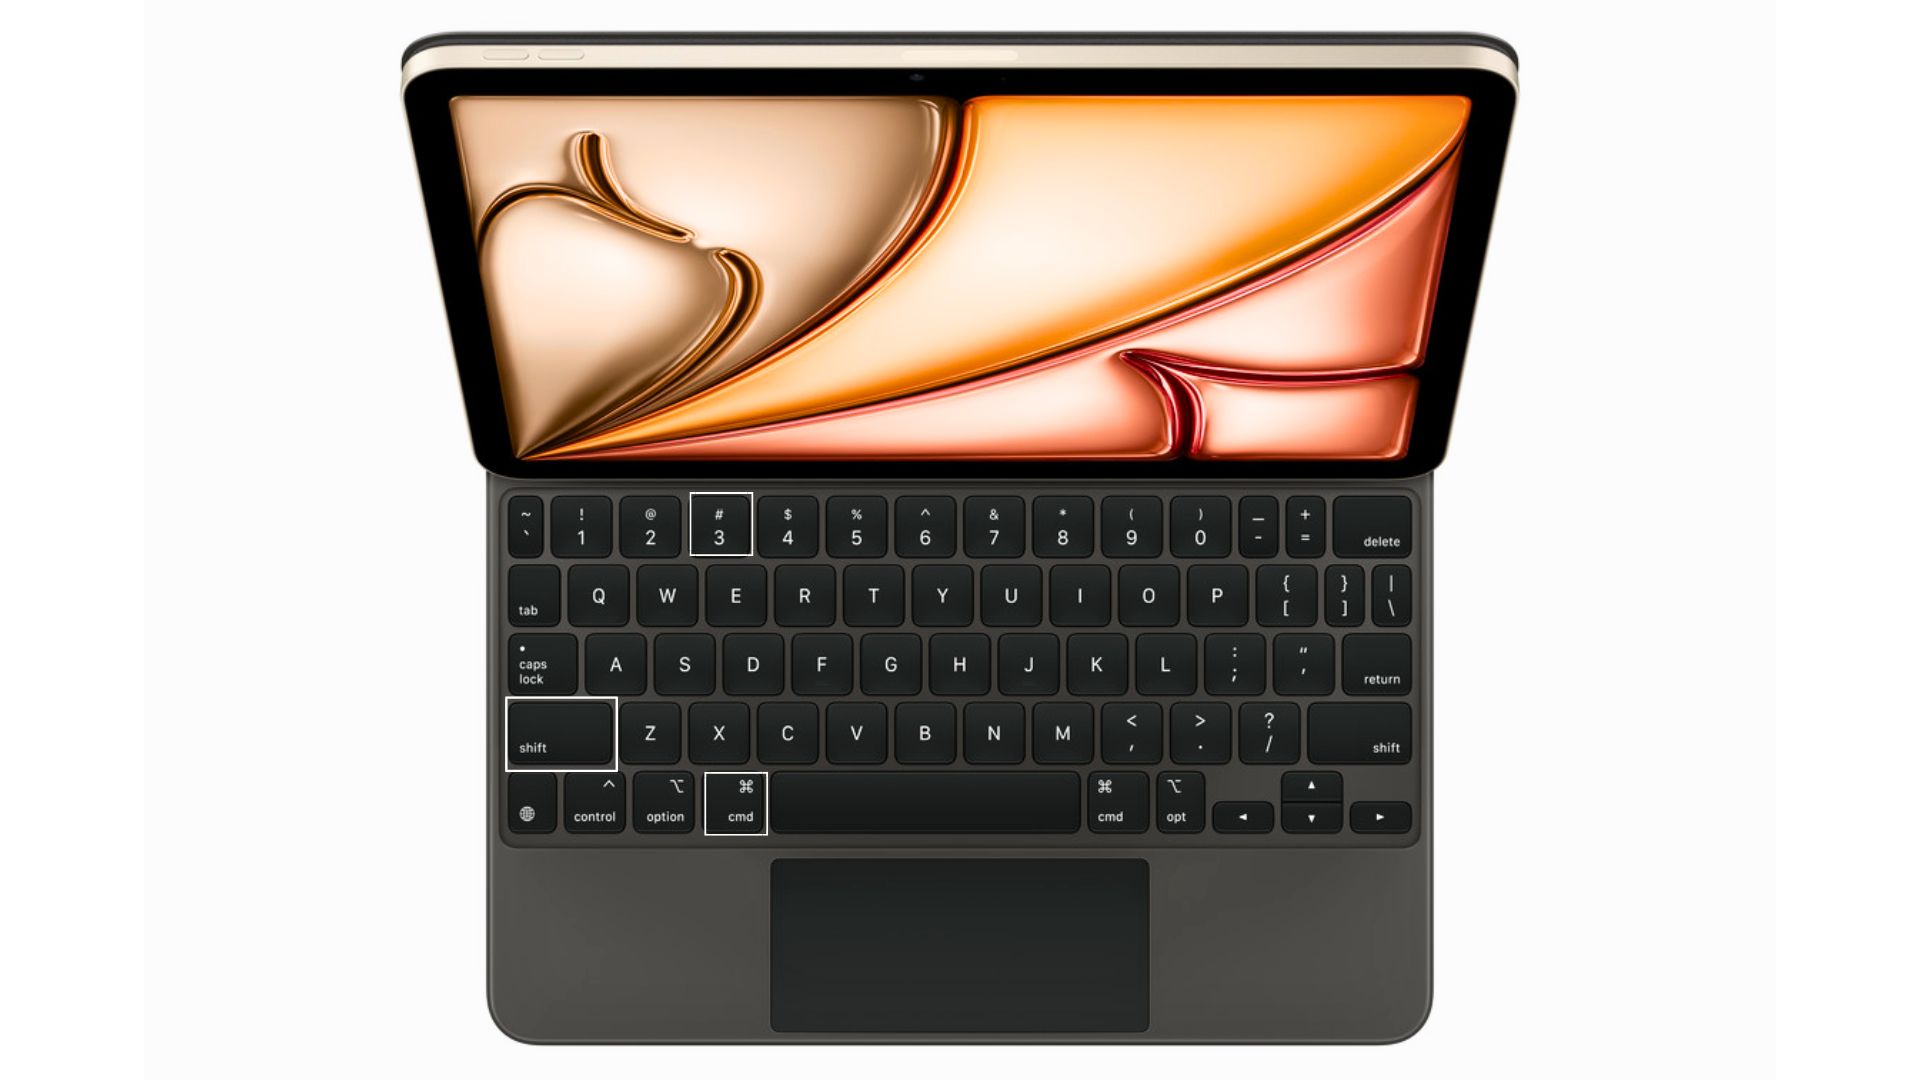
Press Shortcut Keys: Press the following keys simultaneously:n
n
Command (⌘) + Shift + 3: This will take a screenshot of the entire screen.
nnnn
Command (⌘) + Shift + 4: This will take a screenshot and immediately open it in Markup for editing.
n
n
nnnnn
So very easy to do and it should just work straight away.
n
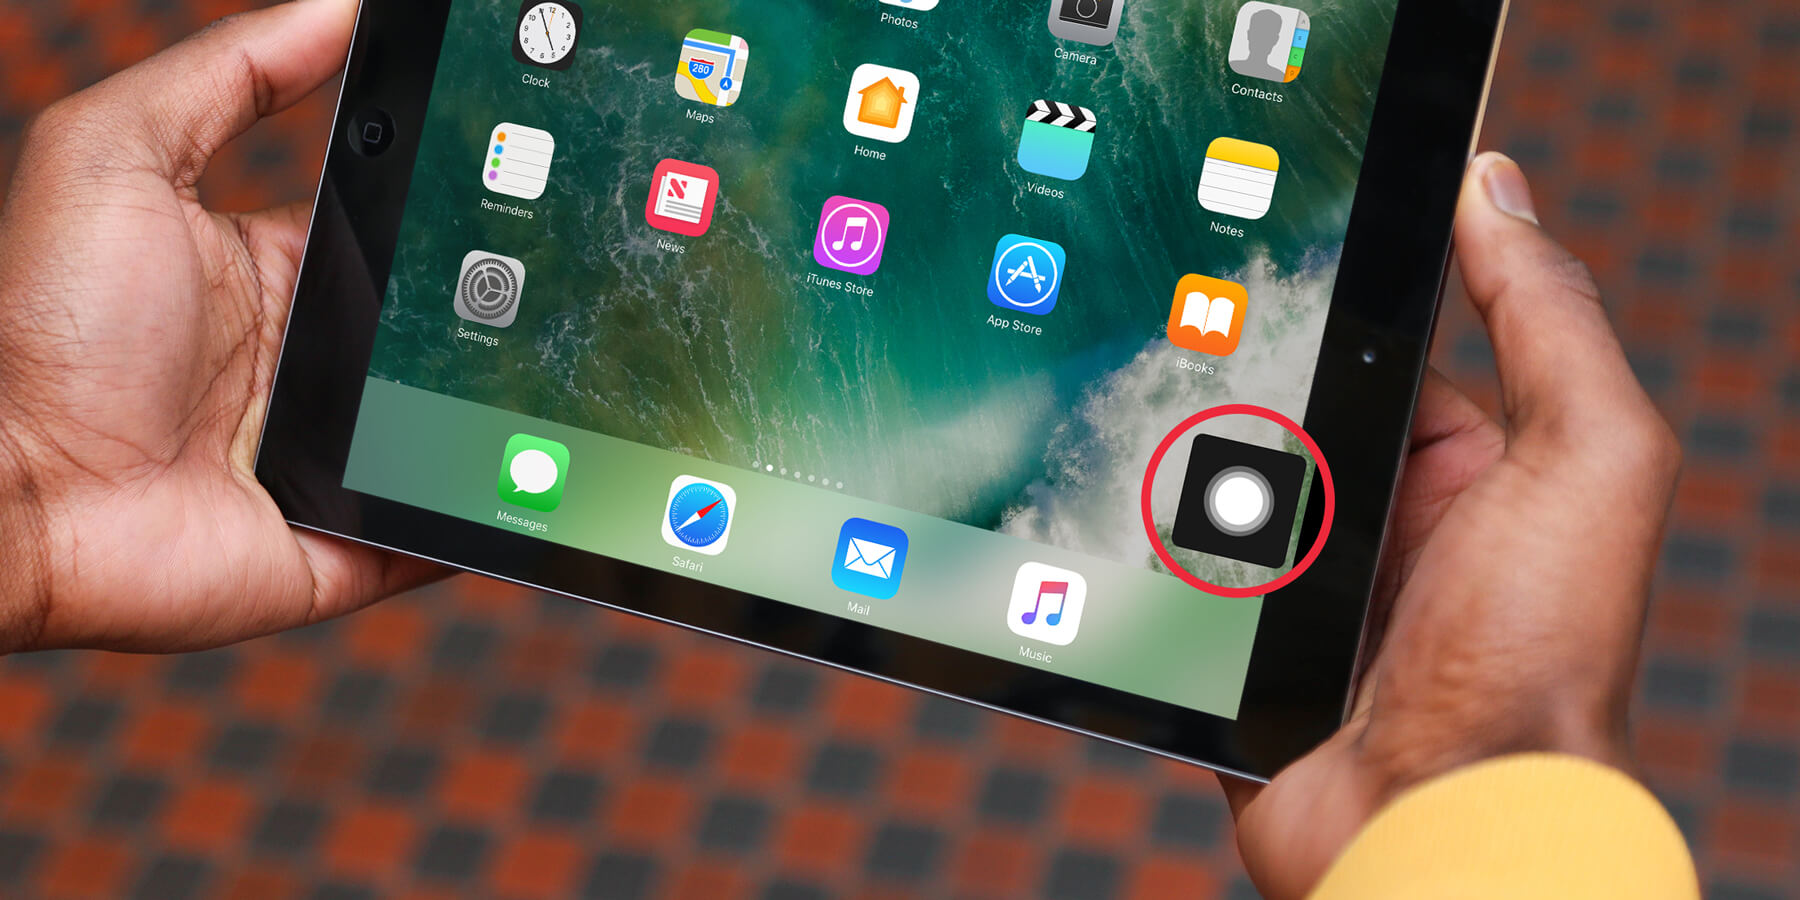
nnnnnnnnn3. How To Take A Screenshot On Your iPad Without Pressing Buttonsn(Image credit: Tom Rolfe/TapSmartnnnn
The last method of taking a screenshot on your iPad is by using something called ”AssistiveTouch” note that you will need an iPad compatible with IOS 13 or later to do this. This is also the most complicated one to set up so far, but it could come in handy if you for whatever reason don’t like swiping or pressing 2 buttons. So here’s a quick and easy guide on how to set up AssistiveTouch to take screenshots on your iPad:
nnnnn
Enable AssistiveTouch:n
n
Open the Settings app.
nnnn
Go to Accessibility.
nnnn
Tap on Touch.
nnnn
Select AssistiveTouch and toggle it on.
n
n
nnnn
Customize AssistiveTouch:n
n
Tap on Customize Top Level Menu.
nnnn
Tap on an icon you don’t use often or tap the + button to add a new icon.
nnnn
Select Screenshot from the list of options.
n
n
nnnn
Take a Screenshot:n
n
Tap the floating AssistiveTouch button on your screen.
If you don’t see a flash or hear the shutter sound, ensure that you’re pressing both buttons simultaneously and releasing them quickly. Check that your iPad’s volume is not muted, as the shutter sound might be off. If the issue persists, restart your iPad and try again.
To take a screenshot on an iPad with a Home button, press and hold the Top button and the Home button at the same time. Quickly release both buttons. The screen will flash, and you’ll hear a shutter sound indicating that the screenshot has been taken.
To share a screenshot, open the Photos app, find the screenshot in your “Recents” or “Screenshots” album, tap on it, and then tap the “Share” icon (a square with an upward arrow). You can choose to share it via email, messages, social media, or other apps.
Have you been struggling with connecting your PS5 controller and just need a quick guide to help you? Well if so, this post is for you. I’m going to give you an easy 5 step tutorial on how to connect your PS5 controller to your PS5. And I’m also going to show you how to connect your PS5 controller to your PC. By the end of this post, you’ll know exactly how to connect your PS5 controller to your PS5 and PC.
Quick Tutorial: Connecting Your PS5 Controller to Your PS5
Power on Your PS5: Press the power button on your console.
Activate Pairing Mode: Press and hold the PS button and the Create button on your controller until the light bar starts flashing.
Connect the Controller: Use a USB cable to plug the controller into one of the USB ports on the PS5.
Complete the Pairing: Press the PS button on the controller to finish the pairing process.
Disconnect the Cable: Once connected, you can unplug the USB cable and use the controller wirelessly.
Complete Guide: Connecting Your PS5 Controller to Your PS5
If you’re still a bit lost with the quick tutorial above, then don’t worry. Here is a more detailed guide explaining every step in-depth. It will be super easy to understand for anyone and everyone.
Power on Your PS5
Locate the Power Button: Find the power button on the front of your PlayStation 5 console. It’s the small, white button near the bottom of the console’s face.
Turn on the Console: Press the power button once. You’ll see a white LED light, indicating that the PS5 is powering up. Wait until the PS5 completes its boot-up process. This should take just a minute or so, and you’ll eventually see the home screen or the PS5 dashboard.
Activate Pairing Mode on Your Controller
Prepare the Controller: Ensure your DualSense controller is charged. If not, connect it to the PS5 using a USB cable or charge it with a separate charger.
Enter Pairing Mode: On your controller, locate the PS Button. It is the circular button with the PlayStation logo. Find the Create Button. It is the button to the left of the touchpad.
Press and Hold: Press and hold both the PS Button and the Create Button simultaneously. After a few seconds, you’ll see the light bar on the controller start to flash rapidly. This flashing indicates that the controller is in pairing mode and searching for a console to connect to.
Connect the Controller to the PS5
Prepare a USB Cable: Take a USB-C to USB-A cable (the one that came with your PS5 controller or any compatible USB-C cable). The USB-C end will connect to the controller, and the USB-A end will connect to the PS5.
Plug in the Cable: Insert the USB-C end of the cable into the port on the top of the controller. Then, connect the USB-A end into one of the USB ports on the front or back of the PS5 console.
Automatic Detection: The PS5 will automatically detect the connected controller. You may see a prompt on the screen asking if you want to pair the controller. If this happens, follow the on-screen instructions to confirm pairing.
(Image credit: Youtube/the tech giant)
Complete the Pairing Process
Press the PS Button: With the USB cable still connected, press the PS Button on the controller. This action should log you into your PS5 user profile or prompt you to select a user if you have multiple profiles set up.
Confirm Connection: Once the PS5 recognizes the controller, it will cease flashing and the light bar will show a solid color, indicating a successful connection. The PS5 home screen should now be navigable using the controller.
Disconnect the Cable
Unplug the USB Cable: Once you’ve confirmed that the controller is working correctly and responding to inputs, unplug the USB cable from the PS5.
Switch to Wireless Mode: The controller will now operate wirelessly. You can use it from a distance without the cable connected, and it will maintain its connection as long as it remains within range of the console.
Get all the latest post on through the eyes of a teenager straight in your inbox.
Subscribe to stay updated, it’s free!
Complete Guide: Connecting Your PS5 Controller to Your PC
Now if you’re wondering if you can also connect your PS5 controller to your pc, then I have the answer for you: yes, and here’s a quick guide on how to do it:
Prepare Your PS5 Controller
Charge Up: Before starting, make sure your PS5 DualSense controller is fully charged. You can do this by connecting it to your PS5 or a separate charger using a USB-C cable.
Power On: Ensure the controller is turned on. Simply press the PS button (the circular button with the PlayStation logo) until the light bar illuminates. This shows that the controller is ready for connection.
Decide on Your Connection Method
Wired Connection: For a straightforward setup, use a USB-C to USB-A cable. This method is typically plug-and-play and requires no additional software.
Wireless Connection: If you prefer a wireless setup, you’ll connect via Bluetooth. Make sure your PC has Bluetooth capabilities. If not, you’ll need a Bluetooth dongle.
Connecting via USB-C Cable
Obtain the Cable: Use a USB-C to USB-A cable. Connect the USB-C end to the port on the top of the controller.
Connect to PC: Plug the USB-A end of the cable into an available USB port on your PC. Windows should automatically detect the controller. You may see a notification indicating that the device is being set up.
Verify Connection: Go to your PC’s “Devices and Printers” or “Game Controllers” settings to confirm the controller is recognized. You should see it listed as “Wireless Controller” or similar. Test the controller in a game or the Windows game controller settings to ensure it’s working.
Connecting via Bluetooth
Enable Bluetooth on Your PC: Go to “Settings” > “Devices” > “Bluetooth & other devices” and turn on Bluetooth. Make sure it’s active and in discovery mode.
Put Controller in Pairing Mode: Press and hold the PS Button and the Create Button (the button next to the touchpad) simultaneously until the light bar starts flashing rapidly. This indicates the controller is in pairing mode.
Pair the Controller: On your PC, click “Add Bluetooth or other device” and select “Bluetooth”. Wait for your PC to detect the controller, which should appear as “Wireless Controller” or a similar name. Click on it to pair. Once connected, the light bar on the controller will stop flashing and remain a steady color.
Test and Configure
Check for Updates: Ensure that your PC’s Bluetooth drivers are up to date. Sometimes, issues can arise from outdated drivers. Check for updates in the Device Manager under “Bluetooth”.
Test the Controller: Open a game or use the Windows “Game Controller Settings” (found in the Control Panel or by searching in the Start menu) to test the functionality of the controller. Make sure all buttons and joysticks are working as expected.
Adjust Settings: If needed, use third-party software like DS4Windows to further customize your controller settings, such as button mappings or sensitivity adjustments.
Troubleshooting tips
Troubleshooting tips for connecting to Your PS5:
Controller Not Pairing
Check the Battery: Make sure your controller has enough juice. If it’s low, charge it up using your PS5 or another USB-C charger.
Reset the Controller: If it’s still not pairing, use a small pin to press the reset button on the back of the controller for about 10 seconds. Then try pairing again.
Update Your PS5: Go to Settings > System > System Software > System Software Update and Settings to check if your PS5 needs an update. Sometimes, outdated software can cause pairing issues.
Controller Not Recognized
Try a Wired Connection: Plug the controller into the PS5 with a USB cable. This might help the console recognize it.
Restart the PS5: Power off your PS5 by holding the power button for about seven seconds until you hear a second beep. Turn it back on and try connecting the controller again.
Controller Not Working After Disconnecting USB
Re-sync the Controller: Press the PS button on the controller to reconnect it wirelessly after unplugging the USB cable.
Check Bluetooth Status: Make sure the PS5’s Bluetooth is working fine. A quick restart of the console can sometimes fix connectivity issues.
Troubleshooting tips for connectingto Your PC:
Controller Not Detected
Update Your Bluetooth Drivers: Head to Device Manager and make sure your Bluetooth drivers are up-to-date. Outdated drivers can sometimes prevent detection.
Try Different USB Ports: If you’re using a wired connection and it’s not working, test different USB ports on your PC. Sometimes, ports can be temperamental.
Controller Not Working Wirelessly
Enable Bluetooth: Make sure Bluetooth is turned on in your PC’s settings. Check for driver updates if it’s not working.
Re-enter Pairing Mode: Press and hold the PS and Create buttons on the controller to re-enter pairing mode, then try connecting through Bluetooth settings on your PC.
Controller Not Working in Games
Check Game Compatibility: Some games might not support the PS5 controller right away. Look into the game’s settings or documentation to confirm compatibility.
Use DS4Windows: If you’re having trouble, try using DS4Windows. This software helps your PC recognize and customize PS5 controllers more effectively.
Controller Functionality Issues
Test on Another Device: Try connecting the controller to another PS5 or PC to see if it works there. This can help identify if the issue is with the controller or the original device.
Check for Interference: If you’re using Bluetooth, make sure there are no other Bluetooth devices causing interference. Keep things simple and close to your PC.
These tips should help you troubleshoot common problems with connecting your PS5 controller. If you’re still having issues, checking out official support resources or reaching out to customer support might be your next step.
No, the PS5 controller can only connect to one device at a time. If you want to switch devices, you’ll need to disconnect the controller from the current device and pair it with the new one.
While many games and applications support the PS5 controller natively on Windows, some might require additional software for full functionality. DS4Windows is a popular choice for customizing and ensuring full compatibility.
No, the PS5 controller can only connect to one device at a time. If you want to switch devices, you’ll need to disconnect the controller from the current device and pair it with the new one.
Did you know over 55 million people rely on Apple AirTags to keep track of their stuff? That’s a lot of people who really don’t want to lose things like keys, wallets, or even their pets! But there’s one big question on everyone’s mind: How long do AirTags batteries actually last?
nnnn
If you’re like me, you don’t want to be left with a dead tracker when it matters most. I’ve used tons of AirTags in my time, so I’m actually pretty curious myself to find out. So let’s dive into everything you need to know to keep your trackers working for as long as possible!
AirTags run on a tiny CR2032 battery—the same kind you’d find in watches or remote controls. Apple says you should get around 8 to 12 months of life from each one. Which is a pretty solid range for most users. But if you’re someone who’s constantly checking on their AirTag, it might run out sooner.
nnnn(Image credit: MacRumors)nnnn
You can check your AirTag’s battery level easily in the Find My app. Just open the app, select your AirTag, and you’ll see the small battery icon. It won’t give you an exact percentage, but it’ll let you know when it’s time to think about a replacement.
n
nnnnnnnn
n
What Affects AirTag Battery Life?
nnnn
AirTag battery life is like trying to balance your phone usage during a long day out. It mostly depends on how often you check it. Here are the main factors:
nnnn
1. Frequency of Location Updates
nnnn
Every time you open the Find My app to check your AirTag’s location, it drains a bit of the battery. You can think of it like a tiny “Where are you?” text message every time you hit refresh. Constant checking means a quicker drain, so try to avoid overdoing it.
nnnn
2. Environmental Conditions
nnnn
CR2032 batteries are tough, but extreme temperatures can take a toll. Cold or hot weather makes them drain faster. Batteries don’t love the cold, and a hot day in the car isn’t ideal either. So aim to keep your AirTag in normal conditions to maximize battery life.
nnnnYou can see in this image that the AirTags’s battery performs best at around 20C and worst at -10C so try to avoid really cold temperatures when using your Airtag. (Data credit: EEVblog)nnnn
3. Distance from Your iPhone
nnnn
AirTags rely on a Bluetooth connection with your iPhone to function. If they’re often on the edge of Bluetooth range, they’ll keep trying to connect, which in turn uses more power. So, the further away your AirTag, the faster it’ll wear out its battery. Keeping it within range whenever possible is always a smart move.
nnnn
4. Using Precision Finding
nnnn
Precision Finding is a super-handy feature. It pinpoints the exact location of your AirTag when it’s nearby. But it uses Ultra-Wideband, which is more power-hungry than regular Bluetooth. So if you use Precision Finding a lot, expect a bit more drain.
nnnn(Image credit: OSXdaily)n
nnnnnnnn
n
Signs Your AirTag Battery Needs Replacement
nnnn
Wondering if it’s time to replace the battery? Apple gives a few hints to help you figure it out:
nnnn
1. Battery Level Indicators
nnnn
In the Find My app, you’ll see a battery icon next to your AirTag. It’s not super precise, but it’ll show a low-battery warning when it’s time to swap in a new one.
nnnn
2. Notifications from Apple
nnnn
Your iPhone will notify you when the battery’s close to dead. You’ll see a message saying, “Battery Low” for that AirTag. It’s a simple heads-up that helps you stay prepared.
nnnn(Image credit: CyberGuy)nnnn
3. Slower Location Responses
nnnn
If your AirTag is taking longer to update its location or seems sluggish in Precision Finding. Then that might be a sign that the battery might be struggling. When AirTags are running low, they often react slower, so this can be an early warning sign.
n
nnnnnnnn
n
How to Replace Your AirTag Battery
nnnn
If you’ve seen the “Battery Low” notification or noticed that your AirTag is slow to update, it’s probably time to replace the battery. Don’t worry—it’s a simple process. Here’s a step-by-step guide with extra tips to make sure everything goes smoothly.
nnnn
Step 1: Gather Your Supplies
nnnn
You don’t need much for this task, but a little preparation goes a long way. Here’s exactly what you’ll need:
nnnn
n
New CR2032 battery (Make sure it’s a trusted brand, like Energizer or Panasonic. Avoid batteries with a “bitter coating,” as it can interfere with the AirTag’s connection.)
nnnn
A clean, flat surface to work on (You don’t want to lose small parts!)
n
nnnnYou can find CR2032 batteries basically anywhere, however if you click on the image I have on from amazon for you that currently has a 15% discount.nnnn
Step 2: Locate the Back Cover
nnnn
Turn the AirTag over so the Apple logo faces you. The stainless-steel back cover is what you’ll be removing to insert the battery. The AirTag’s design keeps everything compact, so it may look tricky at first, but it’s actually very straightforward.
nnnnnnnn
Step 3: Press Down and Twist
nnnn
To open the battery compartment:
nnnnn
Press down firmly on the back cover with your thumb. You’ll feel a slight give as you press.
nnnn
While pressing, twist counterclockwise. It should rotate about a quarter turn.
nnnn
Lift off the back cover gently. You’ll now see the CR2032 battery sitting inside.
nnnnn(Image credit: MacRumors)nnnn
Step 4: Remove the Old Battery
nnnn
Carefully tip the AirTag to let the old battery fall out. If it’s a little snug, you can gently nudge it with a fingernail or a small, non-metallic tool. Avoid using anything sharp that may damage the battery compartment.
nnnn(Image credit: AppleInsider)nnnn
Step 5: Insert the New Battery
nnnn
With the new CR2032 battery in hand:
nnnnn
Check the orientation: The positive (+) side should be facing up.
nnnn
Place the battery into the compartment, ensuring it sits snugly. You might hear a little chime when the new battery connects. This is a quick signal that the AirTag is recognizing the new power source.
nnnnn(Image credit: MAVEN Wallets)nnnn
Step 6: Secure the Back Cover
nnnn
To close up the AirTag:
nnnnn
Align the back cover with the AirTag.
nnnn
Press down and twist clockwise until the cover locks into place. You should feel it click into position, making sure it’s secure.
nnnnn
Step 7: Confirm the Replacement
nnnn
Once the battery is replaced, open the Find My app on your iPhone. Check that your AirTag is connecting properly. This is also a good time to verify that the battery icon shows full power.
nnnnCheck if your AirTag is in the Find My App. (Image credit: Apple)nnnn
Extra Tips for a Smooth Battery Replacement
nnnnn
Use a New, High-Quality Battery: Cheaper or older batteries may not give you the full lifespan. Also, some generic brands might not fit as snugly.
nnnn
Avoid Bitter-Coated Batteries: Many CR2032 batteries now come with a bitter coating to prevent ingestion. This is great for safety but can disrupt AirTag connectivity. Check the packaging to make sure your replacement battery doesn’t have this coating.
nnnn
Dispose of the Old Battery Responsibly: Used batteries can be harmful to the environment. So make sure to find a local recycling center or a nearby electronics store that accepts used batteries. It’s a small effort that goes a long way.
nnnn
Check for a Proper Seal: After you replace the battery and reattach the cover, give it a gentle shake. If you hear anything rattling, it’s a sine you should have a closer look. Open it up and make sure the battery is seated correctly and the cover is locked in place.
nnnn
Resetting the AirTag (If Needed): If, for some reason, your AirTag doesn’t respond after replacing the battery. Then, try removing the battery and holding down on the stainless-steel back for five seconds before reinserting. This can help reset the AirTag and reconnect it to your iPhone.
nnnnn
Troubleshooting Common Battery Replacement Issues
nnnn
If things don’t go as planned, here are a few common issues and solutions:
nnnn
n
No Sound When Battery is Inserted: The AirTag should make a sound when a new battery is inserted. If it doesn’t, check the orientation and ensure the battery’s positive side is facing up.
nnnn
Battery Life Issues: If your new battery doesn’t seem to last as long as expected. Then it might be due to environmental factors (like extreme temperatures) or a low-quality battery like we discussed earlier. Consider using a higher-quality brand to get optimal performance.
nnnn
Connection Problems: If the AirTag doesn’t reconnect to your iPhone, try restarting your iPhone and opening the Find My app again. Sometimes a quick reboot can quickly solve the issue.
n
nnnn
Post-Replacement Setup Tips
nnnn
Once your battery is replaced and your AirTag is back in action. It’s a good idea to keep an eye on it in the Find My app. This will help you track its battery life and ensure it’s operating as expected.
nnnn
Replacing an AirTag battery may seem like a tiny task, but I would recommend taking these few extra steps to do it right. So you’ll be able to rely on it for another year without any hassle. Plus, understanding these small maintenance steps makes owning and using an AirTag even easier!
n
nnnnnnnn
n
Tips to Maximize AirTag Battery Life
nnnn
Let’s talk about how to keep that AirTag battery lasting as long as possible. A few small changes can make a big difference.
nnnn
1. Limit Unnecessary Checks
nnnn
Every time you check the location of your AirTag, it takes a bit of battery life. So try to avoid over-checking unless you really need it. Less checking means longer-lasting power.
nnnn(Image credit: Simplymac.com)nnnn
2. Store in Moderate Conditions
nnnn
Extreme temperatures drain batteries quickly. Keep your AirTag out of places that get very hot or cold. Like for example a car in the sun or a chilly garage.
nnnn
3. Reduce Precision Finding Use
nnnn
Using Precision Finding often is handy, but it drains power faster. Only use it when you need an exact location. This will help stretch the battery life.
nnnn
4. Keep Track of the Battery Level
nnnn
Check the battery status in the Find My app every few months. It’s a simple way to stay on top of your AirTag’s power and avoid surprises.
n
nnnnnnnn
n
AirTag Battery Life – Conclusion
nnnn
Now you’re ready to make the most of your AirTag’s battery life! With average use, you’ll likely see about a year from each battery, but it depends on how you use it. Keeping the AirTag close, using Precision Finding sparingly, and storing it in stable conditions all help extend it’s battery life.
nnnn
Replacing the battery is quick and simple, so you’ll never be stuck without your tracker. Following these tips should help you stay one step ahead. Got more questions about your AirTag? Let me know in the comments below! Remember, replacing the battery is easy and takes just seconds. Have any more questions about AirTag battery life? Drop them in the comments below—happy tracking!
Technically, yes, but it’s not recommended. Rechargeable CR2032 batteries usually have a lower capacity and may drain much faster than non-rechargeable ones. Additionally, they may not fit as snugly or connect as well in the AirTag, potentially causing connectivity issues. Standard CR2032 batteries typically provide more reliable performance and last around a year.
Absolutely, and it’s encouraged! Many electronics stores, battery retailers, and recycling centers accept used batteries. Since batteries contain chemicals that can harm the environment if not disposed of properly, recycling them is a responsible choice. Just drop them off at an appropriate recycling point in your area.
After replacing the battery, you should hear a chime when it makes contact, signaling the AirTag is ready. Open the Find My app to confirm it’s showing full battery status and check that it reconnects to your iPhone. If you don’t hear a sound or see connection issues, try reinserting the battery or performing a reset by pressing the back of the AirTag without the battery for a few seconds.
Installing your CPU or Central Processing Unit might seem daunting at first. But in this post, I’m going to show you that it’s simple. Everything you need to install your CPU includes: a screwdriver, thermal paste, and of course a motherboard to install it in, thermal paste is to keep your CPU cool and you can find it on Amazon for pretty cheap. I would also strongly recommend getting a cooler, this is most of the time included with your CPU but if it isn’t you should get one. CPU coolers come in all shapes and sizes, but if you have a normal processor the stock cooler will do just fine. Do know that if you’re getting a stock cooler you have to get it from the right brand, if you have an AMD processor then you should get an AMD cooler and if you have an Intel processor then you should get an Intel cooler.
nnnn
So in this post, I’ll explain how to install your CPU in only 5 simple steps, and all you need is a screwdriver and some thermal paste. The process of installing your CPU will also depend on what brand of CPU you’re using. So first I’m going to explain how to install your AMD CPU and then I’ll tell you how to install your Intel CPU. Then I’ll show you how to install the stock cooler as it’s pretty similar for both AMD and Intel
nnnnnnnn
How To Instal An AMD CPU
nnnnnnnn
I’m going to explain how to install your AMD CPU in only 5 steps, and I’m going to try to keep it as simple as possible.
nnnnnnnnn
Get the socket ready.
nnnnn
Start by putting the retention arm on your CPU socket up by gently pressing it to the side and then up, as shown in the picture below.
nnnnImage credit: Asusnnnn
2. Putting the CPUin it’s socket.
nnnn
Gently put the CPU in the socket by letting it fall in the holes, you should see a golden arrow in one of the corners of the CPU make sure that it’s pointing in the same direction as the arrow on the socket. Note that you shouldn’t be using any force to do so and give it a gentle little wiggle once it is in to confirm the CPU is fully seated in its socket. Also, make sure to not touch any of the pins as they’re quite fragile. If it isn’t going in try repositioning it a couple of times and it should just fall in, as shown in the picture below.
nnnn(Image credit: Tom’s Hardware)nnnn
3. Fully installing the CPU.
nnnn
Put the retention arm down again and you’ve succesfully installed your CPU!
nnnn(Image credit: ifitjams)nnnnnnnn
How To Install An Intel CPU
nnnnnnnn
Installing an Intel CPU might seem similar but there are a few things you have to do differently than with an AMD CPU.
nnnnnnnnn
Get the socket ready.
nnnnn
Getting the socket ready is the same process as with the AMD socket, start by putting the retention arm on your CPU socket up by gently pressing it to the side and then up, as shown in the picture below. Now you will also have to flip the load plate up, the load plate will be unlocked once you have put the retention arm up. Also, make sure to not touch the pins once they’ve been exposed as they can be quite fragile.
nnnn(Image credit: Asus)nnnn
2. Putting the CPU in it’s socket.
nnnn
Putting the CPU in its socket is a bit different with Intel as the pins aren’t on the CPU but on the socket. Again be sure to not touch the bottom of the CPU, because your fingers can get oils or residue in there which isn’t what you want. Now as with the AMD CPU, there will be a golden arrow and another arrow printed on the loadplate and they should be pointing in the same direction. You want to go straight down and gently put it in its socket, be sure not to use any force or try and press it in as the CPU should just fall straight into the socket and give a gentle little wiggle to confirm it’s fully in.
nnnn(Image credit: 173.rtaf.mi)nnnn
3. Fully installing the CPU.
nnnn
Now if the CPU is fully seated you can put the loadplate back down over the CPU, and if you have a black protective cover on your loadplate it should just pop straight off. Then proceed to put the retention arm back down to its original spot, so fully down and beneath that notch. And that’s it, well done!
nnnn(Image credit: XDA)nnnnnnnn
How To Install The Stock Cooler
nnnnnnnn
Installing your CPU stock cooler is going to be pretty much the same on AMD and Intel, so I’m going to just make 1 guide for this. All you will need to install your CPU’s stock cooler is some thermal paste (which might already be pre-installed on your stock cooler) and a screwdriver.
nnnnnnnnn
Applying some thermal paste.
nnnnn
Applying thermal paste is very important to ensure that your CPU isn’t overheating and that it’s working at its maximum potential. Applying the thermal paste is easy, note that if you bought a new CPU then there should already be thermal past pre-applied on the stock cooler. There are multiple ways of putting on thermal paste, my favorite is putting a dot of it on your CPU and it should automatically spread out if you have a spatula for your thermal paste which looks like this, you should spread it out with that and make sure everything is covered with a thin layer of thermal paste.
nnnn(Image credit: coolingmonster)nnnn
2. Putting the cooler on the CPU
nnnn
Now putting the cooler on the CPU might look complicated but it’s easy, all you need is a screwdriver. Firstly you want to locate the designated holes for the cooler on the motherboard, these will often be pretty big holes in all 4 corners around the CPU. Then you have to put the cooler on and screw it in, it’s that simple! You should do this in one go so the thermal paste stays intact so make sure you’re being careful when installing the cooler.
nnnn(Image credit: XDA)nnnn
3. Connecting the cooler to the motherboard.
nnnn
Now for our last step, plugging the cooler into the motherboard. This is probably the easiest to do so I’ll make this nice and short. Locate the cable of your stock cooler, typically a black cable coming from the top (so where the logo is). Then you want to find the PWM header on the motherboard, this can be anywhere from the top to the sides of your motherboards but should say CPU_FAN above it. Plug it in and you should be good to go!