


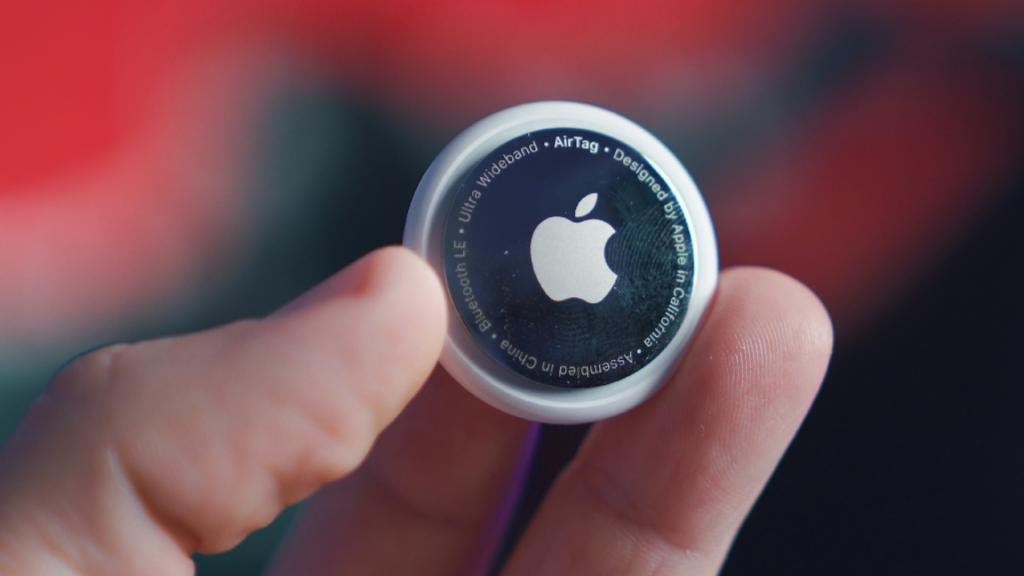
Did you know over 55 million people rely on Apple AirTags to keep track of their stuff? That’s a lot of people who really don’t want to lose things like keys, wallets, or even their pets! But there’s one big question on everyone’s mind: How long do AirTags batteries actually last?
If you’re like me, you don’t want to be left with a dead tracker when it matters most. I’ve used tons of AirTags in my time, so I’m actually pretty curious myself to find out. So let’s dive into everything you need to know to keep your trackers working for as long as possible!
Helpfull article:

Best iPhone 15 Pro Max Cases of 2024: Top Picks for Style and Protection
Discover the best iPhone 15 Pro Max cases of 2024! From premium Bandwerk leather to rugged Mous, protective Casetify Bounce, and… Read more
Best latest article:
-
How Charging Your Power Bank to 100% Can Damage It
Learn why you shouldn’t charge your power bank to 100% and tips on extending your power banks lifespan. Read more
Table of Contents:
Understanding AirTag Battery Basics
AirTags run on a tiny CR2032 battery—the same kind you’d find in watches or remote controls. Apple says you should get around 8 to 12 months of life from each one. Which is a pretty solid range for most users. But if you’re someone who’s constantly checking on their AirTag, it might run out sooner.

You can check your AirTag’s battery level easily in the Find My app. Just open the app, select your AirTag, and you’ll see the small battery icon. It won’t give you an exact percentage, but it’ll let you know when it’s time to think about a replacement.
What Affects AirTag Battery Life?
AirTag battery life is like trying to balance your phone usage during a long day out. It mostly depends on how often you check it. Here are the main factors:
1. Frequency of Location Updates
Every time you open the Find My app to check your AirTag’s location, it drains a bit of the battery. You can think of it like a tiny “Where are you?” text message every time you hit refresh. Constant checking means a quicker drain, so try to avoid overdoing it.
2. Environmental Conditions
CR2032 batteries are tough, but extreme temperatures can take a toll. Cold or hot weather makes them drain faster. Batteries don’t love the cold, and a hot day in the car isn’t ideal either. So aim to keep your AirTag in normal conditions to maximize battery life.

3. Distance from Your iPhone
AirTags rely on a Bluetooth connection with your iPhone to function. If they’re often on the edge of Bluetooth range, they’ll keep trying to connect, which in turn uses more power. So, the further away your AirTag, the faster it’ll wear out its battery. Keeping it within range whenever possible is always a smart move.
4. Using Precision Finding
Precision Finding is a super-handy feature. It pinpoints the exact location of your AirTag when it’s nearby. But it uses Ultra-Wideband, which is more power-hungry than regular Bluetooth. So if you use Precision Finding a lot, expect a bit more drain.

Signs Your AirTag Battery Needs Replacement
Wondering if it’s time to replace the battery? Apple gives a few hints to help you figure it out:
1. Battery Level Indicators
In the Find My app, you’ll see a battery icon next to your AirTag. It’s not super precise, but it’ll show a low-battery warning when it’s time to swap in a new one.
2. Notifications from Apple
Your iPhone will notify you when the battery’s close to dead. You’ll see a message saying, “Battery Low” for that AirTag. It’s a simple heads-up that helps you stay prepared.

3. Slower Location Responses
If your AirTag is taking longer to update its location or seems sluggish in Precision Finding. Then that might be a sign that the battery might be struggling. When AirTags are running low, they often react slower, so this can be an early warning sign.
How to Replace Your AirTag Battery
If you’ve seen the “Battery Low” notification or noticed that your AirTag is slow to update, it’s probably time to replace the battery. Don’t worry—it’s a simple process. Here’s a step-by-step guide with extra tips to make sure everything goes smoothly.
Step 1: Gather Your Supplies
You don’t need much for this task, but a little preparation goes a long way. Here’s exactly what you’ll need:
- New CR2032 battery (Make sure it’s a trusted brand, like Energizer or Panasonic. Avoid batteries with a “bitter coating,” as it can interfere with the AirTag’s connection.)
- A clean, flat surface to work on (You don’t want to lose small parts!)

Step 2: Locate the Back Cover
Turn the AirTag over so the Apple logo faces you. The stainless-steel back cover is what you’ll be removing to insert the battery. The AirTag’s design keeps everything compact, so it may look tricky at first, but it’s actually very straightforward.

Step 3: Press Down and Twist
To open the battery compartment:
- Press down firmly on the back cover with your thumb. You’ll feel a slight give as you press.
- While pressing, twist counterclockwise. It should rotate about a quarter turn.
- Lift off the back cover gently. You’ll now see the CR2032 battery sitting inside.

Step 4: Remove the Old Battery
Carefully tip the AirTag to let the old battery fall out. If it’s a little snug, you can gently nudge it with a fingernail or a small, non-metallic tool. Avoid using anything sharp that may damage the battery compartment.

Step 5: Insert the New Battery
With the new CR2032 battery in hand:
- Check the orientation: The positive (+) side should be facing up.
- Place the battery into the compartment, ensuring it sits snugly. You might hear a little chime when the new battery connects. This is a quick signal that the AirTag is recognizing the new power source.

Step 6: Secure the Back Cover
To close up the AirTag:
- Align the back cover with the AirTag.
- Press down and twist clockwise until the cover locks into place. You should feel it click into position, making sure it’s secure.
Step 7: Confirm the Replacement
Once the battery is replaced, open the Find My app on your iPhone. Check that your AirTag is connecting properly. This is also a good time to verify that the battery icon shows full power.

Extra Tips for a Smooth Battery Replacement
- Use a New, High-Quality Battery: Cheaper or older batteries may not give you the full lifespan. Also, some generic brands might not fit as snugly.
- Avoid Bitter-Coated Batteries: Many CR2032 batteries now come with a bitter coating to prevent ingestion. This is great for safety but can disrupt AirTag connectivity. Check the packaging to make sure your replacement battery doesn’t have this coating.
- Dispose of the Old Battery Responsibly: Used batteries can be harmful to the environment. So make sure to find a local recycling center or a nearby electronics store that accepts used batteries. It’s a small effort that goes a long way.
- Check for a Proper Seal: After you replace the battery and reattach the cover, give it a gentle shake. If you hear anything rattling, it’s a sine you should have a closer look. Open it up and make sure the battery is seated correctly and the cover is locked in place.
- Resetting the AirTag (If Needed): If, for some reason, your AirTag doesn’t respond after replacing the battery. Then, try removing the battery and holding down on the stainless-steel back for five seconds before reinserting. This can help reset the AirTag and reconnect it to your iPhone.
Troubleshooting Common Battery Replacement Issues
If things don’t go as planned, here are a few common issues and solutions:
- No Sound When Battery is Inserted: The AirTag should make a sound when a new battery is inserted. If it doesn’t, check the orientation and ensure the battery’s positive side is facing up.
- Battery Life Issues: If your new battery doesn’t seem to last as long as expected. Then it might be due to environmental factors (like extreme temperatures) or a low-quality battery like we discussed earlier. Consider using a higher-quality brand to get optimal performance.
- Connection Problems: If the AirTag doesn’t reconnect to your iPhone, try restarting your iPhone and opening the Find My app again. Sometimes a quick reboot can quickly solve the issue.
Post-Replacement Setup Tips
Once your battery is replaced and your AirTag is back in action. It’s a good idea to keep an eye on it in the Find My app. This will help you track its battery life and ensure it’s operating as expected.
Replacing an AirTag battery may seem like a tiny task, but I would recommend taking these few extra steps to do it right. So you’ll be able to rely on it for another year without any hassle. Plus, understanding these small maintenance steps makes owning and using an AirTag even easier!
Tips to Maximize AirTag Battery Life
Let’s talk about how to keep that AirTag battery lasting as long as possible. A few small changes can make a big difference.
1. Limit Unnecessary Checks
Every time you check the location of your AirTag, it takes a bit of battery life. So try to avoid over-checking unless you really need it. Less checking means longer-lasting power.

2. Store in Moderate Conditions
Extreme temperatures drain batteries quickly. Keep your AirTag out of places that get very hot or cold. Like for example a car in the sun or a chilly garage.
3. Reduce Precision Finding Use
Using Precision Finding often is handy, but it drains power faster. Only use it when you need an exact location. This will help stretch the battery life.
4. Keep Track of the Battery Level
Check the battery status in the Find My app every few months. It’s a simple way to stay on top of your AirTag’s power and avoid surprises.
AirTag Battery Life – Conclusion
Now you’re ready to make the most of your AirTag’s battery life! With average use, you’ll likely see about a year from each battery, but it depends on how you use it. Keeping the AirTag close, using Precision Finding sparingly, and storing it in stable conditions all help extend it’s battery life.
Replacing the battery is quick and simple, so you’ll never be stuck without your tracker. Following these tips should help you stay one step ahead. Got more questions about your AirTag? Let me know in the comments below! Remember, replacing the battery is easy and takes just seconds. Have any more questions about AirTag battery life? Drop them in the comments below—happy tracking!
FAQ’s
Technically, yes, but it’s not recommended. Rechargeable CR2032 batteries usually have a lower capacity and may drain much faster than non-rechargeable ones. Additionally, they may not fit as snugly or connect as well in the AirTag, potentially causing connectivity issues. Standard CR2032 batteries typically provide more reliable performance and last around a year.
Absolutely, and it’s encouraged! Many electronics stores, battery retailers, and recycling centers accept used batteries. Since batteries contain chemicals that can harm the environment if not disposed of properly, recycling them is a responsible choice. Just drop them off at an appropriate recycling point in your area.
After replacing the battery, you should hear a chime when it makes contact, signaling the AirTag is ready. Open the Find My app to confirm it’s showing full battery status and check that it reconnects to your iPhone. If you don’t hear a sound or see connection issues, try reinserting the battery or performing a reset by pressing the back of the AirTag without the battery for a few seconds.

Are Portable Chargers Safe? Everything You Need to Know in 2024
Discover the truth about portable charger safety in 2024. Learn about potential risks, how to choose safe devices, and essential tips to protect your electronics and yourself. (140 characters)
Can Portable Chargers Charge Laptops in 2024: Everything You Need to Know
Discover how portable chargers can power your laptop on the go. Learn about compatibility, wattage requirements, and top tips for choosing the right portable charger in 2024.
Is a 10,000 mAh Power Bank Good? What You Need to Know in 2024
Discover if a 10,000 mAh power bank is the right choice for your charging needs. Learn about capacity, charging capabilities, portability, and how to choose the perfect portable charger.
Power Bank vs. Portable Charger: Understanding the Key Differences in 2024
Confused about power banks and portable chargers? Discover the essential differences, features, and which device is right for your charging needs in our comprehensive guide.
How Many Watts Do I Need to Charge My Laptop? Power Requirements Guide 2024
Discover exactly how many watts your laptop needs to charge properly. Learn about power requirements, charger compatibility, and how to choose the right wattage for your device in 2024.