


Taking a screenshot on you’re iPad can be really handy if you want to shar would you’re looking at or just want to save it for later. So that’s why today I’m going to explain exactly how to screenshot on iPads in 2024. After reading this post you will know exactly how to screenshot an iPad. You will also learn which iPads or versions of IOS can take screenshots. Finally, you will also understand how to screenshot in 3 different ways like for example on a keyboard or even how set it up so you can take a screenshot with just swiping.
nnnnHow to screenshot on iPad Quick summary
nnnn- n
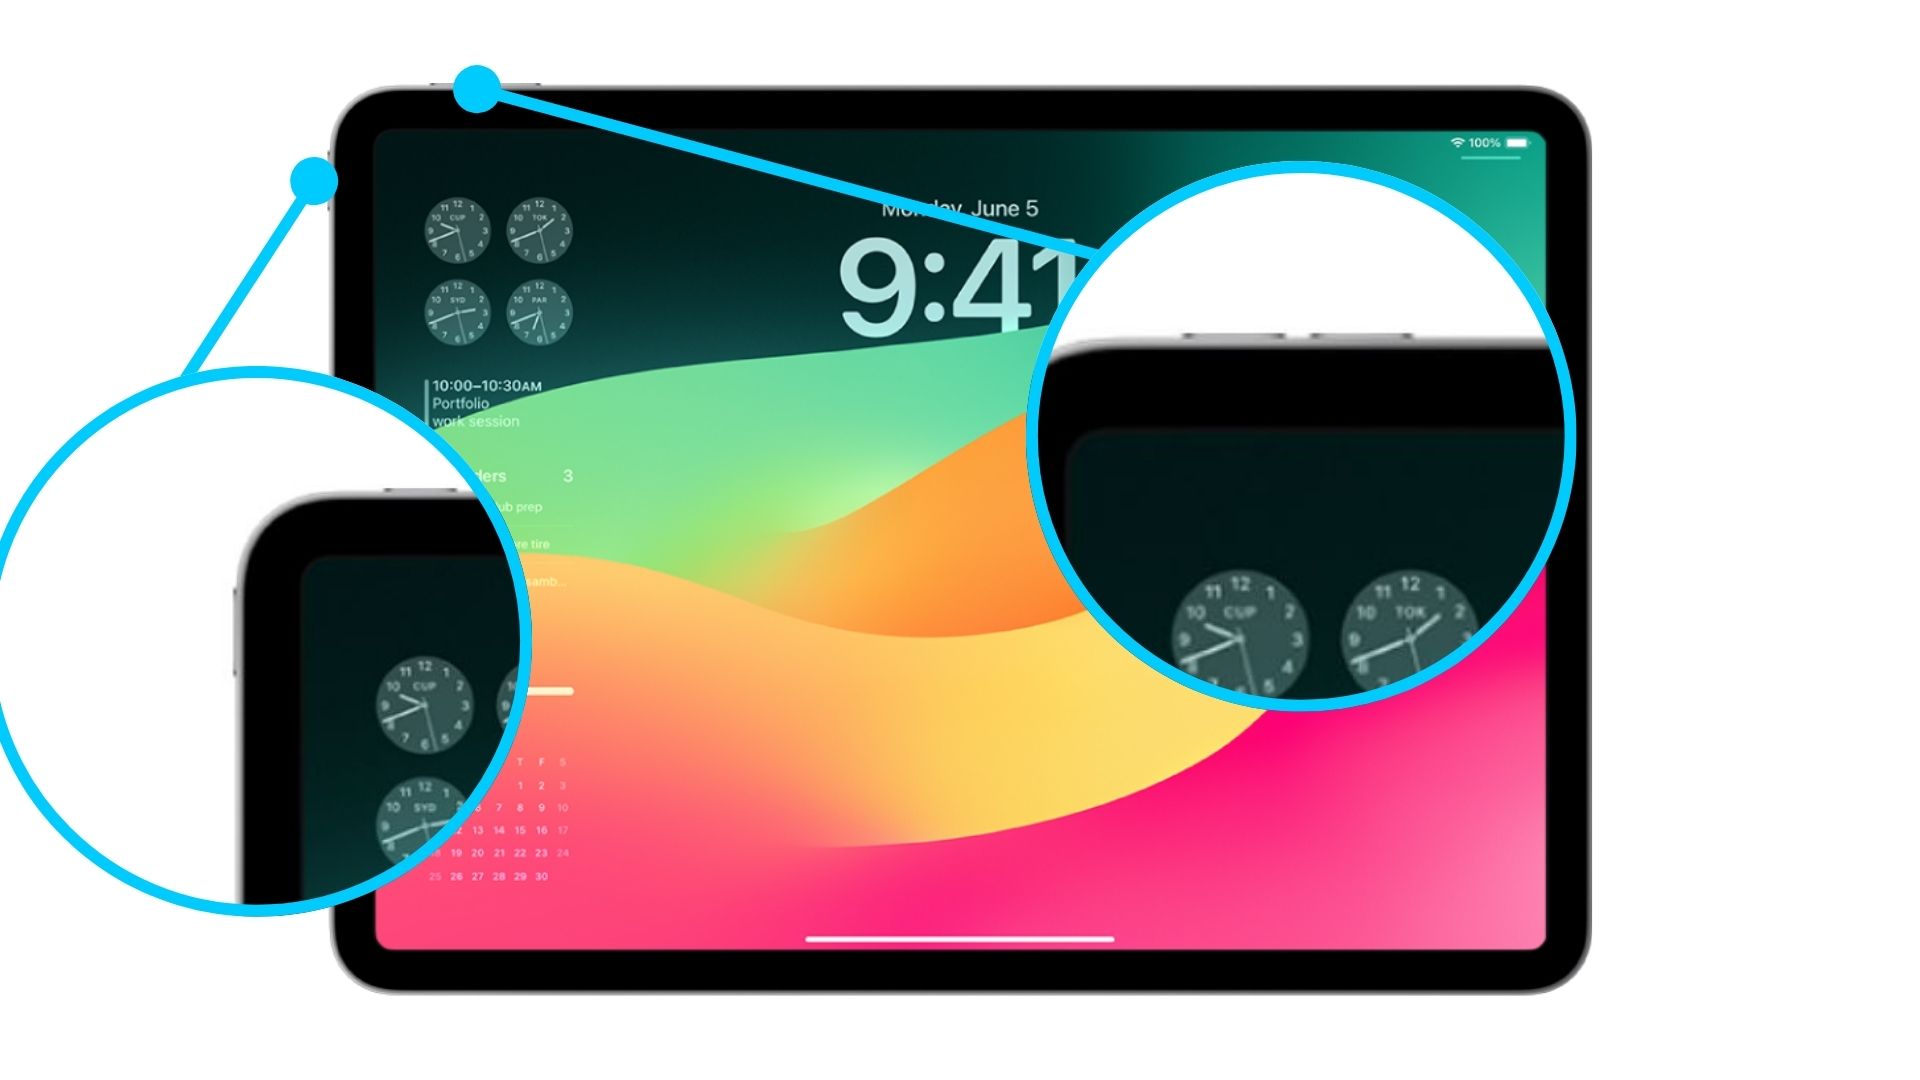
- Locate the Top button and the Volume Up button nnnn
- Press both buttons at the same time nnnn
- Quickly release both buttons nnnn
- Look for the screenshot preview in the lower-left corner nnnn
- Tap the preview to edit or swipe left to dismiss it. n
Helpfull article:
nnnn
How to Clear Cache on iPad: Quick and Easy Methods for 2024
nnnnDiscover simple steps to clear cache on your iPad, boosting performance and freeing up storage. Learn multiple methods to… Read more
Best latest article:
nnnnnTable of Contents:
n nHow To Screenshot on ipad full tutorial
nnnnScreenshotting on your iPad is a great way to save important information. You can share what you’re seeing. Or just keep a record of something you want to save. Whether you’re using it for work, or personal use. Here’s a detailed guide on how to take a screenshot on your iPad.
nnnn- n
- Locate the Buttonsn
- n
- First, you need to find the Top button. It’s sometimes called the Power/On button. You also need to find the Volume Up button on your iPad. The Top button is located on the top left of your iPad. The Volume Up button is also on the left side of the device, beside the Volume Down button. Make sure you have a good grip on your iPad to avoid dropping it during the process. n
n
- n
- Press the Buttons at the Same Time
- n
- With your iPad in your hand, press both the Top/Power button and the Volume Up button at the same time. It’s important to press them together to capture the screenshot properly. Make sure you don’t press them too hard or too soft—just a firm, simultaneous press should do the trick. n
n
- n
- Quickly Release the Buttonsn
- n
- Once you’ve pressed both buttons, release them quickly. You should hear a camera shutter sound and see a brief flash on the screen. This indicates that the screenshot has been successfully taken. If you don’t see the flash or hear the sound, make sure you pressed both buttons again. n
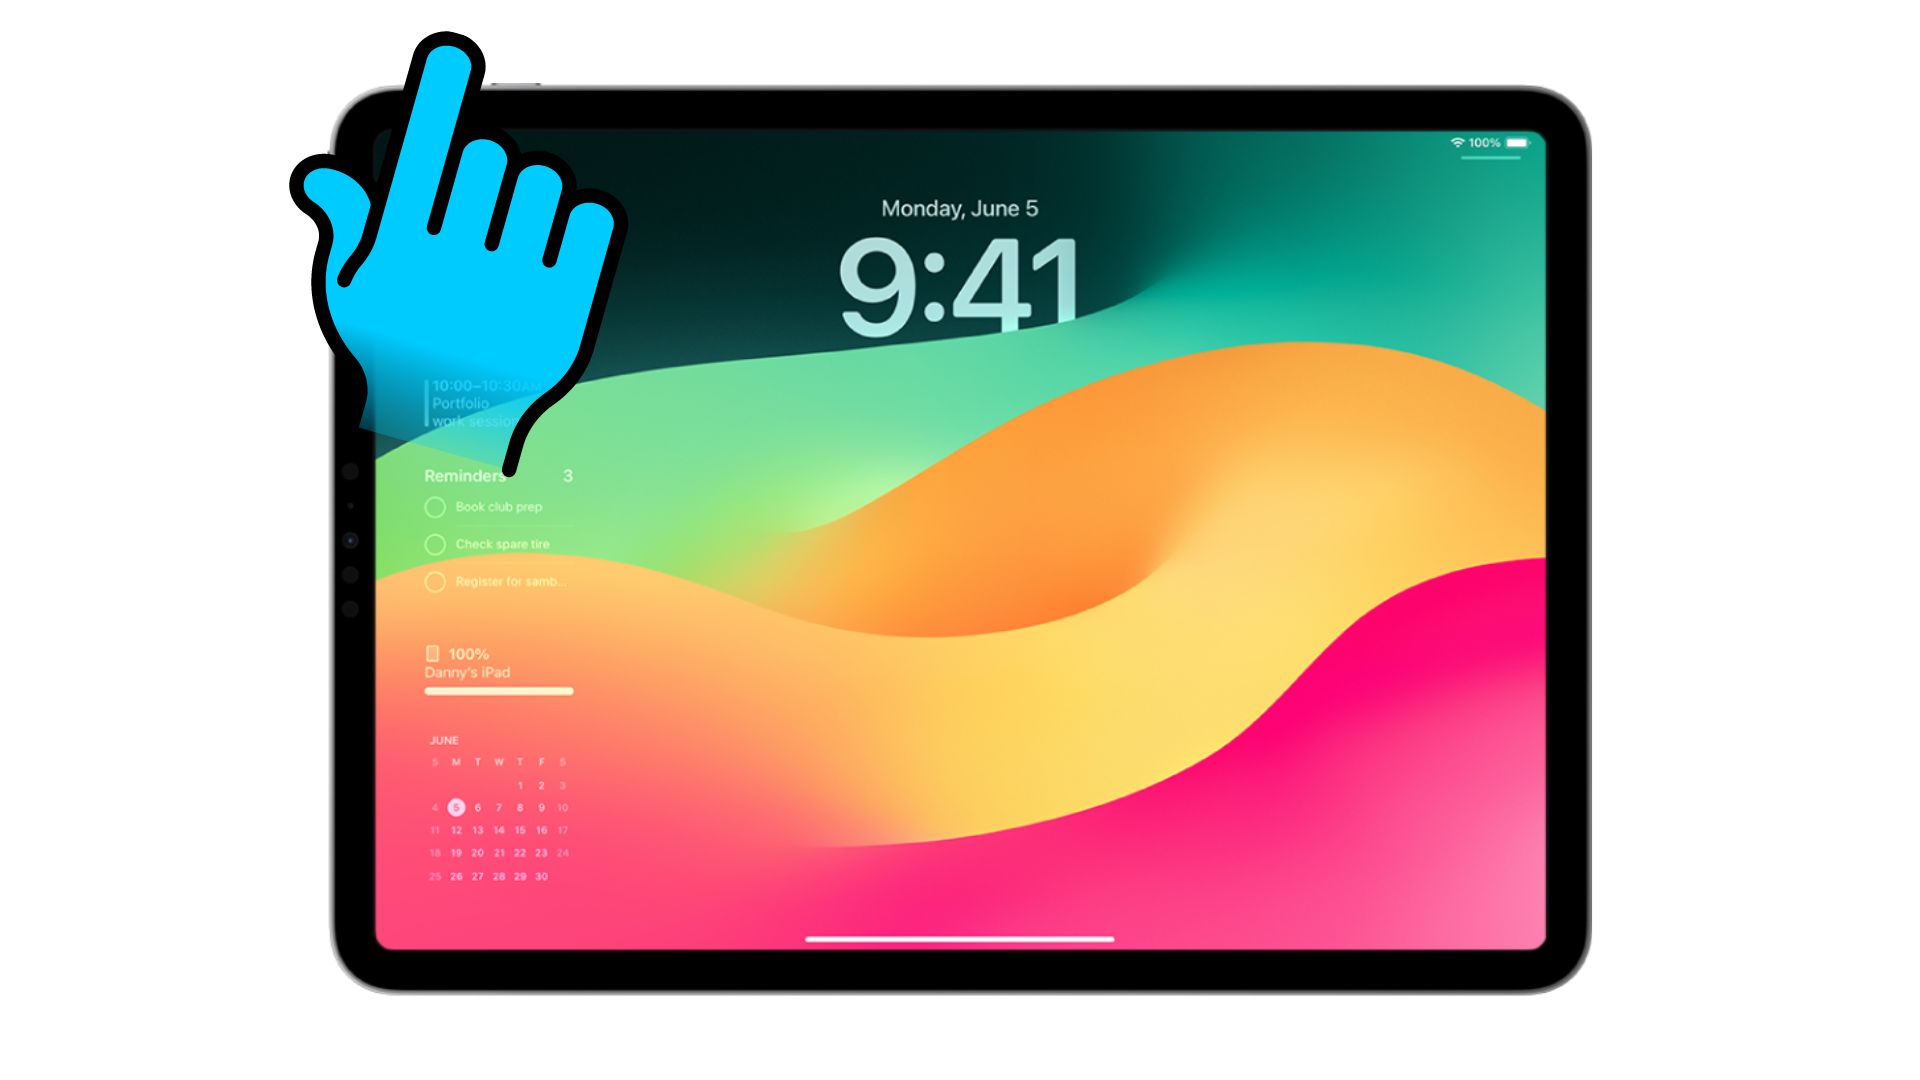
nnnn - Find the Screenshot Previewn
- n
- After taking the screenshot, a small preview of the screenshot will be in the bottom left corner of the screen. This preview will be visible for only a few seconds before it disappears. If you tap on it, you’ll enter the editing mode. You can crop, draw, or make other changes to your screenshot there. If you don’t tap on the preview, it will still be saved automatically so don’t worry about that. n
n
- n
- Access the Screenshot in the Photos Appn
- n
- To view or share your screenshot later, open the Photos app on your iPad. Go to the “Recents” album or the “Screenshots” album (some may not have that). Your screenshot will be there, ready for you to view, edit, or share. You can also use the “Share” button within the Photos app to send it via email, message, or social media. n
n
And you’re done! With these steps, you can easily capture and manage screenshots on your iPad. Taking a screenshot is quick & easy. Whether you’re saving an important document, or just something you want to remember. Taking a screenshot is a great way to do so.
nOther ways to screenshot on iPad
nnnnIf you wanna know more ways to screenshot on an iPad like on a keyboard for example, then the following tips are for you. I have listed 3 other ways to take a screenshot on an iPad that are worth checking out.
nnnnnnnn1. How To Take A Screenshot On iPad With A Swipe Gesture?
n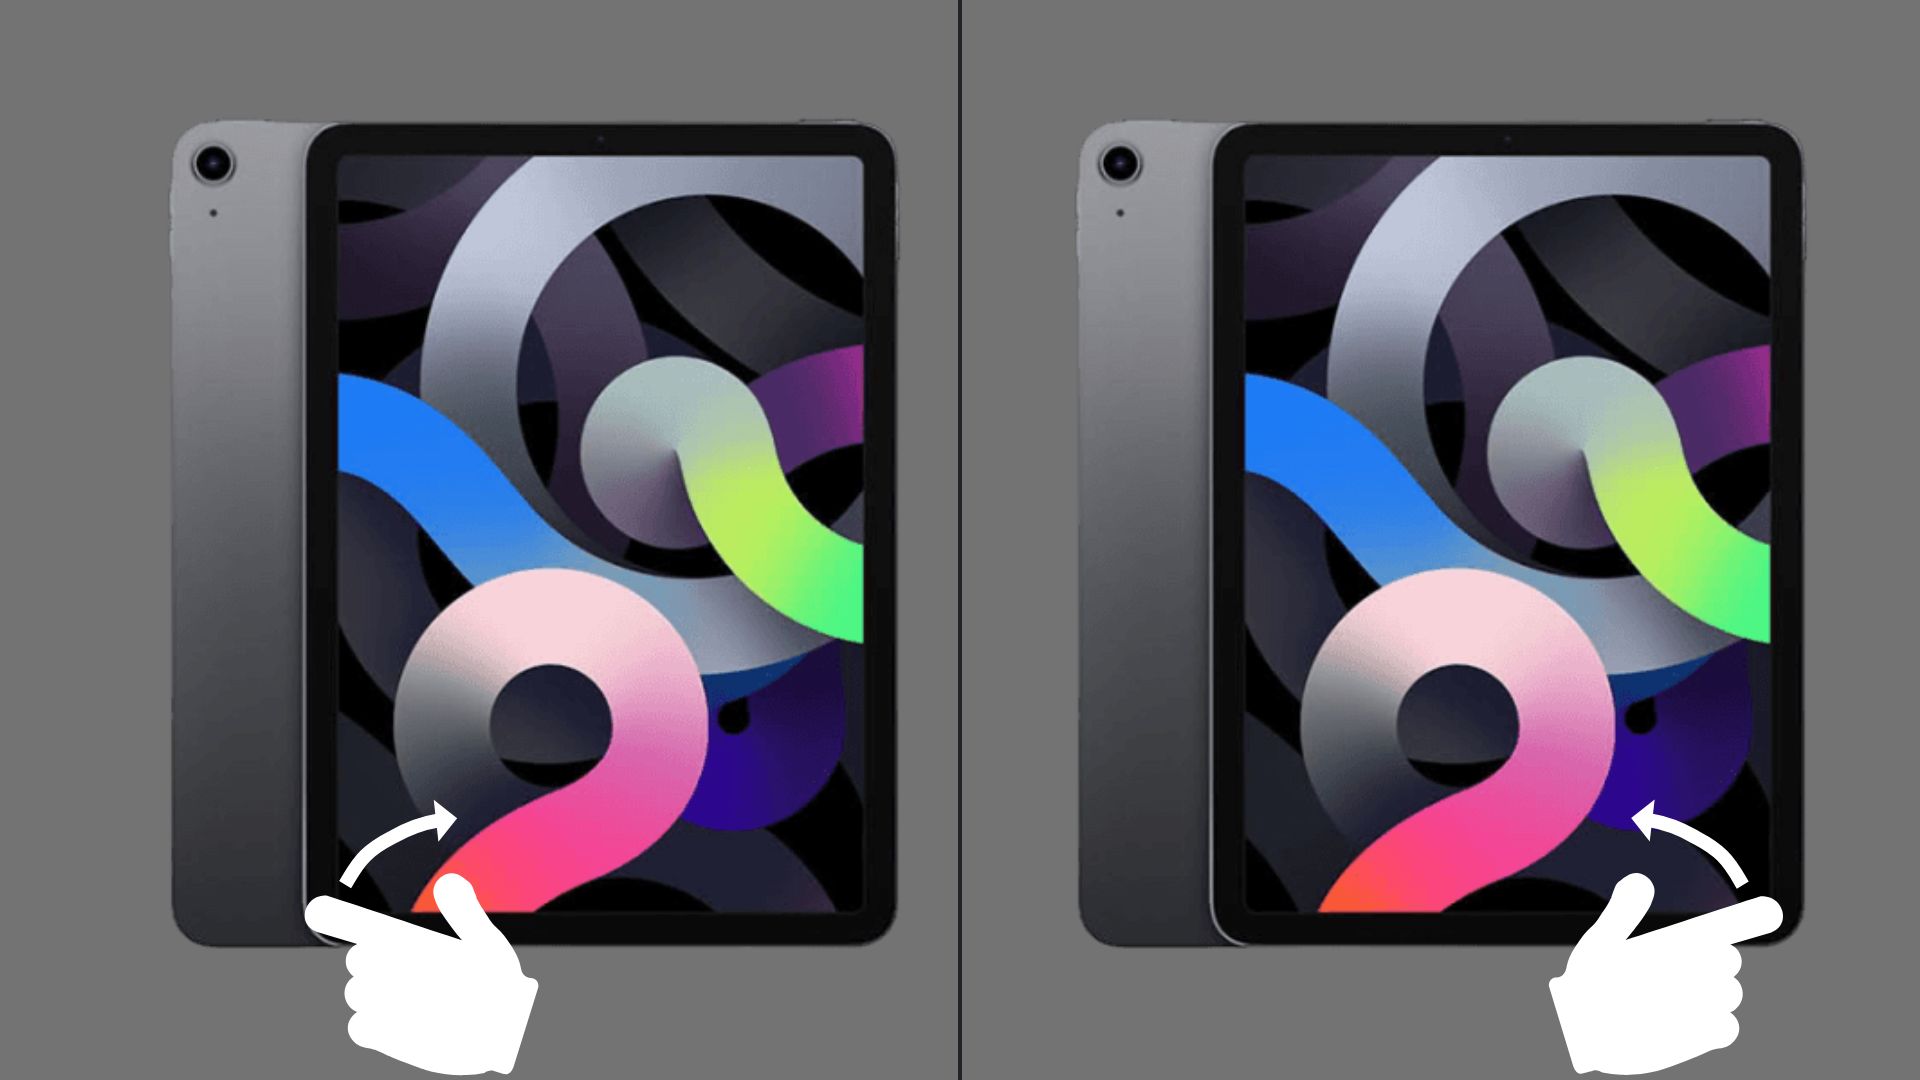
Another and far easier way of taking screenshots on an iPad is to use something called a ”swipe gesture”, a swipe gesture is a gesture of you swiping up or down, or sideways, etc. So we can also use this gesture for taking screenshots, all you’ll need is an iPad that supports iPad OS 15 and you’re good to go! So here’s a quick and easy-to-understand list which shows you exactly how to do so:
nnnn- n
- Open Settings: Tap on the Settings app on your iPad. nnnn
- Tap Multitasking & Gestures: Navigate to Home Screen & Dock > Multitasking & Gestures. nnnn
- Turn on Swipe Finger from Corner: Ensure that the toggle for Allow Multiple Apps is turned on. nnnn
- Customize Corner Gestures:n
- n
- Tap on Left Corner Swipe or Right Corner Swipe. nnnn
- Select Screenshot from the list of options. n
nnnn - Swipe from a Corner: Swipe your finger from the bottom left or bottom right corner of the screen, depending on which corner you set up for taking a screenshot. nnnn
- Screenshot Taken: A screenshot will be taken and saved to your Photos app. n
2. How To Screenshot On iPad Keyboard?
n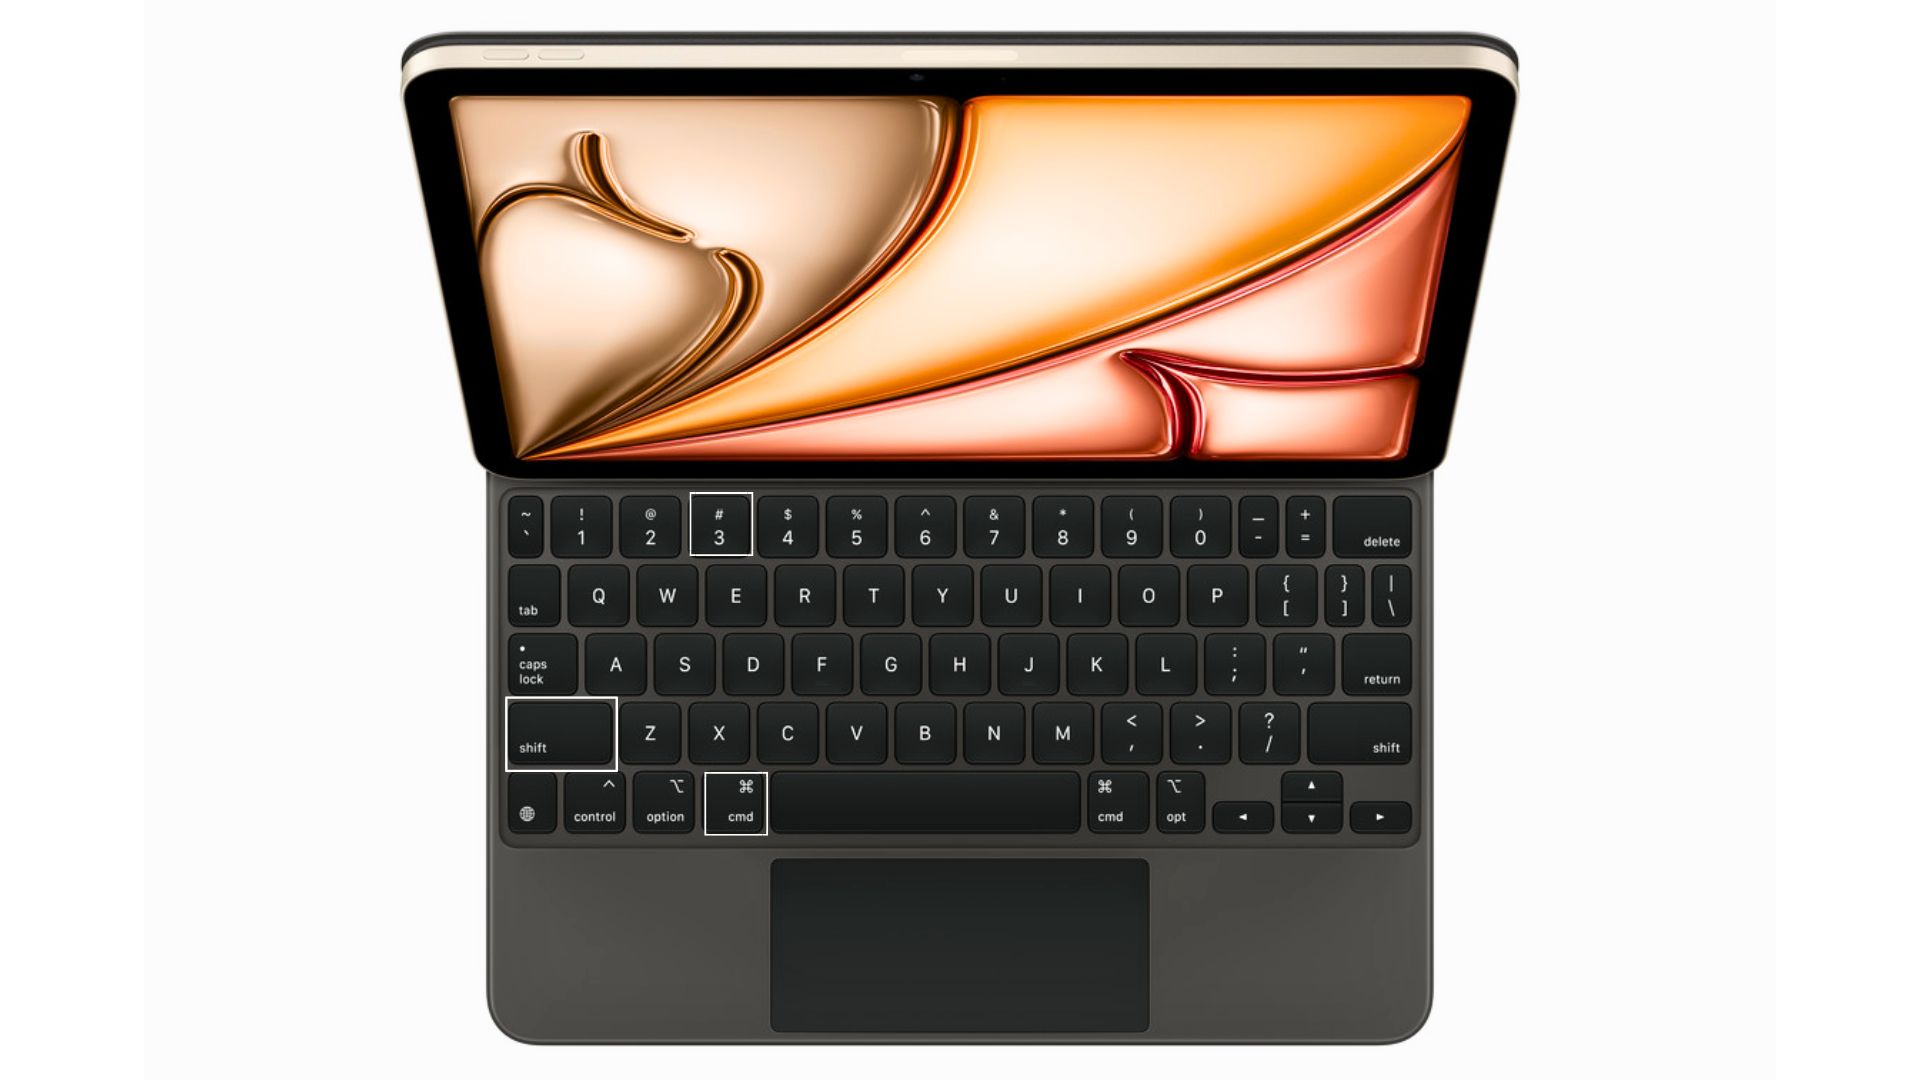
Now for those who have a keyboard connected to their iPad, taking a screenshot is just as easy. So if your iPad has an external keyboard and has iPad OS 13 or later, then follow this guide:
nnnn- n
- Connect Your Keyboard: Ensure your external keyboard is properly connected to your iPad. nnnn
- Press Shortcut Keys: Press the following keys simultaneously:n
- n
- Command (⌘) + Shift + 3: This will take a screenshot of the entire screen. nnnn
- Command (⌘) + Shift + 4: This will take a screenshot and immediately open it in Markup for editing. n
n
So very easy to do and it should just work straight away.
n3. How To Take A Screenshot On Your iPad Without Pressing Buttons
n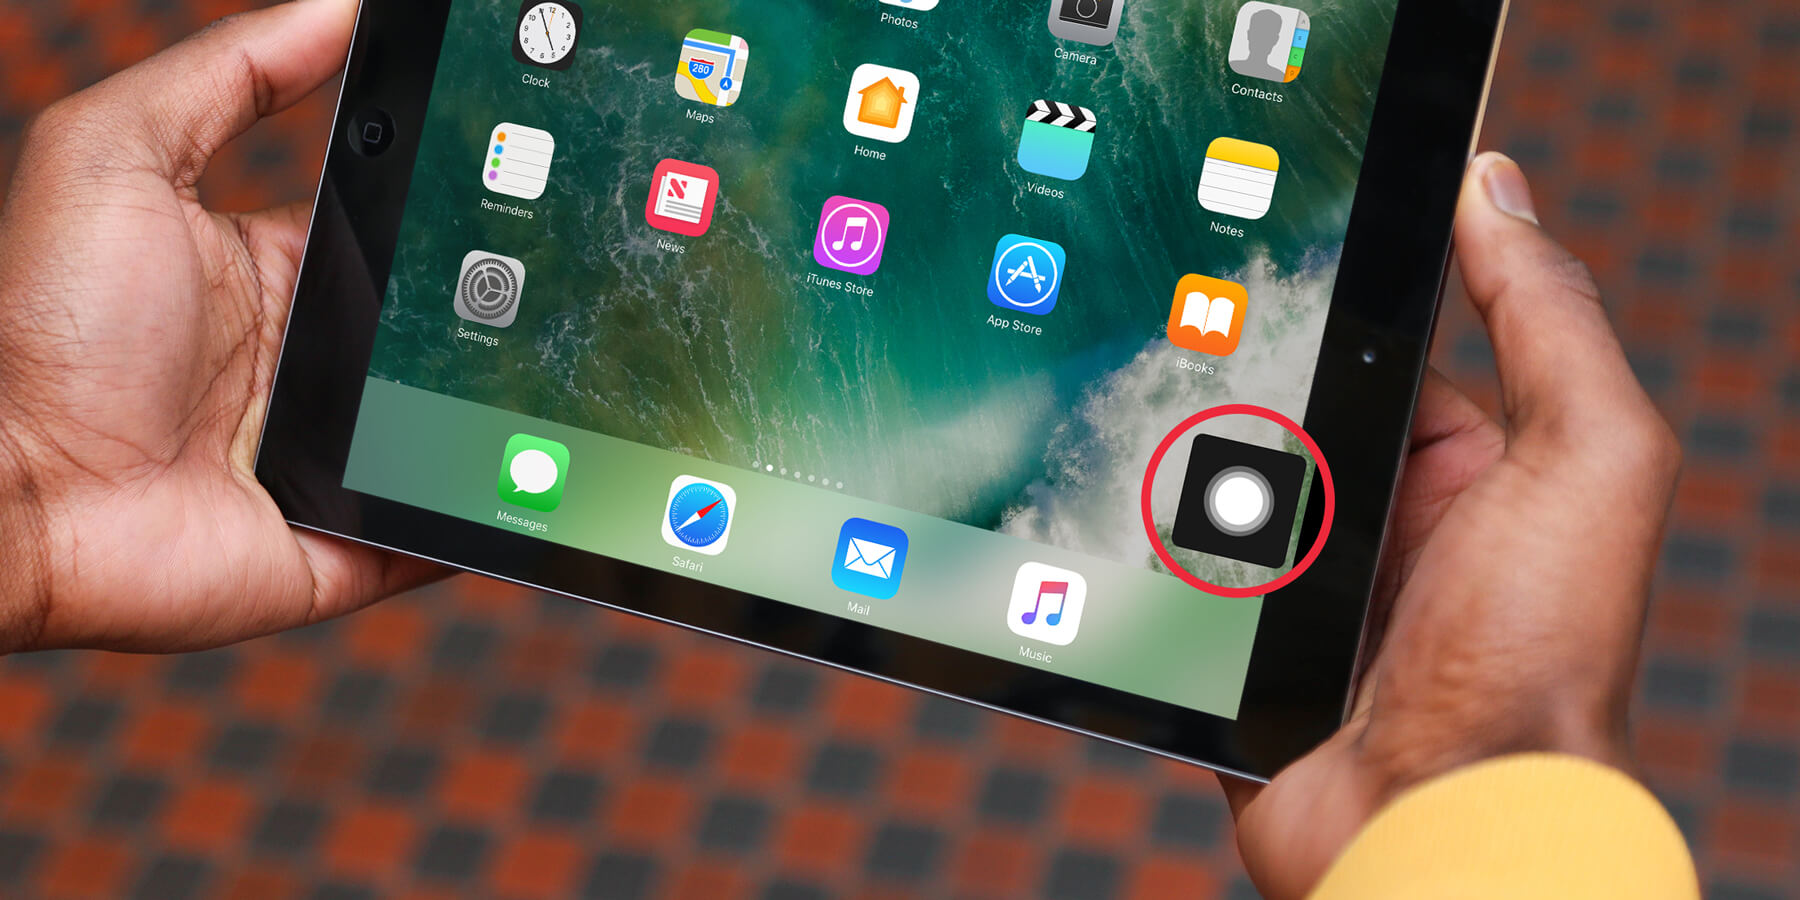
The last method of taking a screenshot on your iPad is by using something called ”AssistiveTouch” note that you will need an iPad compatible with IOS 13 or later to do this. This is also the most complicated one to set up so far, but it could come in handy if you for whatever reason don’t like swiping or pressing 2 buttons. So here’s a quick and easy guide on how to set up AssistiveTouch to take screenshots on your iPad:
nnnn- n
- Enable AssistiveTouch:n
- n
- Open the Settings app. nnnn
- Go to Accessibility. nnnn
- Tap on Touch. nnnn
- Select AssistiveTouch and toggle it on. n
nnnn - Customize AssistiveTouch:n
- n
- Tap on Customize Top Level Menu. nnnn
- Tap on an icon you don’t use often or tap the + button to add a new icon. nnnn
- Select Screenshot from the list of options. n
nnnn - Take a Screenshot:n
- n
- Tap the floating AssistiveTouch button on your screen. nnnn
- Tap the Screenshot icon you added. n
n
FAQ’s
nnnnIf you don’t see a flash or hear the shutter sound, ensure that you’re pressing both buttons simultaneously and releasing them quickly. Check that your iPad’s volume is not muted, as the shutter sound might be off. If the issue persists, restart your iPad and try again.
nTo take a screenshot on an iPad with a Home button, press and hold the Top button and the Home button at the same time. Quickly release both buttons. The screen will flash, and you’ll hear a shutter sound indicating that the screenshot has been taken.
nTo share a screenshot, open the Photos app, find the screenshot in your “Recents” or “Screenshots” album, tap on it, and then tap the “Share” icon (a square with an upward arrow). You can choose to share it via email, messages, social media, or other apps.
n
Are Portable Chargers Safe? Everything You Need to Know in 2024
Discover the truth about portable charger safety in 2024. Learn about potential risks, how to choose safe devices, and essential tips to protect your electronics and yourself. (140 characters)
Can Portable Chargers Charge Laptops in 2024: Everything You Need to Know
Discover how portable chargers can power your laptop on the go. Learn about compatibility, wattage requirements, and top tips for choosing the right portable charger in 2024.
Is a 10,000 mAh Power Bank Good? What You Need to Know in 2024
Discover if a 10,000 mAh power bank is the right choice for your charging needs. Learn about capacity, charging capabilities, portability, and how to choose the perfect portable charger.
Power Bank vs. Portable Charger: Understanding the Key Differences in 2024
Confused about power banks and portable chargers? Discover the essential differences, features, and which device is right for your charging needs in our comprehensive guide.
How Many Watts Do I Need to Charge My Laptop? Power Requirements Guide 2024
Discover exactly how many watts your laptop needs to charge properly. Learn about power requirements, charger compatibility, and how to choose the right wattage for your device in 2024.